# Welcome to chatalog
Welcome to chatalog Help Centre! Explore all the chatbot know-how here and embark on your marketing and sales automation journey!

[**Chatalog**](https://chatalog.ai) is an omni-channel social messaging and chatbot solution that helps you save time and drive engagement with our automation and customer relationship management features.
Our chatbot platform has several sections that make your IG , Facebook , Whatsapp , Wechat management much easier. With [**Chat**](/crm-quickstarts/messages), We help you manage DM inbox and relieve your stress to respond users one by one with our chatbot-agent hybrid conversation solution. Our rule-based post auto reply campaign with [**Bot**](/post-auto-reply/post-auto-reply/post-auto-reply-setup) sends comment reply and DM reply instantly to automate sales or drive web traffic. With [**Broadcast**](/broadcast-setup/broadcast-non-whatsapp), you can save much time from sending identical messages to users individually by creating one message and broadcasting to multiple users. Additionally, you can also create a sophisticated conversational flow to automate the repetitive general enquiries through Direct Message with [**Flow**](/crm-quickstarts/customized-flow). With all the automation journey curated, finally you can manage all your contacts as well as the labels that attach to them in [**Contact**](/contact-setup/contact).
[**Get started with chatalog for Free!**](http://app.chatalog.ai/signup)
# Release Notes
View the newest feature releases and bug fixes updates in the [2026 Releases Page](/release-notes/2026-releases)!
# 2026 Releases
# Web - 2026 Release Notes
This page covers web updates only. For the latest mobile app updates, please visit the Mobile App Release Notes page.
{% hint style="success" %} **20260630 - Release Updates**
{% endhint %}
We're excited to introduce AI capabilities, workflow enhancements, and usability improvements across Chatalog.
#### 🤖 AI Agent Enhancement *(Add-on)*
AI Agent continues to expand its capabilities with support for more external data sources.
* Added support for **Google Sheets** as a knowledge source.
#### 📅 Booking Enhancement *(Add-on)*
Enhance the booking experience with automated customer communication and richer analytics.
* Send automatic booking **confirmation**, **cancellation**, and **reminder** messages.
* Added a new **Booking** tab in Analytics to track booking performance.
#### 📝 New Flow Blocks
Two new Flow Builder blocks are now available to support more automation scenarios.
* **Sticky Notes** — Add notes directly to your flows for better collaboration and documentation.
* **Business Hour Checker** — Route conversations based on your configured business hours.
#### 📄 Doc Reply Enhancement
Doc Reply now supports additional file formats.
* Upload and use **Excel (.xlsx)** files as knowledge sources.
#### 👥 Cross-team Assignment Configuration
Improve collaboration across teams.
* Configure conversation assignment across multiple teams with greater flexibility.
#### 💬 WhatsApp Improvement
Sending WhatsApp templates is now more convenient.
* Sort templates by **Name** or **Created Time**.
#### 🔗 Faster Navigation
Access related conversations more quickly.
* Click a **Contact** or **Booking** to open the related conversation instantly.
#### 👤 User Management Enhancement
Finding users is now faster and easier.
* Added a search bar and filters on the **Users** page.
#### 📤 Conversation Export Enhancement
Export conversations with greater flexibility.
* Added **Label** as a filter when exporting conversations.
{% hint style="success" %} **20260521 - Release Updates**
{% endhint %}
We’ve released several updates to the web to improve AI automation, customer engagement, workflow management, and daily operations.
#### 🤖 AI Agent Flow Block *(Beta) — Add-on Feature*
The new **AI Agent** feature is now available in Beta. Businesses can build AI-powered automated conversation workflows with configurable goals and actions.
* Defining AI agent roles and objectives
* Configuring completion conditions
* Collecting customer information through custom fields and labels
* Searching and retrieving answers from the Knowledge Base
* Creating bookings automatically during conversations
This enables more intelligent, goal-driven, and automated customer interactions within a single flow.
#### 📅 Booking *(Beta) — Add-on Feature*
The new **Booking** feature is now available in Beta. Businesses can:
* Create and manage booking services
* Configure booking details and availability
* Manage booking records directly within the platform
* Build automated booking workflows
#### 🎟️ Coupon *(Beta) — Add-on Feature*
Introducing the new **Coupon** feature in Beta. Businesses can now create and distribute coupon campaigns directly through flows.\
This add-on feature supports:
* Coupon creation and management
* Auto-generated or customized coupon codes
* Coupon redemption tracking
* Coupon distribution through Flow Builder
#### 🍎 Apple Login
You can now sign in to the platform using Apple Login, providing users with an additional secure and convenient authentication method.
#### 💬 Keep Conversation Open Flow Block
A new **Keep Conversation Open** flow block is now available in Flow Builder. This block allows conversations to remain in the Open status after automation is completed, helping teams continue follow-up actions without manually reopening conversations.
#### 🔍 Custom Field Filter on Contact Page
The Contact page now supports filtering contacts using Custom Fields, making it easier to segment and locate customers based on specific data attributes.
#### 📎 More Attachment Types in Saved Replies
Saved Replies now support more attachment formats to improve sharing and agent efficiency. Supported file types now include: Image, PDF, XLSX, DOCX, PPTX
#### 🔔 WhatsApp Credit Alert
You can now configure WhatsApp Credit Alerts to receive email notifications when your WhatsApp balance reaches selected thresholds, helping you better monitor messaging usage and avoid service interruptions.
#### 📝 Doc Reply Enhancements
We’ve introduced several improvements to the Doc Reply experience, making AI response testing and document management more flexible and interactive.
This enhancement includes:
* Support uploading Markdown (.md) files
* Support multi-turn conversations in the Doc Reply Test Area for more natural AI interaction testing
#### ✅ Support Chat Selection After Searching
You can now continue selecting conversations after performing a search, improving efficiency for bulk actions and conversation management workflows.
#### 🎨 New Top Bar UI
The web interface now includes a refreshed Top Bar UI with an improved layout and cleaner navigation experience.
#### 🌐 Multi-language Support for Web Widget
The Web Widget now supports configuring different languages for the Header, Welcome Message, and Brand Name. Businesses can customize content in English, Traditional Chinese, and Simplified Chinese to provide a more localized customer experience.
#### 😀 More Emoji Reactions on the Message Page
The Message Page now supports more emoji reactions, allowing agents to respond and engage with conversations more expressively and efficiently.
{% hint style="success" %} **20260422 - Release Updates**
{% endhint %}
We’ve introduced several updates to improve your conversation management, workflow flexibility, and overall user experience.
#### ✉️ Send Email in Chat Flows
You can now add a **Send Email** flow block to automate email communication directly within your chat flows. Easily configure recipients, content, and triggers to streamline follow-ups and notifications.
#### 📩 Mark Conversations as Read / Unread
Agents can now manually **mark conversations as read or unread**, helping teams better manage follow-ups and prioritize important messages.
#### 🤖 Conversation Handling Status Filter
A new **Handling Status filter** lets you quickly identify conversations based on **who is actively handling them at that moment**:
* Bot (currently handled by automation)
* Agent (currently handled by a human agent)
This helps you instantly understand ownership and take action more efficiently.
#### 📄 Improved AI Reply from Document
When selecting documents for **AI Reply from Document**, the list is now **scrollable**, allowing you to easily browse large document sets and select or unselect documents more efficiently before publishing.
#### 🔐 Clearer Password Guidelines
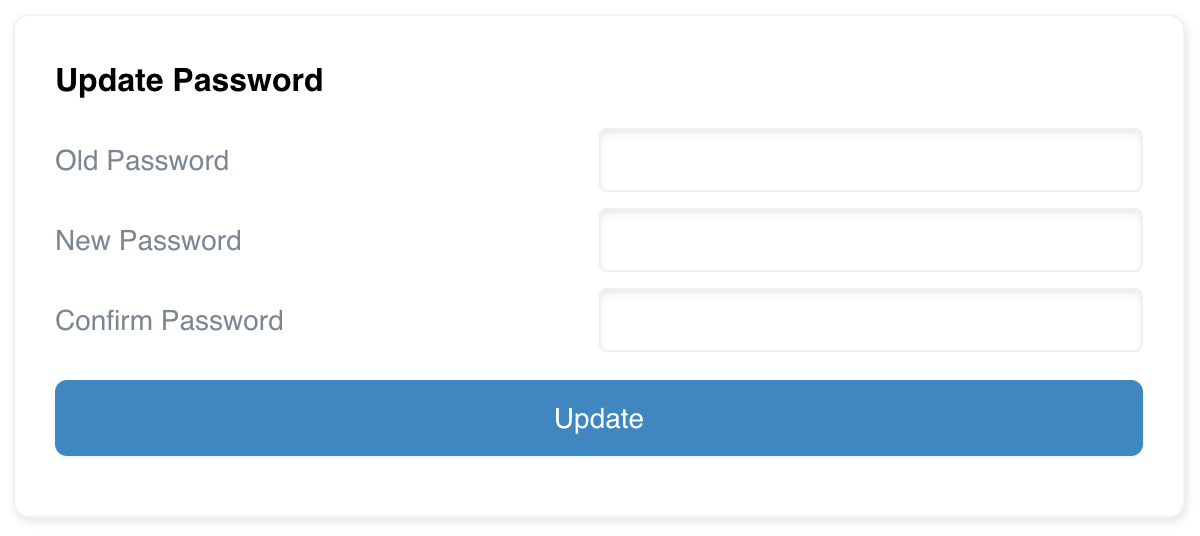
We’ve improved the **password requirements guidance** when creating or updating passwords, making it easier to understand.
{% hint style="success" %} **20260310 - Release Updates**
{% endhint %}
We’ve released several updates to improve messaging capabilities and overall usability.
#### 🟢 WhatsApp Template Improvements
The WhatsApp Template experience has been revamped to provide a more consistent and flexible workflow across the platform.
Key improvements include:
* Updated **UI/UX for creating templates**
* Improved experience when **selecting templates in broadcasts and conversations**
* Support for additional **template sub-types**
* Ability to **add a footer** to templates
* **Expanded button support** (up to 10 buttons, including URL and phone buttons)
***
#### 🎨 Navigation Menu UI Update
The navigation menu has been refreshed with a **lighter color scheme** to improve visual clarity and readability.
***
#### 👤 Shared Contact Display in Conversations
Shared contacts sent by customers can now be **displayed directly in the conversation**, allowing agents to easily view the contact details and follow up.
*This enhancement is currently available on the web app, with mobile app support coming in a future update.*
***
#### 🔘 Web Chat Button Character Limit Increased
The **button character limit on the web widget has been increased to 40 characters**, allowing more descriptive button labels.
***
#### 🔎 Search Contacts by Phone Number
You can now **search contacts by phone number on the Contact page**, making it easier to quickly locate customer profiles.
{% hint style="success" %} **20260203 - Release Updates**
{% endhint %}
### Notification
#### 💬 Direct Conversation Access from Notifications
Clicking a Chatalog notification now takes you directly to the related conversation, enabling faster follow-ups without manual searching.
***
### Contacts Management
#### 🏷️ Filter & Export Contacts by Label Timestamp
You can now filter contacts by a selected time range based on label timestamps and export the filtered results for reporting or follow-up actions.
#### 🔄 Enhanced Contact Import with Custom Field Strategy
A new import strategy provides greater control over how existing custom field values are handled:
* Existing custom fields are preserved by default.
* Custom fields are updated only when values are provided in the import file.
* When an imported value is empty, you can choose one of the following behaviors:
* **Ignore** – Keep the current value unchanged.
* **Remove old value** – Clear the existing value.
***
### Broadcast & Analytics
#### 📈 Replied & Read Data in Broadcast Reports
Broadcast reports now include replied and read metrics, providing better visibility into message engagement and campaign performance.
#### 🧮 **Chat Flow Triggered Report Export**
The analytics page has been enhanced to support exporting chat flow triggered reports, including flow ID, flow name, trigger date, and trigger counts.
***
### Chat Flow
#### 🧩 Regex Support in Condition Funnel Blocks
Condition funnel blocks now support regex validation, allowing more flexible and precise input checks (for example, email or format validation).
***
### Conversation Management
#### 🤖 Bot Handling Status Indicator
A new bot status icon has been added to the conversation window, making it easier to see whether a bot is enabled, currently handling the conversation, or disabled.
***
### Web Widget
#### 📋 Menu Buttons List View
Menu buttons in the web widget can now be displayed in a list view, improving readability and usability when multiple options are available.
***
### Saved Replies
#### 📎 Image Attachments in Saved Replies
Saved replies now support adding image attachments, making it easier to send complete responses with visuals in a single action.
*This enhancement is currently available on the web app, with mobile app support coming in a future update.*
# Mobile App - 2026 Release Notes
This page covers mobile app updates only. For the latest web app updates, please visit the Web Release Notes page.
{% hint style="success" %} **20260529 - Release Updates**
{% endhint %}
We’ve introduced several updates to improve your messaging experience on mobile.
#### :apple: Apple Login
Apple Sign-In is now available on mobile, providing a secure and seamless login experience for iOS users.
#### 💬 Revamped WhatsApp Template Experience
The WhatsApp template experience on mobile is now aligned with the web, providing a more consistent and improved UI/UX for browsing, selecting, and sending templates.
#### 🤖 Bot Handling Status Indicator & Filter
A new bot status icon and filter help you quickly identify and find conversations that are currently handled by bots.
#### 🖼️ Image and Template Preview in Reply Messages
When replying to image or template messages, you can now preview the image or template being replied to, making it easier to understand context and respond accurately.
#### 📚 Saved Replies with Attachments
Saved replies now support attachments, allowing you to send richer responses and preview before sending.
#### :closed\_lock\_with\_key: Password Error Message Enhancement
Improved error messaging for password creation and updates, providing clearer guidance when password requirements are not met.
{% hint style="success" %} **20260204 - Release Updates**
{% endhint %}
We’ve made several improvements to enhance security, efficiency, and daily chat handling on the mobile app.
#### 🔐 Single Sign-On (SSO) Login
You can now sign in using **Google** or **Microsoft** SSO. This makes login faster, more secure, and easier to manage—especially for teams using company-managed accounts.
#### 🔍 Chat History Search
Quickly find past conversations or messages with the new **chat history search**, helping you locate customer context without scrolling through long threads.
#### ⚡ New Quick Send Modal
We’ve redesigned the **Quick Send** experience to bring everything into one place:
* **Saved Replies**
* **Flows**
* **Message Templates**
* **NEW:** Send **WhatsApp Flow** directly from the chat
This reduces steps and helps you respond faster during active conversations.
#### 💬 Message Actions
You can now interact with individual messages more easily:
* **Reply** to a specific message
* Add **emoji reactions**
* **Translate** messages instantly
* **Copy** message content
#### 📶 Offline Account Verification Handling
The app now supports **account verification even when the internet connection is unstable or temporarily unavailable**, improving reliability in low-connectivity scenarios.
# 2025 Releases
{% hint style="success" %} **20251223 - Release updates**
{% endhint %}
We’re introducing several updates to improve message clarity, media handling, and customer engagement across messaging and the web widget.
#### Messaging & Conversation Improvements
* **Message Status Timestamps**\
Message info now shows the exact timestamps for when a message is sent, delivered, and read, helping agents better understand message delivery and response timing.
* **Conversation Activities on the Message Page**\
Conversation activities such as system updates and interaction changes are now displayed directly on the message page, giving agents better context without leaving the conversation view.
#### Image Message Experience
* **Enhanced Image Preview Controls**\
Image messages now support zooming in, zooming out, and flipping, making it easier for agents to view and review image content in detail.
* **Richer Reply Context for Image and Template Messages**\
When replying to an image message or a template message, the reply preview now includes the image thumbnail, sender name, and file name, providing clearer context during replies.
#### Web Widget Updates
* **Greeting Flow for Web Widget**\
You can now set up a Greeting Flow for the web widget to automatically welcome visitors and guide them into the appropriate conversation flow.
* **Media Sending Support in Web Widget *****(Paid Add-On)***\
The web widget now supports sending images, audio files, and other file types, enabling richer customer interactions through the widget. This feature is available as an add-on.
{% hint style="success" %} **20251031 - Release updates**
{% endhint %}
We’re excited to share the latest updates and enhancements designed to make your Chatalog experience smoother, smarter, and more customizable than ever!
#### Message Actions
You can now take quick actions directly from the message area:
* **Copy** message content
* **Reply** to specific messages
* **Translate** messages instantly
* **React with emoji** for faster, friendlier communication
#### Import Contacts Enhancement
We’ve added more flexibility when importing contacts:
* **Replace the existing labels** of imported contacts
* **Add to existing labels** without overwriting current ones
#### AI Reply from Document: More Model Options
We’ve expanded our AI capabilities! Now supporting **Claude-4.5-sonnet** and **Gemini-2.5-flash** models for smarter and faster AI document replies.
#### Saved Replies: Variable Picker Enhancement
The variable picker in saved replies just got smarter!
* **Search by keywords** for faster access
* **Browse by categories** for clearer organization
#### Send WhatsApp Flow in Flow Builder
You can now **send a WhatsApp Flow directly** within your chatbot journey — making your automation more interactive and personalized.
#### Notification Enhancement
Stay on top of updates more easily:
* **Mark all as read** with one click
* **Individually mark notifications as read** for better control
#### Agent Roster Management *(Paid Add-On)*
Allows owners and admins to manage the team’s duty schedule and availability easily:
* **Upload CSV** files to set agent duty rosters
* **Customize duty slots** (name, color, period)
* **Set off-duty messages** at the organization or team level
More details, please refer to: [Agent Roster Management](/settings/team-management/agent-roster-management)
#### Advanced Assign Conversation Flow Block Enhancement
Gain more control over your assignment logic:
* Choose to **exclude away, offline, or off-duty agents** when assigning conversations
* The **off-duty** option is available only if **Agent Roster Management** is enabled
{% hint style="success" %} **20250827 - Release updates**
{% endhint %}
We're excited to announce the following recent updates to our platform:
#### Chat History Search
Search through your entire chat history to quickly locate specific conversations or messages, improving efficiency and saving time when referencing past interactions.
#### Quick Send Modal
Instantly send saved replies, bot flows, or the new WhatsApp Flows from within an active conversation window, streamlining communication with seamless access to pre-configured responses.
More details, please refer to: [Quick Send - Bot Flow, Saved Replies, WhatsApp Flow](/crm-quickstarts/messages/quick-send-bot-flow-saved-replies-whatsapp-flow)
#### Notification Configuration
Customize notifications for owners and admins with Unassigned Conversation Alerts and Agent Response Delay Alerts, ensuring prompt responses and enhancing team accountability.
More details, please refer to: [Notification](https://docs.chatalog.ai/settings/notification)
#### Message Status Icons
Track message delivery status in real-time with new intuitive icons, offering clear visibility into whether messages are sent, delivered, or read, improving communication transparency.
More details, please refer to: [Message Status Icons Guide](/crm-quickstarts/messages/message-status-icons-guide)
{% hint style="success" %} **20250804 - Release updates**
{% endhint %}
We're excited to announce the following recent updates to our platform:
#### Analytics Page Enhancement
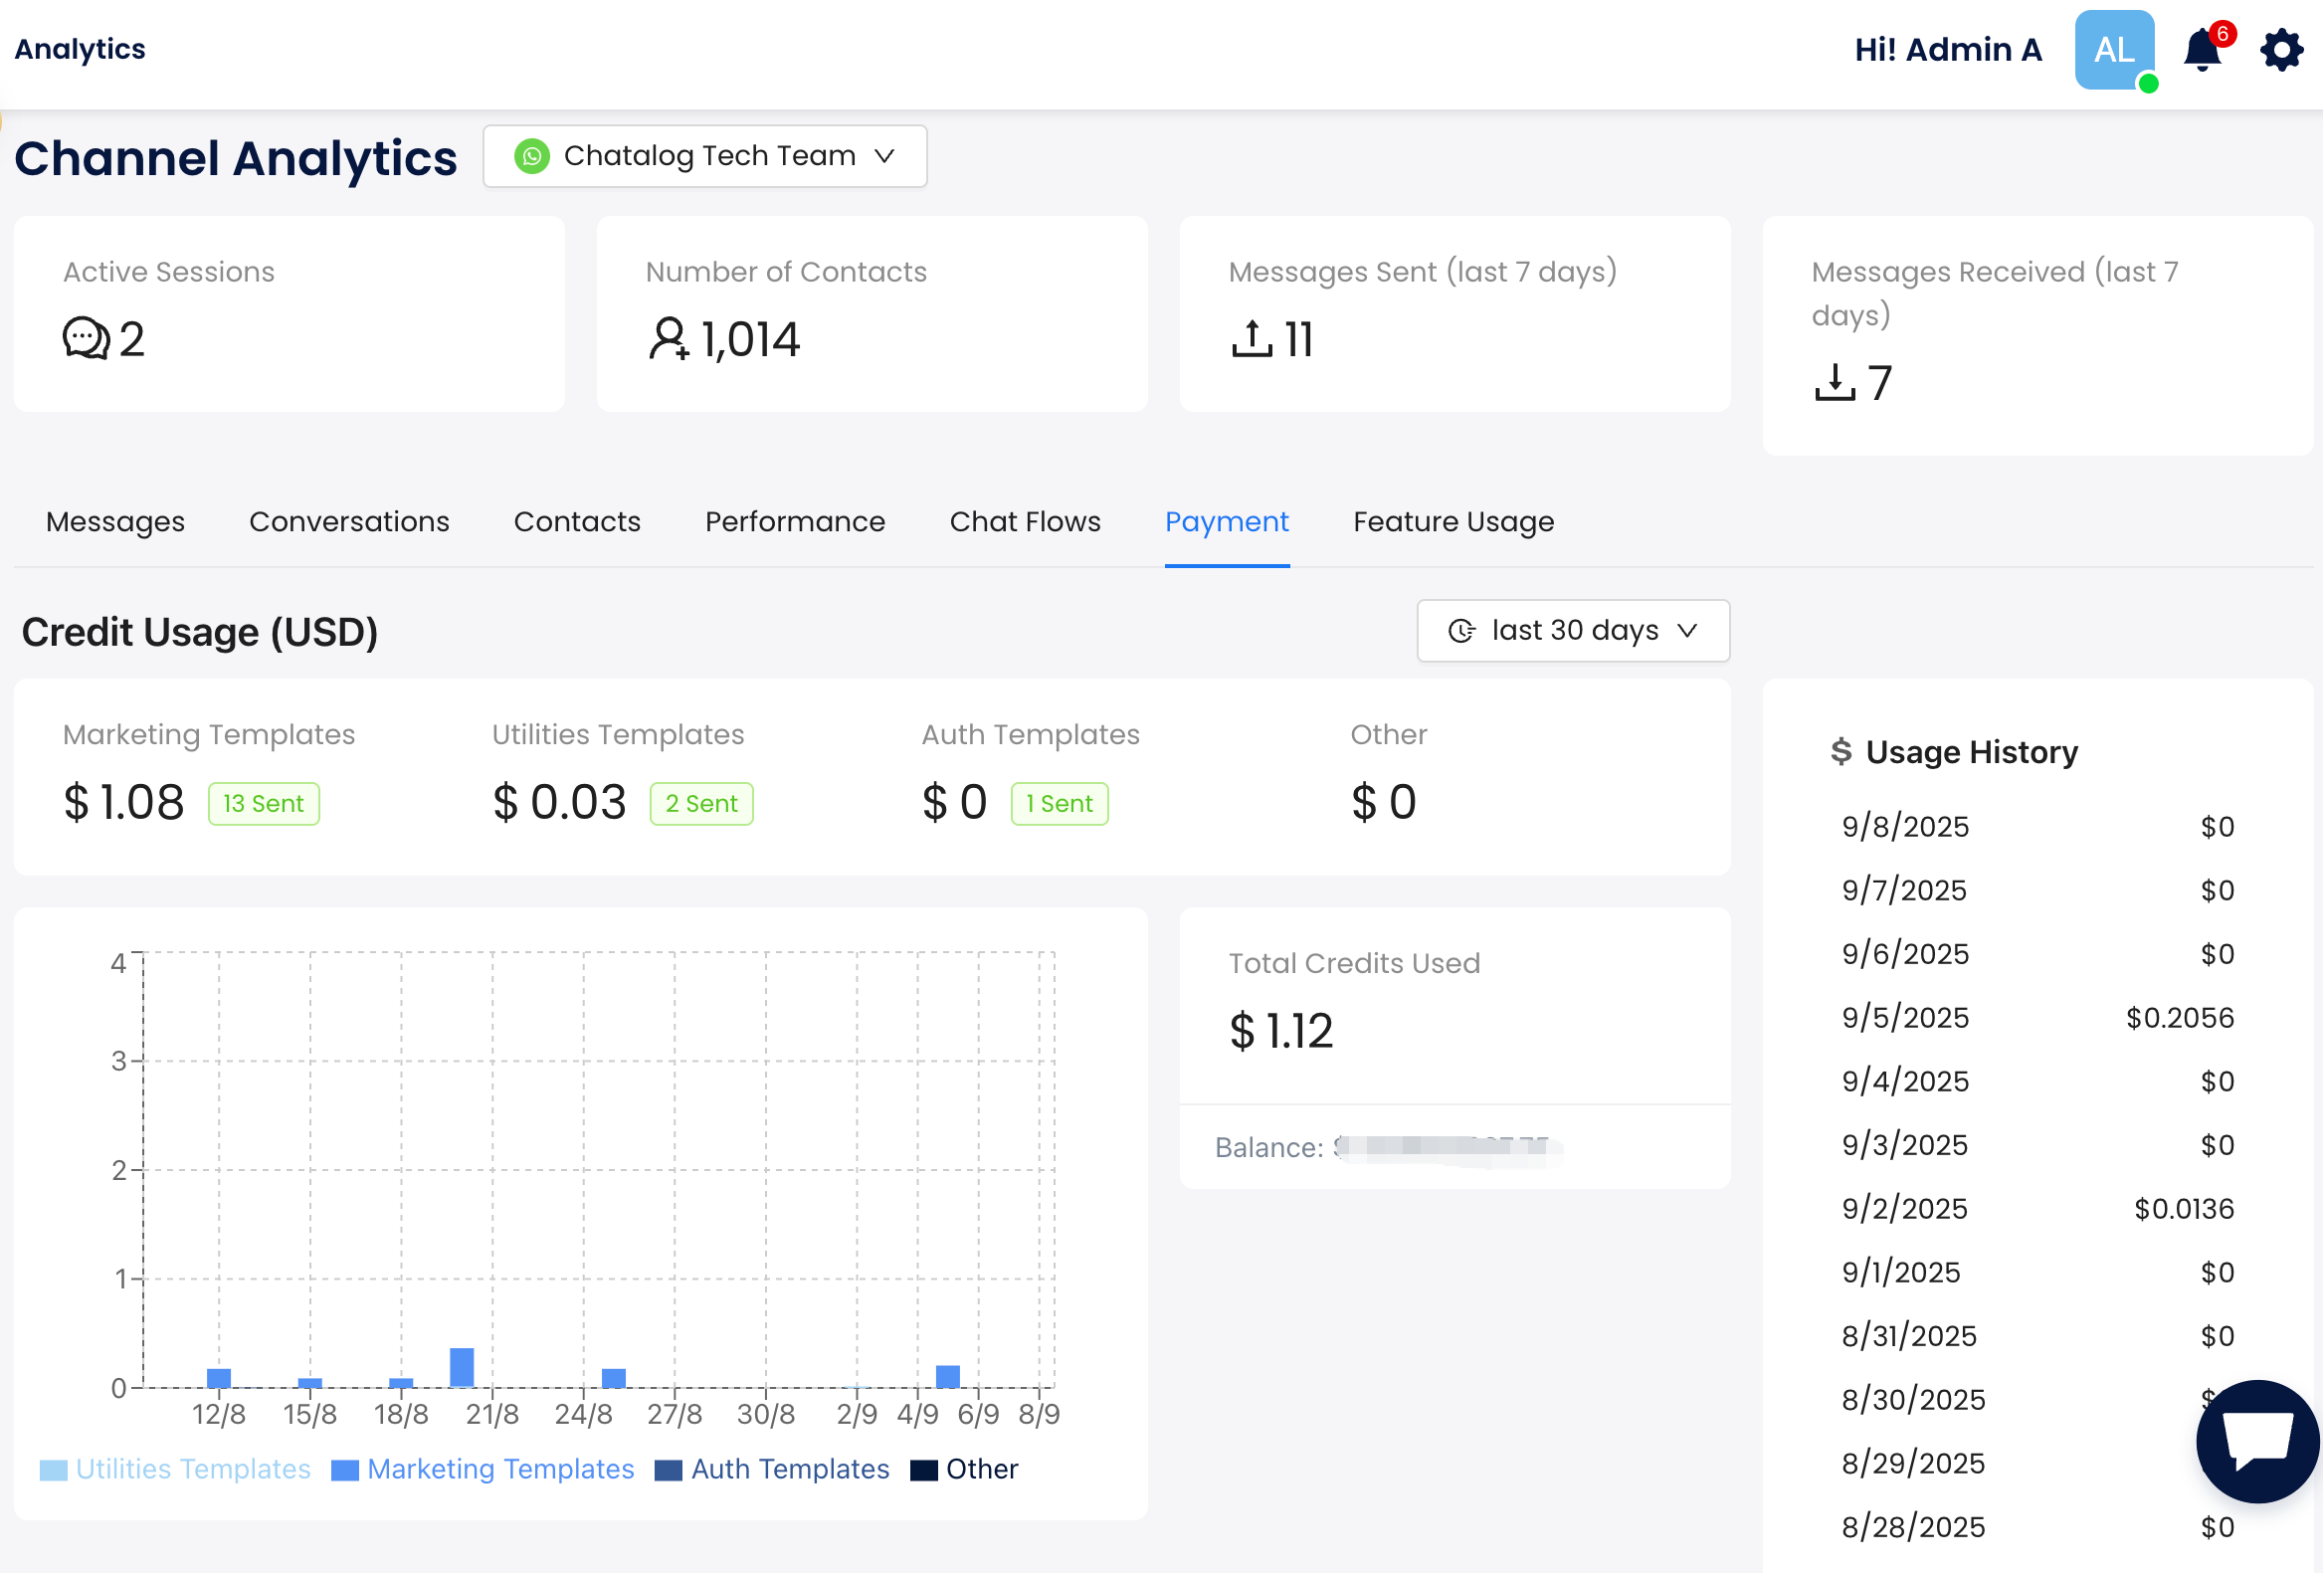
We've added a new Payment tab that displays credit usage by different types of WhatsApp template messages, usage history by day, and total credit used. This provides you with a comprehensive view of your messaging costs and credit consumption.
#### Flow Block Enhancement
Two new capabilities have been added to the Condition Funnel:
* **Compare Variables**: You can now compare variables against each other in condition blocks, enabling more complex automation logic.
* **Empty Custom Field Check**: Verify whether custom fields contain values, allowing for better data validation in your flows.
#### Owner Account SSO Sign-Up
We've implemented Single Sign-On (SSO) functionality for owner accounts, including Google and Microsoft, making it easier and more secure to access your Chatalog account.
#### Custom Field Display Orders
You can now customize the display order of custom fields on the message page, helping you organize your data in a way that makes sense for your team.
{% hint style="success" %} **20250709 - Release updates**
{% endhint %}
We’re excited to announce the latest enhancements to our platform, crafted to improve functionality and user experience.
#### Analytics Page Updates
We’ve enriched the analytics page with a new metric, "Triggered Count of Flows," to monitor flow initiations. Additionally, we’ve added usage and accuracy metrics for AI Writer to assess its performance. Users can now select custom date ranges for more precise and flexible analytics reporting.
#### Expanded Attachment Support in Message Flow Block
The message flow block now supports a wider range of attachment types, including various image formats, videos, and documents, enabling more engaging and versatile content sharing.
#### Speech-to-Text Feature
Owners can enable this feature for specific inboxes, automatically transcribing all incoming audio messages to text. Transcribed text can trigger flows if it matches predefined keywords, streamlining communication by converting audio to actionable text and saving time, thereby enhancing workflow automation. **This feature requires a separate paid subscription to activate, not included in other subscription plans.**
#### AI Tools - Doc Reply Enhancement
* **Prompt Editing Area**: Introduced a dedicated space for editing prompts, offering greater control and customization.
* **Message History Checkbox**: Added a checkbox to toggle message history inclusion, enhancing flexibility in response context.
{% hint style="success" %} **20250530 - Release updates**
{% endhint %}
We're excited to announce the following recent updates to our platform, including the V2 conversation status enhancement.
#### Conversation Status Enhancements (Mobile & Web)
* **New UI/UX for Assigning Conversations**: A refreshed interface makes assigning conversations to team members or agents faster and more intuitive.
* **Enhanced Conversation List Views**: Easily navigate through different conversation statuses with improved inbox and filter views, providing clearer visibility into your workflow.
* **Bot Toggle**: Enable or disable the bot for specific conversations directly from the UI, giving you greater control over automation.
#### Analytics Enhancements - Team & Agent Performance
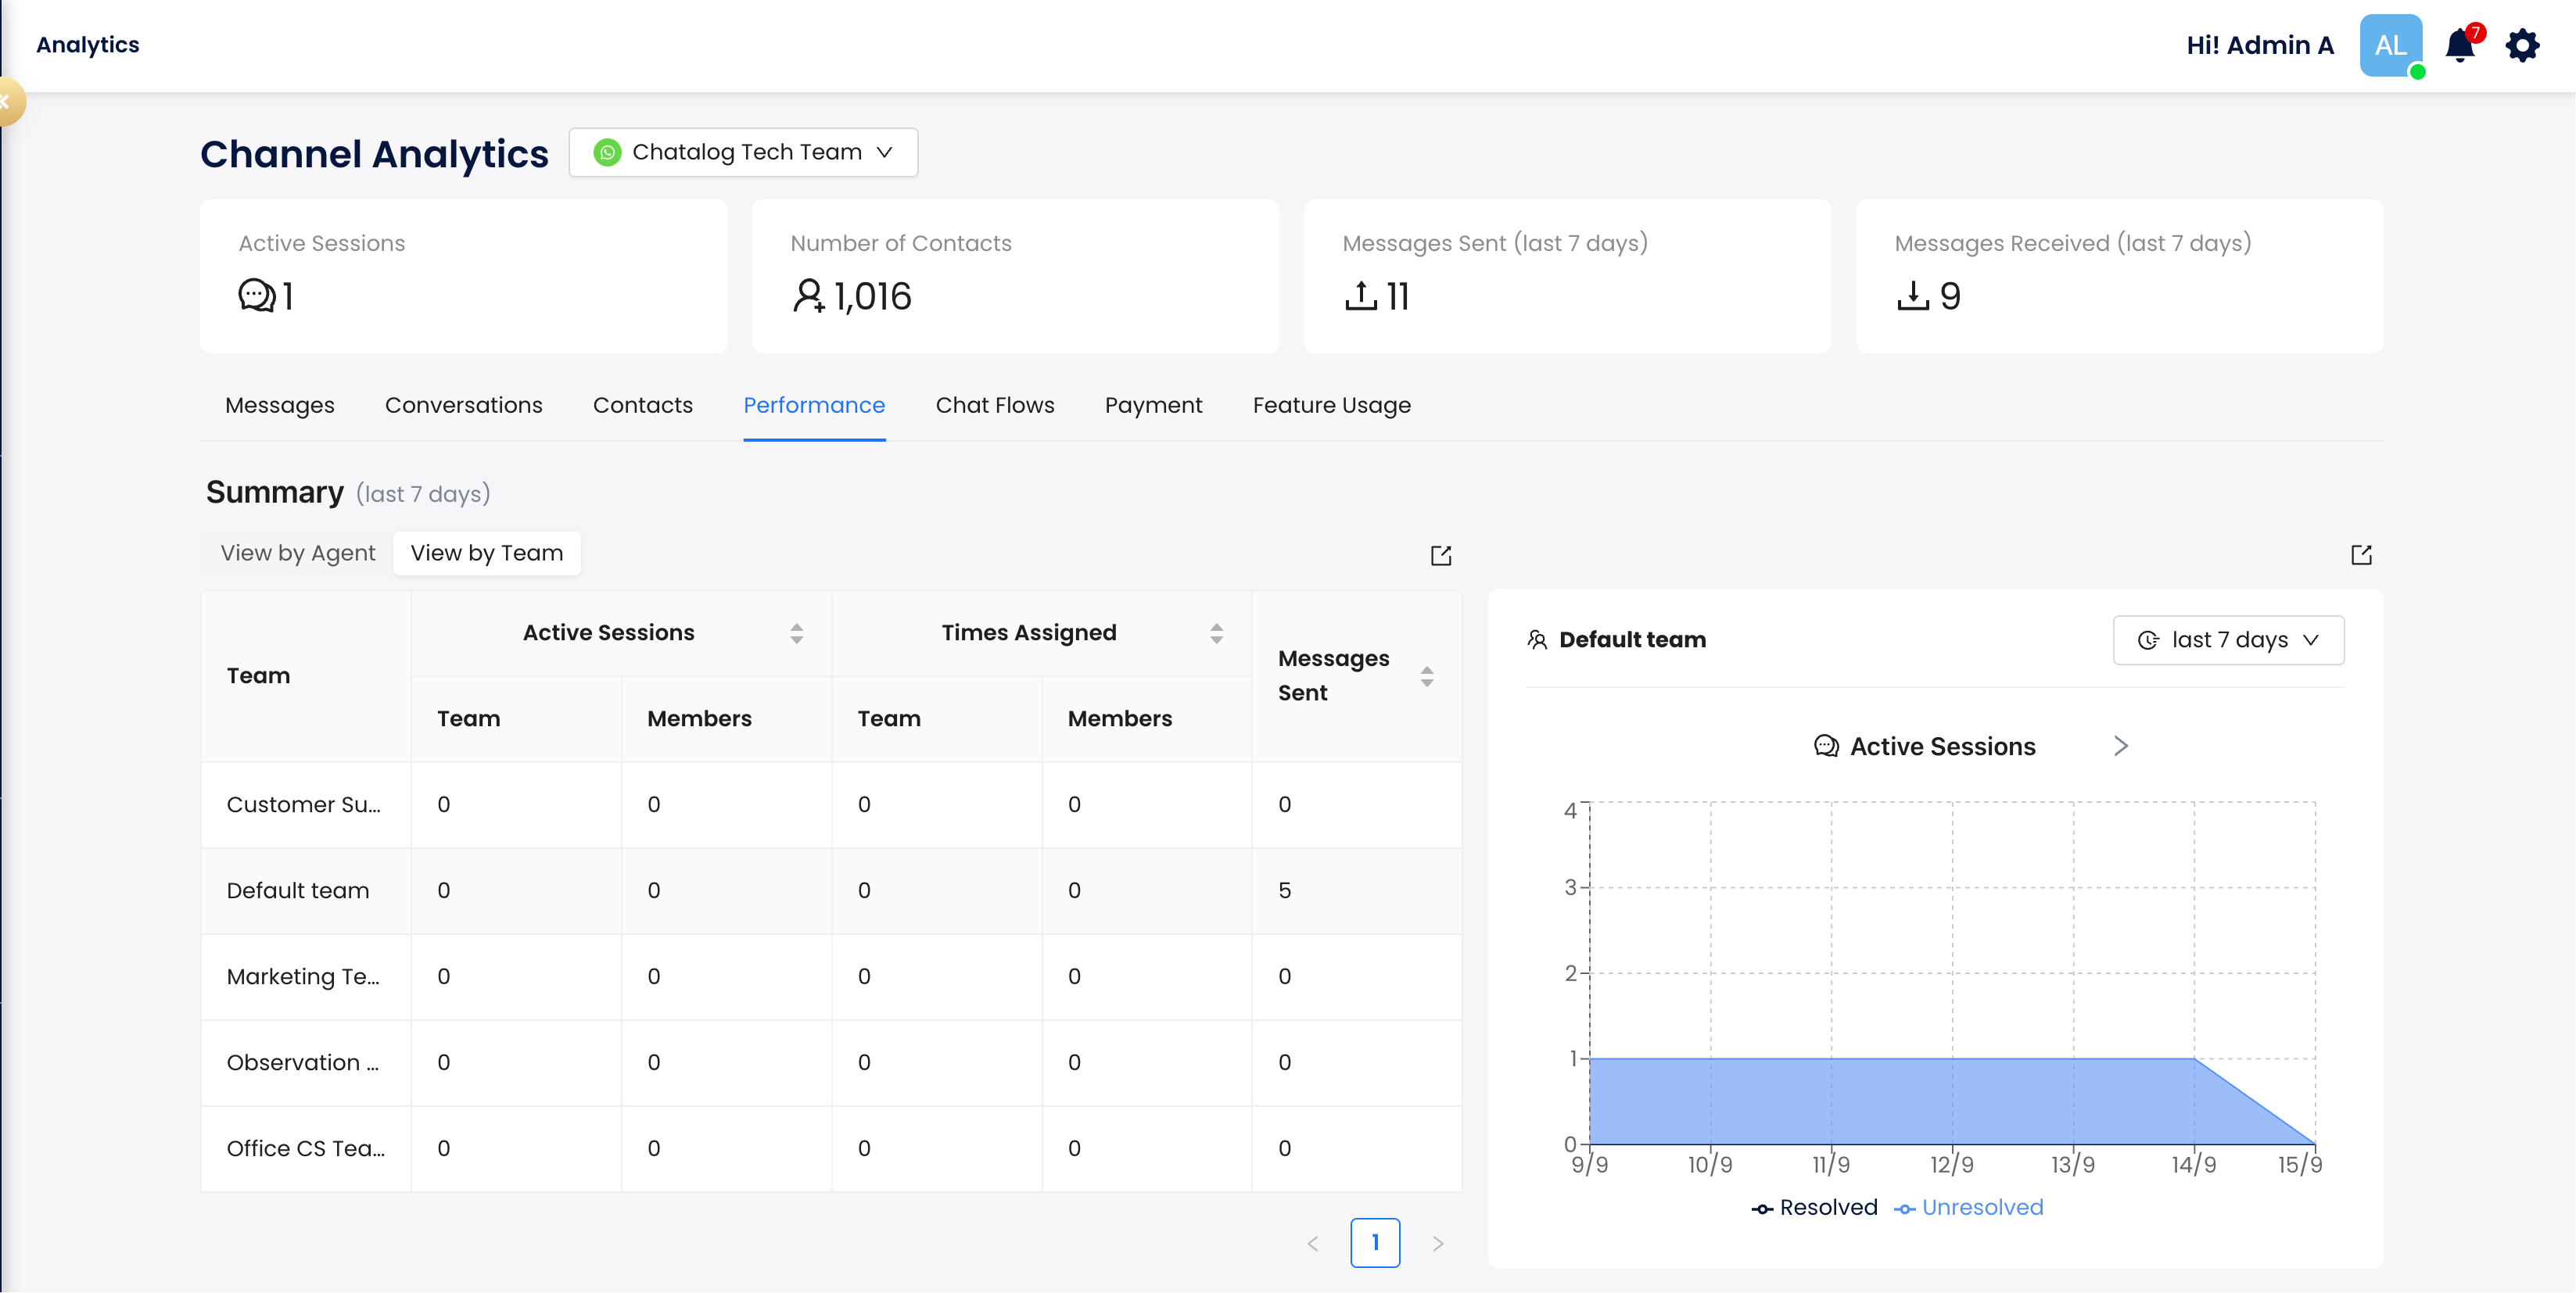
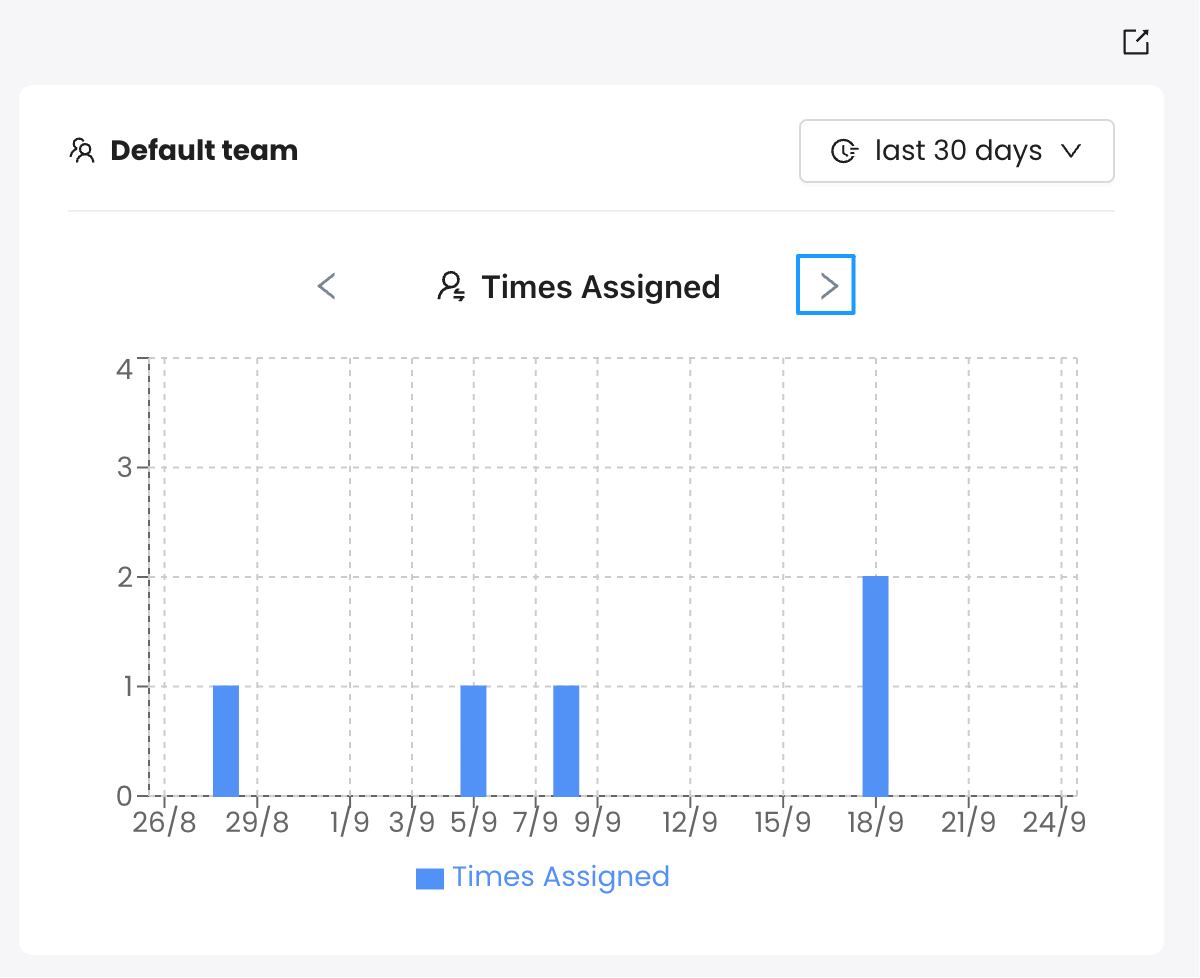
Gain deeper insights into performance with new analytics metrics and charts of Message Sent, Times Assigned, and First Response Time. These analytics tools help managers identify bottlenecks, optimize team performance, and ensure consistent service delivery across all channels.
#### :mobile\_phone:Mobile App Updates
* **Inbox Label Toggle in Settings**: Customize your messaging views by toggling inbox labels for a tailored experience.
* **Contact Blocking/Unblocking**: Easily block or unblock contacts directly from the Contact Info page, and sync with the web version.
* **New AI Tools**: Smarter, more efficient AI-powered features include the AI Writer and Doc Reply to enhance your mobile experience.
* **WhatsApp Catalog Selection**: Support for browsing and selecting items from WhatsApp catalogs.
* **Fixed Display Issues**: Resolved bugs affecting Avatar Icon and First Name display in the Settings menu for a smoother experience
{% hint style="success" %} **20250513 - Release updates**
{% endhint %}
We're thrilled to introduce the latest updates to our platform, including our new LINE channel:
#### **LINE Integration (BETA)**
Connect your LINE Business account to chatalog to manage conversations, automate responses, and track customer interactions directly within the platform. This new channel enhances your ability to engage with contacts on a widely-used messaging platform efficiently.
#### **Block and Unblock Contact**
Easily block or unblock contacts on the web to manage your communication preferences. This feature allows you to restrict or restore interactions with specific contacts as needed.
#### **Sound Notification**
Receive audible alerts for new messages to stay informed in real time. Customize notification sounds to align with your preferences for a personalized experience.
#### **New Tabs on Contact Info Page**
The Contact Info page now features two new tabs—Custom Field for managing custom data and Notes for adding and reviewing contact-specific details, enhancing contact management capabilities.
* **Custom Field**: Add and manage personalized data fields for each contact to capture unique information. This feature enables you to tailor contact profiles to your specific business needs.
* **Note**: Attach and view notes directly on the contact info page for quick reference and better organization. Keep all relevant details easily accessible in one place.
#### **Text Formatting Enhancements**
Rich text formatting is now supported on both web and mobile apps, with options like Bold text, Italic text, Strikethrough text, Monospace text, and Blockquote text.
{% hint style="success" %} **20250407 - Release updates**
{% endhint %}
We're excited to announce the following recent updates to our platform:
#### Analytics Page Enhancement
We’ve enhanced the analytics page with new metrics, including the Number of Resolved Conversations and the Assigned Conversations in Active Sessions, to provide deeper insights into conversations and agent performance. You can now select a specific inbox for tailored analytics.
#### AI Tools – AI Writer & Doc Reply Enhancement
The AI Writer now features a larger, more comfortable editing area and an improved, user-friendly option to generate content based on message history for better context-aware responses. Meanwhile, Doc Reply has been upgraded with a Regenerate button to effortlessly refresh AI-generated answers and a new Translate function to support multilingual communication.
#### AI Reply From Document Enhancement
We’ve enhanced the AI Reply from Document feature by introducing an additional optional step, allowing users to edit the prompt for a project. This gives you greater control and flexibility to fine-tune AI-generated responses to better suit your specific needs.
#### Private Note Flow Block
A new flow block for private notes has been introduced, making internal communication smoother and more organized.
#### More SSO Login Support
Log in faster and more securely with Single Sign-On (SSO) support, now available for Google and Facebook.
#### Enhanced Set Label/Custom Field/Variable Flow Block
This update brings new dynamic options: Set Increment or Decrement Custom Field, and Set Variable, offering greater flexibility in flow settings.
{% hint style="success" %} **20250307 - Release updates**
{% endhint %}
We're excited to announce the following recent updates to our platform:
#### **New Analytics Page**
We’ve enhanced the analytics page with improved data accuracy and expanded metrics to provide deeper insights into conversations and agent performance.
#### **AI Tools – Doc Reply & New Analytics Metrics (Beta)**
Users can now select a published document to let AI generate suggested answers for client conversations. Additionally, we’ve introduced a new usage and accuracy metric to measure the effectiveness of this feature. This feature is available for **Business plan and higher tiers only**.
#### **AI Funnel Flow Block (Beta)**
A new AI Funnel block in the Flow Builder allows users to set prompts and let AI classify queries. AI can now generate responses or trigger different flows based on the situation. This feature is available for **Business plan and higher tiers only**.
#### **Microsoft SSO Login (Beta)**
Microsoft users can now log in to Chatalog using Single Sign-On (SSO) via the account owner's invitation email. This beta feature simplifies authentication and provides an additional login option.
#### **Message Block Enhancements**
When creating more than three buttons in a message block, users can now customize the button list name and add descriptions for each button, making the interface more structured and informative. This feature is available for **WhatsApp users only**.
#### **Auto Follow-Ups Enhancement**
The "Automation" feature has been renamed and redesigned for better clarity. We’ve also introduced UI/UX improvements to make follow-up management more intuitive.
#### **Display Agent or Bot Name in Outgoing Messages**
The display name on reply configuration feature allows you to automatically display your name before each message you send. Once set up, every message will appear with your chosen name at the beginning, making it easier for others to identify who is speaking in conversations.
#### **Web Chat Testing Link**
A new testing page allows users to preview and fine-tune their web chat setup before going live.
#### **Message Page UI/UX Enhancements**
We’ve refined the design of frequently used buttons in live chat and enhanced the UI/UX for AI Tools, creating a more seamless and user-friendly experience.
{% hint style="success" %} **20250109 - Release updates**
{% endhint %}
We're excited to announce the following recent updates to our platform:
#### New WhatsApp Flow Page
A new WhatsApp Flow page allows users to view all WhatsApp flows in one place and manage them efficiently. Users can also create broadcast templates on chatalog to engage with customers directly via WhatsApp flows.
#### Zapier Integration (Beta)
Invited users can now integrate Zapier with chatalog through our new integration page. This beta feature simplifies connecting with external services to enhance workflows. Also, more integrations will be coming soon. Business or Enterprise plan users can contact us for access to the beta version.
#### Enhanced Label Management Experience
Label management has been redesigned to facilitate label creation and editing, improve the user experience, and manage workflows.
#### Flow Priority Enhancement
Managing flow priorities is now more convenient, allowing users to adjust flow orders to optimize response handling easily.
#### Sign Up Verification
New users are now required to verify their accounts during the signup process, enhancing security and ensuring the authenticity of new registrations.
#### Facebook/Instagram Ads Post ID
Users can now find Facebook and Instagram ads by post ID and manage the post auto-reply, simplifying tracking and managing processes within chatalog.
#### :mobile\_phone:Improved Mobile App Performance
The mobile app is now more stable with improved performance, offering a smoother, crash-free experience for users on mobile devices.
# 2024 Releases
{% hint style="success" %} **20241008 - Release Updates**
{% endhint %}
We're excited to announce the following updates to our platform:
#### **Smart Delay flow block (BETA)**
Users can now customize delay durations for follow-up messages, allowing for more strategic timing in customer communications.
#### **Enhanced Contact Information Page**
The new Activities section displays conversation status changes and other important contact interactions, providing better insights into customer engagement and team management.
#### **Advertisement ID Display**
Conversations initiated from ads now show the corresponding ad ID, helping track marketing effectiveness and customer journey.
#### **Refreshed Navigation Bar**
Our UI has been updated to better align with the Chatalog brand, improving overall user experience and visual consistency.
#### **GPT Model Selection for AI Reply from Document**
Users can now choose specific GPT model types when using the AI reply from document feature, offering more control over AI-generated responses.
#### **Improved User Deletion Process**
We've streamlined the process of reassigning conversations and flows when deleting users, making account management more efficient.
{% hint style="success" %} **20240603 - Release Updates**
{% endhint %}
We're excited to announce the release of several new features over the past months:
#### **Flow list page enhancement (BETA)**
You can now select multiple flows to import, export, or delete in bulk, optimizing your workflow.
#### **Contact page enhancement (BETA)**
You can now select multiple contacts to export, add to your list, or delete. Plus, you can customize the contact column to display the information you need.
#### **Image caption in Live Chat**
You can now send images with captions in live chat, broadening your communication options.
#### **Two-factor authentication (2FA)**
Account owners can now enable 2FA for increased security. This will require all team members to use 2FA when logging into their accounts, enhancing the safety of your accounts and data.
#### **Draggable Flow Buttons**
Reorganizing your flow buttons is now easier. You can simply drag and move them around as needed.
{% hint style="success" %} **20240319 - Release Updates**
{% endhint %}
We're excited to announce the release of a series of new features over the past months:
#### **Notes**
You can now add, edit, and delete notes for specific clients on the message page.
#### **Selective Display of Flows and Template Messages**
Customize which flows or template messages are displayed on the message page, making them easier to find and send out.
#### **Search by Name**
Easily find the flow, template message, or saved reply you need by searching by name.
#### **Auto Assign Conversation Message**
Automatic messages can be sent out when assigning a conversation to other team members. These messages are editable and available in English, Traditional Chinese, and Simplified Chinese.
#### **Automation**
Set a time limit for conversations in each inbox, after which a pre-set flow will be sent to the open or assigned conversation. This feature also enables the automatic closure of open and assigned conversations.
#### **Translation**
Messages you receive or are about to send can be translated between English, Traditional Chinese, and Simplified Chinese, improving communication across languages.
#### **Duplicate Flow Block**
Duplicate entire flow blocks within a flow page for faster flow creation.
# 2023 Releases
{% hint style="success" %} **20231114 - Release Updates**
{% endhint %}
We are excited to announce the release of new features that enhance the functionality of chatalog. This release focuses on these key areas:
#### **Improved WhatsApp Integration**:
We have implemented tips and guidelines to help you seamlessly connect your WhatsApp inboxes to chatalog. The enhancement provides valuable insights on limitations before connecting inboxes, ensuring a smooth integration experience.
#### **AI Reply from Multiple Documents**
With this new feature, you can now upload and publish multiple documents for your AI to reference when generating replies. This allows for more accurate and diverse responses, improving the overall effectiveness of AI-generated replies.
#### **Display Labels in the Conversation List**
With the new toggle option, users can now choose whether to display labels in the conversation list. This allows for better organization and easier identification of conversations based on specific labels.
#### **Improved AI Flow Control**
We have added a required toggle for AI flow blocks, enabling users to exit AI flows by triggering keywords from other flows. When users trigger keywords from different flows, they will be directed to the corresponding flow, providing a seamless and dynamic conversational experience.
{% hint style="success" %} **20231024 - Release Updates**
{% endhint %}
We are excited to announce a new set of features to enhance collaboration and customization within chatalog.
#### **Separate Read Status for Different Agents**
With this update, different agent accounts can now manage the read status of the same conversation separately. This means that when one user marks a conversation as read, it will not affect the read status for other users in the same organization.
#### **New Carousel Template for WhatsApp Broadcast**
We have introduced a new carousel template for WhatsApp broadcast messages. This feature allows you to send a single text message accompanied by up to 10 carousel cards in a horizontally scrollable view.
#### **Enhanced Inbox Permissions**
We have added the ability for owners to edit the permissions for different inboxes. Owners can now associate specific inboxes with teams, ensuring that members of each team can only access the inboxes associated with them. This feature is particularly useful for organizations with different stores or teams managing different inboxes, as it allows for better organization and control over inbox access.
#### **Variables in AI Flow Block Prompts**
We have introduced the ability to use variables in AI flow block prompts. This means you can now add user metadata, system data, or custom fields in the prompts, providing more personalized and dynamic customer interactions.
#### **Improved WhatsApp Broadcast Management**
We have replaced the "Last Edited" column with a new "Start Time" column in WhatsApp broadcast. This change provides a clearer and more relevant view of your broadcast messages, allowing you to track the start time of each broadcast easily.
#### **Enhanced Reply and Private Notes UI**
We have improved the Reply and Private Notes user interface, making it more intuitive and user-friendly.
{% hint style="success" %} **20230927 - Release Updates**
{% endhint %}
We are excited to introduce several enhancements and new features with this latest release update.
#### **Add Icons for Sending and Failed Messages in Live Chat Messages**
This feature enhances the user experience by visually indicating the status of messages in the live chat. Icons will be shown to differentiate between messages currently being sent and those that have failed to be sent.
#### **Show Notification When WhatsApp Credit is Under $20**
To help users stay informed about their WhatsApp credit balance, a notification will be displayed when the credit falls below $20. This ensures that users are aware of their remaining credit and can take necessary actions to top up if needed.
#### **Filter Conversations by Label**
Users can now search and filter conversations based on labels. Labels will be shown for each inbox. This feature simplifies the organization and management of conversations by allowing users to quickly sort and view conversations that are associated with specific labels.
#### **Add Export Button for Broadcast Targets**
With this new feature, users will be able to export the list of broadcast targets. This allows for easier management and analysis of broadcast campaigns.
#### **Rename AI Sales Dialog Block to AI Dialog**
To better reflect the feature's functionality and scope, the AI Sales Dialog block will be renamed to AI Dialog.
{% hint style="success" %} **20230907 - Release Updates**
{% endhint %}
### **Web Update**
We are excited to introduce several enhancements and new features with this latest web release update.
1. **WhatsApp Broadcast Enhancement**: Broadcasting messages just got easier. Now, you have the option to use the default image, video, or file when sending message templates through WhatsApp. This feature simplifies the process of creating and sending broadcast messages.
2. **Setting Page - Plans & Billing Page UI Enhancement**: We've made improvements to the Plans & Billing page's user interface. Navigating through your subscription details and billing information is now more seamless and user-friendly.
3. **Advanced Assign Conversation (Beta)**: We're introducing a powerful new feature in beta. With Advanced Assign Conversation, you can set team and agent statuses (online/away/offline) to automatically assign new conversations based on your advanced assignment rules. Conversations will be assigned to the agent with the least assigned conversations in the team at that moment, ensuring efficient customer support.
4. **AI Reply from Document Enhancement**: Enhancements have been made to the AI Reply from Document flow block. We've added a system prompt to streamline the AI reply process when using this feature.
5. **Contact Enhancement**: You can now import large batches of contacts, with a maximum of 3000 contacts per upload. This improvement simplifies the process of managing your contact list.
### **Mobile Update Version 1.19.0**
We're thrilled to introduce the following enhancements and features in Mobile Release Version 1.19.0.
1. **Edit Contact Name and Copy Phone Number**: You can now easily edit contact names and copy phone numbers directly from your mobile device. This feature adds flexibility and convenience to managing your contacts.
2. **New Setting Page Tab**: We've introduced a new tab in the setting page with several options:
* Edit profile name
* Select app language (English, Traditional Chinese, Simplified Chinese)
* Change password
* Set status online/away
These options give you greater control over your mobile app settings and preferences.
3. **Send Flow in Chat**: You can now send flows directly in chat, making it easier to engage with your contacts and streamline communication.
4. **Small UI Enhancement on Login Page**: We've made minor user interface enhancements to the login page to improve the overall user experience.
5. **Mobile Notification Message**: You will now see the button content in mobile notification messages, ensuring that you have clear and actionable information at your fingertips.
We hope you enjoy these updates and enhancements, which are designed to make your experience with our platform even better. Thank you for your continued support!
{% hint style="success" %} **20230828 - Release Updates**
{% endhint %}
### Default image for broadcast
You can now re-use the default image uploaded in WhatsApp broadcast template instead of selecting and uploading an image every time you want to send template messages.
### Web Chat Setting enhancement
You can now set the language of the Web Chat buttons. The language options are English, Traditional Chinese, and Simplified Chinese. You can also upload your WeChat QR code to your web chat, so that your customers can scan the QR and talk to you via your WeChat.
### AI reply from document enhancement
We have added a time-out feature to AI reply from the document, so the conversation can now be closed automatically after a time-out. Additionally, users can connect to another flow block if the chatGPT response is empty.
{% hint style="success" %} **20230810 - Release Updates**
{% endhint %}
### Simplified Chinese
chatalog now supports Simplified Chinese on the web. And the help center also supports Simplified Chinese now.
### Auto-End Conversation (Beta)
You can set a time limit for conversations. Once the time limit is reached, the conversation will be automatically closed, triggering a predefined flow. The time limit can be set between 30 minutes and 24 hours.
### New UI for Post Auto-Reply
chatalog has updated the user interface for the post auto-reply, making it more intuitive and user-friendly.
### New sync button for WhatsApp templates
You can now sync all WhatsApp templates from different WhatsApp numbers under the same WABA account on chatalog with one click, ensuring that you have the most up-to-date templates available.
### Support message emoji reaction
Now you can see the emoji reactions from your customers on chatalog.
### Online and offline status
You can now set yourself as online, away, or offline. chatalog also displays the user status of each team member, making it easier to collaborate and communicate effectively. [Learn more here.](/settings/user-management/user-status)
### Send Flow to the Customer
You can now send a flow directly to the customer in the conversation, allowing them to easily navigate through the conversation and find the information they need.
### More AI Consultant Templates
chatalog has added more AI consultant templates to make it easier for you to explore your business success.
### Mobile - Saved Replies
chatalog's mobile app now includes saved replies, making it easier to respond to customers in a few seconds.
{% hint style="success" %} **20230707 - Release Updates**
{% endhint %}
### Temporarily disabled the delete message templates feature
Due to restrictions caused by Meta, the functionality to delete WhatsApp message templates has been temporarily disabled. Please be assured that we are actively following up on this, and once resolved, we will promptly reinstate this feature.
### Non Business Hour Flow
You can set your non business hours in the chat flow page, and select a flow to handle all customer inquiries during non business hours. Learn more [here](/crm-quickstarts/basic-flow/setting-up-non-business-hours).
### Custom field supports more data types like Date and Number
You can now create custom fields with more data types, including Text, Date, Number etc. For example, for a VIP member, you can create a custom field called registeredAt, and its value can be '2023-07-07 18:00". Learn more here.
### Resend team member invitation
You can resend the team member invitation in the settings page - user tab, in case your team member did not receive the invitation previously, or the invitation has expired after 24 hours.
### More chat flow templates
Now You can find more chat flow templates in the chat flow page, template tab. Follow the templates to make more advanced logics to set up your automated conversations with your customers.
### ANY\_KEYWORDS flow now contains button toggle
Previously, if you want to set the trigger for a chat flow as any keywords, you will need to type 'ANY\_KEYWORDS' in the keyword block. Now the keyword block contains button toggle for better users experience. Turn on the 'Any' toggle means no matter what keywords the customer types, this flow will be triggered.
### New ending-condition for AI Sales Dialog flow block - Time Out
In order to end the AI Sales Dialog, now you can set a new ending condition - timeout. For example, if a customer hasn't replied after a certain period of time, an AI sales conversation session will be auto ended, and routed to another chatbot flow for follow-up (eg. payment/product inquiries flows) or a live agent.
{% hint style="success" %} **20230612 - Release Updates**
{% endhint %}
### New Webhook Flow block to call external APIs \[Enterprise Plan Only]
We have a new Webhook Flow Block available now for enterprise plan users. With this flow block, you can conduct external API calls in your chat flow journey design.
### New look for AI Writer & Consultant \[Pro Plan and above Only]
We have added more templates for our AI Writer & Consultant feature with a brand new look.
### New Plan & Billing Page
We have added a new Plan& Billing page where you can manage your subscription better.
{% hint style="success" %} **20230529 - Release Updates**
{% endhint %}
### chatalog changes due to WhatsApp New Pricing policy
Starting from Jun 1st, we will prompt user to top up WhatsApp conversation credit, if current credit is 0 & if user want to send broadcast/ send template message, due to WhatsApp's new pricing policy. Read more on [WhatsApp's new pricing policy.](https://chatalog.ai/en/blog/2023-whatsapp-business-conversation-based-pricing-model/)
### WhatsApp Template Message Draft Status
Now user has the option to save a WhatsApp template message as draft, rather than submitting it right away.
Learn more:
### Edit and Delete WhatsApp Message Template
Now user can update their existing approved WhatsApp message templates and submit for approval again. User can also delete their existing approved WhatsApp message templates.
Learn more:
### Manage Custom Fields in Organization Level
User can manage custom fields in organization level, including:
1. delete custom field
2. create new custom field
3. add descriptions to custom fields
Learn more:
### Mobile App 1.14.0 new version deployed with bug fixes:
1. conversion window hour count in app sometimes not aligned with web
2. users sometimes auto logged out after a short period of time
3. some users received duplicate notifications
{% hint style="success" %} **20230509 - Release Updates**
{% endhint %}
### Import contact with labels and custom fields
Now you can import contacts with labels and custom fields into your whatsapp inbox. Just make sure you follow the csv format we provided in the contact page.
### Tooltips for chat flow blocks
To better guide you to fully use our chat flow features, now every flow block in the chat flow builder page, if you hover on the block, you will see the tooltips. Follow the instruction and build your own chat flows!
Learn more:
### New categories for whatsapp template message
WhatsApp Business API has updated their categories for whatsapp template messages. Now when you submit a whatsapp template message for approval, you will need to select a new category according to your need. The new categories are Utility, Authentication, and Marketing.
Learn more:
{% hint style="success" %} **20230502 - Release Updates**
{% endhint %}
### AI Knowledge Base powered by chatGPT \[business plan feature]
It’s a powerful feature that you can upload a document as your knowledge base, and you can connect this knowledge base with flow. Then once your customers ask questions , chatGPT will respond based on your document.
Learn more:
### Filter conversations on mobile app
Now you can filter the conversations by clicking the filter icon in chatalog mobile app!
Learn more:
### New Look for Home Page
Home page design has been revamp. To help you make the most of chatalog, we have added different sections like My Channels, Recommended For You, FAQs etc.
Learn more:
### Analytics dashboard \[pro plan feature]
Your messaging data statistics includes: total contacts and daily new contacts, cumulative conversations and messages, source of conversations by channel, agent performance in resolving conversations, agent vs bot messages etc.
Learn more:
{% hint style="success" %} **20230404 - Release Updates**
{% endhint %}
### Delete team member
As owner, I can delete team members under my organisation. Go to “setting”, and then “users”, click the delete icon. Please make sure there is no conversation or flow assigned to this team member, otherwise you cannot delete this team member.
Learn more:
### Assign conversation flow block has default value now
Assign Conversation flow block now has default value selected. The first team in the organization will be the default value. You can change the value according to your need.
Learn more:
### New look for create broadcast pages
Create Broadcast Pages have been revamped. Now we have unified designs for all channels - Instagram, Messenger, Facebook.
Learn more:
### User can choose static or dynamic when creating contact list
Dynamic list : a list that is dynamically updated according to the selected conditions in real time.
Static list: a list that captures a snapshot of contacts that meet the selected conditions and its data will not be further automatically updated unless you manually update the list.
Learn more:
### Sidebar and topbar enhancement
The previous ‘Bot’ page has been renamed to ‘Post Auto Reply’, ‘Flow’ has been renamed to ‘Chat Flow’. We updated the sequence of the tabs according to frequency of usage. Moved the inbox selection from sidebar to topbar for better user experience.
Learn more:
### Mobile App enhancements
Please kindly update your app to version 1.12.0. We added sound notifications for our chatalog mobile app. If needed, you may turn on the sound notification for this app in your mobile phone setting. Learn more:
Also, the issue of not being able to view the new messages after receiving notifications has been fixed.
Learn more:
{% hint style="success" %} **20230323 - Release Updates**
{% endhint %}
### AI Writer - content generation tool powered by chatGPT
With all different built-in templates, it allows you to create all sorts of copy ranging from marketing promotions to FAQs and more in minutes. Upgrade your plan to start using it!
Learn more:
### Web Chat Service
This handy feature allows you to embed a live chat service directly into your website. Together with our existing Dialog Flow feature, you can automate conversations with your website visitors effortlessly 24/7.
Learn more:
### Dynamic Contact List
You can create customised contact lists with adjustable conditions. For example, you can easily generate a “VIP Customer” list by filtering all contacts with the “VIP Customer” label and quickly broadcast promotional offers to them.
Learn more:
### Edit Contact
Now you can conveniently modify the details of your contacts, such as their name and label, directly from the contact page by clicking into the contact detail.
Learn more:
### WhatsApp Template Message in Simplified Chinese
Previously, we only supported English and Traditional Chinese, but now we have also included support for Simplified Chinese when submitting WhatsApp Template Messages for review and approval.
Learn more:
# FAQs
How to manage the business integrations you've connected to your Facebook account or remove them?
Reference link of Facebook Help Center [HERE](https://www.facebook.com/help/405094243235242).
To manage the business integrations you've connected to your Facebook account:
1. Click your profile picture in the top right of Facebook.
2. Select Settings & privacy, then click Settings.
3. Click Business Integrations on the left side.
4. Select Active or Removed at the top, or search for a specific business integration using the search bar to the right. From here you can:
* Adjust your settings:
1. Click View and Edit next to the business integration to control the information it has access to.
2. Adjust your settings by checking or unchecking the boxes next to your information or using the dropdown menus, and then click Save.
* Renew permissions: If the business integration has expired user permissions that you want to re-enable, click on Renew.
* Remove an integration: Select the business integration, click Remove, then Remove.
If a business integration is:
* Active: You've logged into this integration with Facebook. It can manage one or more of your ads, Pages, groups, events, or messages. It can also currently request the information you choose to share with it at any time, if its user permissions haven’t expired.
* Removed: You've removed this business integration from your account. It can no longer manage your ads, Pages, groups, events, or messages. It'll also no longer be able to access new private information about you, but it may have information you've previously shared. View removed business integrations to review their privacy policy.
Expired Permissions:
If you haven’t used a business integration for 90 days, its access to your personal, non-public information (like your email address) automatically expires. However, this expired access does not affect a business integration’s connection to your Facebook business assets and information. Integrations with expired permissions are found in the Active list and the permissions will be identified as expired.Integrations that have expired permissions or are removed can continue to access:
* Your name.
* Your profile picture and cover photo.
* Your App User ID. This ID is created when you connect your Facebook account to the integration. It’s used to identify you with the app creator and doesn’t have your Facebook account details.
* Information that you shared while the integration was active. You can contact the business integration developer for more information or to request that they delete your information.
Why there are no inbox messages, or no posts in my Auto Post Reply page?
It's probably due to permission issue. Please try the following steps:
1\) Go to home page, click the little triangle(dropdown) of the inbox and click 'Edit'.

3\) Click the 'CONTINUE WITH FACEBOOK' button in the pop up page. We’ll ask you to login via Facebook where you can add an associated Facebook Page to your Inbox. If this is an instagram inbox, please make sure to select the Facebook Page your Instagram account is associated with. And please allow all permissions.


\
If you still cannot see your posts after you updated your facebook access token, re-login and refresh page, please WhatsApp us for direct support +852 5485 4684.
How to regenerate my facebook access token in chatalog
1\) Login to your chatalog account [https://app.chatalog.ai/signin](https://app.chatalog.ai/signin\\)
2\) Go to home page, click 'Update permissions'.

3\) Click the 'CONTINUE WITH FACEBOOK' button in the pop up page. We’ll ask you to login via Facebook where you can add an associated Facebook Page to your Inbox. If this is an instagram inbox, please make sure to select the Facebook Page your Instagram account is associated with. And please allow all permissions.


What message types does chatalog livechat feature support?
Regarding chatalog omni-channel livechat feature, we
**Support** receiving the following WhatsApp Messages Types:
* text, template, audio, document, location, image, sticker
**DO NOT Suport** receiving the following WhatsApp Messages Types:
* Interactive messages: List messages, Reply button messages, and Single and Multi Product Messages.
The picture of the Broadcast can't fully be displayed, what is the ratio of the picture?
1.91 : 1
What to do if my Web Chat is showing 'Not Allowed' on my website
Our web-widget require `Referrer` in the request header to detect iframe usage, and this is a common practice for embed service to ensure service safety. However, client's website, which is azure static app, default `Referrer-Policy` is `same-origin` which means `Referrer` will not send to our widget.\
[Referrer-Policy Reference](https://developer.mozilla.org/en-US/docs/Web/HTTP/Headers/Referrer-Policy)
Suggestion:\
Client should update their header config to allow `Referrer` send to our web-widget. Client can refer to the following website to update their website config. [Similar Issue and Fix](https://learn.microsoft.com/en-us/answers/questions/448776/is-there-a-compatibility-issue-with-static-web-app) , [Azure Static web app config](https://learn.microsoft.com/en-us/azure/static-web-apps/configuration#global-headers)
What is Messenger API for Instagram?
Instagram offers personal connection at every phase of the customer journey. The Messenger API for Instagram enables brands to connect with customers on their preferred messaging channel. Integrating with existing tools and data, the Messenger API for Instagram makes managing high volumes of customer messages easier - helping to turn conversations into business outcomes.
Can I use a private Instagram account?
Unfortunately this service is only for Instagram Business accounts. The good news is that there is no requirement on the number of followers! As long as you have an Instagram Business account linked to your Facebook account, you are eligible to use chatalog.
Do I need to know programming to create a chatbot?
Our platform is 100% no code! We offer tutorial and templates for you to drag and drop in creating a basic chatbot in under 3 minutes.
Can I try out chatalog for free?
Yes! We offer free plan to explore our features for all users with 14-day period .No credit card info is required to set up an account.
When is the credit card starting to charge?
Only when you upgraded to business/enterprise plan. Our service charges in a monthly basis according to the [Pricing](https://chatalog.ai/en/pricing/) page.
How to fix a browser timezone issue?
If your conversation window is not closed or expired incorrectly due to a 24-hour limit, or if the conversation time displayed in your conversation window is inconsistent with your computer system time, it may be due to a browser timezone issue.
**Step 1: Check if you have a browser timezone issue.**
In your browser, right-click and select ***Inspect*** from the menu.
Copy and paste the following script into the ***Console*** to check your browser timezone.
```
Intl.DateTimeFormat().resolvedOptions().timeZone
```

Check if your browser timezone is consistent with your computer system.
**Step 2: Fix the browser timezone issue.**
Click on the three-dotted menu -> Click on ***More*** ***tools** ->* ***Sensors**.*

Select the location according to your current situation, making the browser timezone consistent with your computer system.

How to find my organization ID ?
It is on the home page.
# Announcements
1 Oct 2026 New Price Update for WhatsApp Message
# Temporarily Disable the Delete Message Template Function
July 7, 2023
From the chatalog team:
Due to restrictions caused by Meta, the functionality to delete WhatsApp message templates has been temporarily disabled. So there is no delete button next to the WhatsApp message template for now.
We apologize for any inconvenience this may cause. Please be assured that we are actively working on resolving this issue, and once it's fixed, we will promptly reinstate this feature.
We will keep you updated on our progress. Thank you for your understanding and patience.
# Things to note when setting up the platform
Next, there are many places that are set according to the channel. Please pay attention to whether the channel is selected correctly
(Including [Contact](/contact-setup/contact) / [Broadcast](/broadcast-setup/broadcast-whatsapp) / [Post Auto Reply](/post-auto-reply/post-auto-reply/post-auto-reply-setup) / [Chat Flow](/crm-quickstarts/customized-flow))
Also, be mindful of the file size limits on **WhatsApp**
# Sign up and Sign in
### Sign Up
If you don't have a chatalog account yet, you can sign up here:
You can create your account with a Google, Microsoft, or Apple account, or click the Sign up button to follow the registration steps to complete the sign-up.
As the owner/admin account, you can invite team members to your organization:
{% content-ref url="/pages/sEh3C2PxaRvY2rbENS0x" %}
[Add Team Member](/settings/user-management/add-team-member)
{% endcontent-ref %}
### Sign In
If you already have chatalog account, you can sign in here:
Based on your account registration or invitation method, we currently support the following login methods:
* Using username and password
* Via Google
* Via Microsoft
* Via Apple
# WhatsApp
Before binding your WhatsApp number to chatalog, you must first have:
1\. a personal Facebook account;
2\. [a qualified mobile phone number](https://docs.chatalog.ai/v/zh-hk/platform-setup/whatsapp-connection-guide/satisfy-phone-number-requirements);
3\. document that proves the legitimacy of your enterprise or organization
If you fulfill the above requirements, you can create or select a Meta Business account, WhatsApp Business account (WABA), verify your phone number for WhatsApp Business API. After creating the account, you will need to conduct Business Verification for your Meta Business account. The following guide will illustrate how to get your account eligible for connection and sign up step-by-step.
{% embed url="" %}
Chatalog Tutorials - Connect WhatsApp Inbox
{% endembed %}
**Step 1. Register a chatalog account**
[Sign up your chatalog account](https://app.chatalog.ai/signup) by clicking "Sign up with Email".
After finishing registration, login to your account and click "Connect" and select WhatsApp platform to register your WhatsApp number.
**Step 2. WhatsApp Business API Sign Up**
As the Facebook window popup, click "Continue as".

Click "Get Started".

Click "Continue".

You can create or select a Meta Business Account. And then click "Continue".

If you create a new Meta Business Account, you need to fill in Legal Business Name, Business Phone Number and Company Website. Please note that the information provided here is for verifying your business. You need to provide document to prove its legitimacy afterwards to fully access WhatsApp Business API features. The name and phone number here may not be equal to your Whatsapp Business account name and phone number. Click "Continue" after filling in.

Decide your WhatsApp Business account name. Select the time zone. Then click "Continue.

Fill in WhatsApp Business display name. If your display name is different with the legal business name, you can select "My display name and legal business name are different" and rename it. Please make sure to adhere to WhatsApp Business Display Name Guideline as below:
{% embed url="" %}
Fill in the website and continue.

Select the business type of your WhatsApp Business account, and then fill in description. Please note that the information filled in here is viewable in your WhatsApp profile. Continue when you finish.

Select or Create a set of WhatsApp Business number. Use text or audio message to verify you own the telephone number.
{% hint style="info" %}
Make sure your phone number is eligible according to WhatsApp's requirements. Refer to the following document:
{% endhint %}
{% embed url="" %}

{% hint style="warning" %}
Please note that if you have created a WhatsApp Business App Account or used other WhatsApp API services, you will see an error message as below. You need to disconnect to these services before proceed.
{% endhint %}

When you have finished the verification, you can select the number you have connected and name the inbox. Click "Connect" when you finish the configuration.

**Step 3. Conduct Business Verification for your Facebook Page**
Go to . Select your page, and then click "Security Center", and then "Start Verification" to provide the documents required. Businesses that apply for business verification need to provide the following documents to prove their accounts belong to a legitimate enterprise or organization, in order to enable WhatsApp Business API.
**Organizations**
If you are a registered business or organization, please provide one of the following:
* **Government-issued company or corporate registration**.
* **Company tax revenue document** (for example, a corporate tax return or tax-exempt certificate).
* **Official articles of incorporation or association**.
**Sole proprietors**
If you are a registered sole proprietor and operate your business by yourself, please provide one of the document types listed below:
* **A government registration document**. This document must confirm that you are a sole proprietor.
* **Company tax filing document**.
If you are not a registered business or sole proprietor, please provide the requested ID below:
* **Proof of ID**. This must be a [valid government-issued identification document](https://www.facebook.com/help/245465555858336) that includes a photograph, preferably a passport.
* **Proof of address**. Note that your document must clearly show the address you registered with Facebook, must be in effect and must be no more than 6 months old. Acceptable proof can include your:
* Utility bill.
* Bank statement.
* Credit card statement.
* Company tax filings documents.
The ultimate right to verify a business lies with Facebook. Please refer to [Facebook official guideline](https://www.facebook.com/business/help/2058515294227817?id=180505742745347) for more information.

Congratulations! You can start managing your customer relationship on Chatalog.ai !
# WhatsApp Business API Pricing Guide
(Effective from Oct 1, 2026)
*How Meta bills your messages, and what changes on October 1, 2026*
Last updated: September 15, 2026 · Chatalog Help Center
### Overview & Effective Dates
Meta bills WhatsApp Business Platform messages on a per-message basis. Rates vary by market and by message category, and Meta reviews rates on a quarterly cadence. This article summarizes the current pricing model together with the upcoming October 1, 2026 update, and gives you a full rate card and a cost-saving checklist.
● July 1, 2025 — Meta moved from per-conversation to per-message billing. Utility template messages sent inside an open 24-hour customer service window became free.
● October 1, 2026 — Service messages (the free-form replies your team sends) become billable, and Utility template messages sent inside an open window become billable again. A new monthly free allowance offsets the change for smaller senders.
#### [**What's Changing on October 1, 2026**](#user-content-fn-1)[^1]
Starting October 1, 2026, two message types that are free today move to per-message billing:
● Service messages — any free-form reply your agents or bots send inside an open 24-hour customer service window. These have been free since WhatsApp Business API launched; from October 1, 2026 they are billed per message, at the same rate as Utility messages in that market.
● Utility template messages sent inside an open window — free since July 2025, these return to being billed at the market's Utility rate (they were, and remain, billed when sent outside a window).
● Meta is also refreshing Utility and Authentication rates in a number of markets, and refining what qualifies as "Utility" based on user engagement — which may shift some templates into or out of that category.
● Marketing and Authentication template pricing is not changing as part of this update.
### Free Monthly Allowance
To soften the impact on smaller and mid-size senders, Meta is introducing a free tier for service messages: each WhatsApp phone number receives 1,000 free service messages every calendar month before billing applies. The allowance resets monthly and is tracked per phone number, not per WhatsApp Business Account (WABA).
● If your business sends fewer than 1,000 service messages a month per number, this change may have no cost impact on you at all.
### How Per-Message Pricing Works
Since July 1, 2025, Meta charges per delivered message rather than per 24-hour conversation. A charge is generated for: delivered Marketing templates, delivered Authentication templates, and Utility templates delivered outside an open customer service window (and, from October 1, 2026, inside one too — see above).
Example: if you send one Marketing template and then two Utility templates to the same user, that is 3 separate charges (1 Marketing + 2 Utility) if no service window is open. If those two Utility messages are sent while a customer service window is already open with that user, only the Marketing template is charged — unless it is after October 1, 2026, in which case the in-window Utility messages are billed too.
● Volume tiers: Utility and Authentication rates step down automatically once a phone number's monthly sends cross market-specific thresholds — for example, Hong Kong's Utility rate drops from $0.0312 to $0.0234 once a number sends over 50 million Utility messages in a month. Marketing and Authentication-International do not currently have volume tiers.
### Message Categories
● Marketing — promotional content: offers, announcements, re-engagement, and other messages designed to drive awareness or sales.
● Utility — non-promotional messages tied to a specific transaction or request: order updates, appointment reminders, payment confirmations, and similar account-servicing content.
● Authentication — one-time passcodes and identity verification messages.
● Authentication-International — a higher-rate variant of Authentication that applies in a small set of markets (currently Egypt, India, Indonesia, Malaysia, Nigeria, Pakistan, Saudi Arabia, South Africa, and the UAE).
● Service (new pricing from October 1, 2026) — free-form, non-template replies sent by your agents or chatbot inside an open 24-hour customer service window.
### The 72-Hour Free Entry Point Window
Conversations that begin through a Click-to-WhatsApp ad or a Facebook/Instagram "Send Message" entry point open a free entry-point window: all messages you exchange with that user — including templates — are free for 72 hours from the first user message. This window is unaffected by the October 2026 update.
### Full Pricing Table (USD, per message)
*Rates below are Chatalog's published per-message rates in USD, with the underlying cost verified against Meta's official WhatsApp Business Platform pricing on September 15, 2026. Figures reflect the base (lowest-volume) tier — Utility and Authentication rates step down further once a phone number crosses each market's monthly volume thresholds. The Service column applies from October 1, 2026 and mirrors each market's Utility rate, consistent with the pattern already confirmed for Hong Kong and Singapore. Meta has not yet published a complete market-by-market Service rate card, so treat the Service figures as indicative and reach out to Chatalog to confirm before billing customers or forecasting spend.*
| Market | Marketing | Utility | Authentication | Auth.-International | Service (from Oct 1, 2026) |
| -------------------------------- | --------- | ------- | -------------- | ------------------- | -------------------------- |
| Argentina | $0.0742 | $0.0312 | $0.0312 | — | $0.0312 |
| Brazil | $0.0750 | $0.0082 | $0.0082 | — | $0.0082 |
| Chile | $0.1067 | $0.0240 | $0.0240 | — | $0.0240 |
| Colombia | $0.0150 | $0.0010 | $0.0010 | — | $0.0010 |
| Egypt | $0.0773 | $0.0043 | $0.0043 | $0.0780 | $0.0043 |
| France | $0.1031 | $0.0360 | $0.0360 | — | $0.0360 |
| Germany | $0.1638 | $0.0660 | $0.0660 | — | $0.0660 |
| Hong Kong | $0.0878 | $0.0312 | $0.0312 | — | $0.0312 |
| Hungary | $0.1032 | $0.0420 | $0.0420 | — | $0.0420 |
| India | $0.0142 | $0.0017 | $0.0017 | $0.0365 | $0.0017 |
| Indonesia | $0.0493 | $0.0300 | $0.0300 | $0.1632 | $0.0300 |
| Israel | $0.0424 | $0.0064 | $0.0064 | — | $0.0064 |
| Italy | $0.0954 | $0.0360 | $0.0360 | — | $0.0360 |
| Malaysia | $0.1032 | $0.0168 | $0.0168 | $0.0502 | $0.0168 |
| Mexico | $0.0366 | $0.0102 | $0.0102 | — | $0.0102 |
| Netherlands | $0.1916 | $0.0600 | $0.0600 | — | $0.0600 |
| Nigeria | $0.0619 | $0.0080 | $0.0080 | $0.0900 | $0.0080 |
| Pakistan | $0.0568 | $0.0120 | $0.0120 | $0.0900 | $0.0120 |
| Peru | $0.0844 | $0.0240 | $0.0240 | — | $0.0240 |
| Poland | $0.0439 | $0.0146 | $0.0146 | — | $0.0146 |
| Qatar | $0.0409 | $0.0144 | $0.0144 | — | $0.0144 |
| Romania | $0.1032 | $0.0348 | $0.0348 | — | $0.0348 |
| Russia | $0.0962 | $0.0480 | $0.0480 | — | $0.0480 |
| Saudi Arabia | $0.0601 | $0.0128 | $0.0128 | $0.0718 | $0.0128 |
| Singapore | $0.0878 | $0.0192 | $0.0192 | — | $0.0192 |
| South Africa | $0.0455 | $0.0091 | $0.0091 | $0.0240 | $0.0091 |
| Spain | $0.0848 | $0.0240 | $0.0240 | — | $0.0240 |
| Turkey | $0.0131 | $0.0011 | $0.0011 | — | $0.0011 |
| United Arab Emirates | $0.0599 | $0.0188 | $0.0188 | $0.0612 | $0.0188 |
| United Kingdom | $0.0762 | $0.0264 | $0.0264 | — | $0.0264 |
| North America (US & Canada) | $0.0300 | $0.0041 | $0.0041 | — | $0.0041 |
| Rest of Africa | $0.0270 | $0.0048 | $0.0048 | — | $0.0048 |
| Rest of Asia Pacific | $0.0878 | $0.0136 | $0.0136 | — | $0.0136 |
| Rest of Central & Eastern Europe | $0.1032 | $0.0254 | $0.0254 | — | $0.0254 |
| Rest of Latin America | $0.0888 | $0.0136 | $0.0136 | — | $0.0136 |
| Rest of Middle East | $0.0409 | $0.0109 | $0.0109 | — | $0.0109 |
| Rest of Western Europe | $0.0710 | $0.0205 | $0.0205 | — | $0.0205 |
| Other | $0.0725 | $0.0092 | $0.0092 | — | $0.0092 |
### Regional Groupings Reference
Markets not individually listed in the table above are billed under one of these regional groups:
North America:
Canada, United States
Rest of Africa:
Algeria, Angola, Benin, Botswana, Burkina Faso, Burundi, Cameroon, Chad, Congo, Eritrea, Ethiopia, Gabon, Gambia, Ghana, Guinea-Bissau, Ivory Coast, Kenya, Lesotho, Liberia, Libya, Madagascar, Malawi, Mali, Mauritania, Morocco, Mozambique, Namibia, Niger, Rwanda, Senegal, Sierra Leone, Somalia, South Sudan, Sudan, Swaziland, Tanzania, Togo, Tunisia, Uganda, Zambia
Rest of Asia Pacific:
Afghanistan, Australia, Bangladesh, Cambodia, China, Japan, Laos, Mongolia, Nepal, New Zealand, Papua New Guinea, Philippines, Sri Lanka, Taiwan, Tajikistan, Thailand, Turkmenistan, Uzbekistan, Vietnam
Rest of Central & Eastern Europe:
Albania, Armenia, Azerbaijan, Belarus, Bulgaria, Croatia, Czech Republic, Georgia, Greece, Latvia, Lithuania, North Macedonia, Moldova, Serbia, Slovakia, Slovenia, Ukraine
Rest of Western Europe:
Austria, Belgium, Denmark, Finland, Ireland, Norway, Portugal, Sweden, Switzerland
Rest of Latin America:
Bolivia, Costa Rica, Dominican Republic, Ecuador, El Salvador, Guatemala, Haiti, Honduras, Jamaica, Nicaragua, Panama, Paraguay, Puerto Rico, Uruguay, Venezuela
Rest of Middle East:
Bahrain, Iraq, Jordan, Kuwait, Lebanon, Oman, Yemen
Other:
All other countries and regions not listed individually above or under a regional group.
### Ways to Reduce Your Messaging Costs
● Consolidate replies — combine what would be several short service messages into one complete message; each send is billed individually from October 1, 2026.
● Use WhatsApp Flows — collect multi-step information (forms, bookings, preferences) in a single interactive Flow instead of a back-and-forth message exchange.
● Make the most of the 72-hour free entry-point window — route Click-to-WhatsApp ad clicks and Facebook/Instagram "Send Message" traffic through WhatsApp while that window is open.
● Consider WhatsApp Coexistence — let your team keep sending free one-to-one messages from the WhatsApp Business App for conversations that don't need API automation.
● Route low-value or high-volume queries to other channels (email, in-app chat, a help center/FAQ bot) where a WhatsApp conversation isn't essential.
● Monitor usage before October 1, 2026 — check your current service-message volume per phone number so you know whether the 1,000/month free allowance will cover you.
[^1]:
# WhatsApp Conversation Fees (Before July 1, 2025)
(Effective May, 2025)
### **Updates on pricing in 2024-2025**
> * Starting November 1, 2024, service conversations will be completely free, with "n/a" reflected in our rate card across markets.
> * From February 1, 2025, the implementation of International Authentication Rates will be extended to more regions. Updated authentication and authentication-international rates will apply in Egypt, Malaysia, Nigeria, Pakistan, Saudi Arabia, South Africa, and United Arab Emirates.
> * From April 1, 2025, Meta is lowering their authentication-international rates in Egypt, Nigeria, Pakistan and South Africa, as part of continued efforts to ensure their prices are on-par with alternate channels.
> * **Effective July 1, 2025 for all businesses on Meta:**
> * The conversation-based pricing model will be deprecated
> * Meta will charge [per-message for template messages](https://developers.facebook.com/docs/whatsapp/pricing/updates-to-pricing#per-message-pricing) instead of per-conversation
> * Utility templates sent within an open customer service window [will be free](https://developers.facebook.com/docs/whatsapp/pricing/updates-to-pricing#free-utility-templates-in-the-customer-service-window)
### Conversation-Based Pricing Policy
Conversations are 24-hour message threads between you and your customers. They are opened and charged when messages you send to customers are delivered. The criteria that determines when a conversation is opened and how it is categorized is explained below.
Conversations are categorized with one of the following categories:
* **Marketing** — Enables you to achieve a wide range of goals, from generating awareness to driving sales and retargeting customers. Examples include new product, service, or feature announcements, targeted promotions/offers, and cart abandonment reminders.
* **Utility** — Enables you to follow-up on user actions or requests. Examples include opt-in confirmation, order/delivery management (e.g., delivery update); account updates or alerts (for example., payment reminder); or feedback surveys.
* **Authentication** — Enables you authenticate users with one-time passcodes, potentially at multiple steps in the login process (e.g., account verification, account recovery, integrity challenges).
* **Service** — Enables you to resolve customer inquiries.
Marketing, utility, and authentication conversations can only be opened with template messages. Service conversations can be opened with any type of message other than a template message.
### Conversation Fees Table (in USD)
The charges will be calculated based on the end-user phone number.
Market
Currency
Marketing
Utility
Authentication
Authentication-International
Service
Argentina
$US
0.07416
0.0408
0.04404
n/a
0.03792
Brazil
$US
0.075
0.0096
0.0378
n/a
0.036
Chile
$US
0.10668
0.024
0.06324
n/a
0.05448
Colombia
$US
0.015
0.00024
0.00924
n/a
0.0072
Egypt
$US
0.12876
0.00624
0.07416
n/a
0.07728
France
$US
0.17184
0.036
0.08292
n/a
0.10308
Germany
$US
0.1638
0.066
0.09216
n/a
0.09828
India
$US
0.01284
0.00168
0.00168
0.0336
0.0048
Indonesia
$US
0.04932
0.024
0.036
0.1632
0.0228
Israel
$US
0.04236
0.00636
0.02028
n/a
0.0216
Italy
$US
0.08292
0.036
0.04536
n/a
0.04632
Malaysia
$US
0.1032
0.0168
0.0216
n/a
0.0264
Mexico
$US
0.05232
0.012
0.02868
n/a
0.0126
Netherlands
$US
0.19164
0.06
0.0864
n/a
0.10692
Nigeria
$US
0.06192
0.00804
0.03444
n/a
0.0372
Pakistan
$US
0.05676
0.00648
0.02736
n/a
0.01704
Peru
$US
0.08436
0.024
0.04524
n/a
0.02148
Russia
$US
0.09624
0.048
0.05148
n/a
0.04776
Saudi Arabia
$US
0.0546
0.0138
0.02712
n/a
0.0234
South Africa
$US
0.04548
0.00912
0.0216
n/a
0.02016
Spain
$US
0.0738
0.024
0.04104
n/a
0.04428
Turkey
$US
0.01308
0.00636
0.00996
n/a
0.0036
United Arab Emirates
$US
0.04608
0.01884
0.02136
n/a
0.0228
United Kingdom
$US
0.06348
0.0264
0.04296
n/a
0.04656
North America
$US
0.03
0.0048
0.0162
n/a
0.01056
Rest of Africa
$US
0.027
0.00732
0.01728
n/a
0.04356
Rest of Asia Pacific
$US
0.08784
0.01884
0.051
n/a
0.02688
Rest of Central & Eastern Europe
$US
0.1032
0.04236
0.06684
n/a
0.03
Rest of Latin America
$US
0.0888
0.01356
0.0534
n/a
0.05076
Rest of Middle East
$US
0.04092
0.01884
0.02136
n/a
0.02616
Rest of Western Europe
$US
0.07104
0.036
0.04536
n/a
0.04764
Other
$US
0.07248
0.00924
0.03648
n/a
0.0174
### List of countries in a region
| North America | Canada, United States |
| ----------------------------------------------- | --------------------------------------------------------------------------------------------------------------------------------------------------------------------------------------------------------------------------------------------------------------------------------------------------------------------------------------------------------------------------------------------- |
|
| All other countries or regions that are not listed in the above. |
# Whatsapp Conversation Fees (2023)
(Effective from 1st June, 2023)
### Conversation Based Pricing Policy
WhatsApp Business API charges businesses per conversation. All messages of the same category in a 24 hour messaging window are counted as 1 conversation. WhatsApp conversations fall into 4 categories that are priced differently:
**Marketing conversations:** Include promotions or offers, informational updates, or invitations for customers to respond / take action. Any conversation that does not qualify as utility or authentication is a marketing conversation.
**Utility conversations:** Facilitate a specific, agreed-upon request or transaction or update to a customer about an ongoing transaction, including post-purchase notifications and recurring billing statements
**Authentication conversations:** Enable businesses to authenticate users with one-time passcodes, potentially at multiple steps in the login process (e.g., account verification, account recovery, integrity challenges)
**Service Conversations:** All user-initiated conversations will be categorized as service conversations, which help customers resolve enquiries.
**First 1000 user initiated conversations** each month will be **free** for each WhatsApp Business Account (WABA)
\*This conversation fees table is effective from 1st June, 2023. For the older version of conversation fees table, please refer to [here](https://chatalog.ai/en/pricing-whatsapp-conversation-fees/).
### Conversation Fees Table (in USD)
The charges will be calculated based on the end-users phone number.\
| Country | Marketing conversations | Utility conversations | Authentication conversations | Service conversations |
| -------------------------------- | ----------------------- | --------------------- | ---------------------------- | --------------------- |
| Argentina | 0.07416 | 0.04896 | 0.04404 | 0.03792 |
| Brazil | 0.075 | 0.042 | 0.0378 | 0.036 |
| Chile | 0.10668 | 0.07032 | 0.06324 | 0.05448 |
| Colombia | 0.015 | 0.0102 | 0.00924 | 0.0072 |
| Egypt | 0.12876 | 0.08244 | 0.07416 | 0.07728 |
| France | 0.17184 | 0.09216 | 0.08292 | 0.10308 |
| Germany | 0.1638 | 0.10236 | 0.09216 | 0.09828 |
| India | 0.01188 | 0.00504 | 0.00504 | 0.0048 |
| Indonesia | 0.04932 | 0.024 | 0.036 | 0.0228 |
| Israel | 0.04236 | 0.02256 | 0.02028 | 0.0216 |
| Italy | 0.08292 | 0.0504 | 0.04536 | 0.04632 |
| Malaysia | 0.1032 | 0.024 | 0.0216 | 0.0264 |
| Mexico | 0.05232 | 0.03192 | 0.02868 | 0.0126 |
| Netherlands | 0.19164 | 0.096 | 0.0864 | 0.10692 |
| Nigeria | 0.06192 | 0.03828 | 0.03444 | 0.0372 |
| Pakistan | 0.05676 | 0.03036 | 0.02736 | 0.01704 |
| Peru | 0.08436 | 0.05028 | 0.04524 | 0.02148 |
| Russia | 0.09624 | 0.05724 | 0.05148 | 0.04776 |
| Saudi Arabia | 0.04872 | 0.03024 | 0.02712 | 0.0234 |
| South Africa | 0.04548 | 0.024 | 0.0216 | 0.02016 |
| Spain | 0.0738 | 0.0456 | 0.04104 | 0.04428 |
| Turkey | 0.01308 | 0.01116 | 0.00996 | 0.0036 |
| United Arab Emirates | 0.0408 | 0.02376 | 0.02136 | 0.0228 |
| United Kingdom | 0.0846 | 0.04776 | 0.04296 | 0.04656 |
| North America | 0.03 | 0.018 | 0.0162 | 0.01056 |
| Rest of Africa | 0.027 | 0.0192 | 0.01728 | 0.04356 |
| Rest of Asia Pacific | 0.08784 | 0.05664 | 0.051 | 0.02688 |
| Rest of Central & Eastern Europe | 0.1032 | 0.07428 | 0.06684 | 0.03 |
| Rest of Latin America | 0.0888 | 0.05928 | 0.0534 | 0.05076 |
| Rest of Middle East | 0.04092 | 0.02376 | 0.02136 | 0.02616 |
| Rest of Western Europe | 0.07104 | 0.0504 | 0.04536 | 0.04764 |
| Other | 0.07248 | 0.04056 | 0.03648 | 0.0174 |
#### List of countries in a region
| North America | Canada, United States |
| -------------------------------- | ------------------------------------------------------------------------------------------------------------------------------------------------------------------------------------------------------------------------------------------------------------------------------------------------------------------------------------------------------------------------------ |
| Rest of Africa | Algeria, Angola, Benin, Botswana, Burkina Faso, Burundi, Cameroon, Chad, Congo, Eritrea, Ethiopia, Gabon, Gambia, Ghana, Guinea-Bissau, Ivory Coast, Kenya, Lesotho, Liberia, Libya, Madagascar, Malawi, Mali, Mauritania, Morocco, Mozambique, Namibia, Niger, Rwanda, Senegal, Sierra Leone, Somalia, South Sudan, Sudan, Swaziland, Tanzania, Togo, Tunisia, Uganda, Zambia |
| Rest of Asia Pacific | Afghanistan, Australia, Bangladesh, Cambodia, China, Hong Kong, Japan, Laos, Mongolia, Nepal, New Zealand, Papua New Guinea, Philippines, Singapore, Sri Lanka, Taiwan, Tajikistan, Thailand, Turkmenistan, Uzbekistan, Vietnam |
| Rest of Central & Eastern Europe | Albania, Armenia, Azerbaijan, Belarus, Bulgaria, Croatia, Czech Republic, Georgia, Greece, Hungary, Latvia, Lithuania, Macedonia, Moldova, Poland, Romania, Serbia, Slovakia, Slovenia, Ukraine |
| Rest of Latin America | Bolivia, Costa Rica, Dominican Republic, Ecuador, El Salvador, Guatemala, Haiti, Honduras, Jamaica, Nicaragua, Panama, Paraguay, Puerto Rico, Uruguay, Venezuela |
| Rest of Middle East | Bahrain, Iraq, Jordan, Kuwait, Lebanon, Oman, Qatar, Yemen |
| Rest of Western Europe | Austria, Belgium, Denmark, Finland, Ireland, Norway, Portugal, Sweden, Switzerland |
| Other | All other countries or regions that are not listed in the above. |
# Turn off WhatsApp Number Two-step verification
Learn how to switch off the two-step verification in WhatsApp Manager for migration purpose.
Turn off the two-step verification in WhatsApp manager is one of the most important steps in order to migrate your WABA number to Chatalog.
{% hint style="warning" %}
**The two-step verification** in WhatsApp manager is **different** from the 2FA in your personal Facebook account.
{% endhint %}
## **Steps:**
1. Login to your [**Facebook Business Manager** ](https://business.facebook.com/)with admin access. Go to **WhatsApp accounts** and click on **WhatsApp Manager** at the bottom.
2. On the left, please click on **Phone numbers.**
3. Click on the **settings** icon on the right.
4. Click on **Two-step verification**. Then, click **Turn off two-step verification**.
5. A pop-up window will appear with the following message. There will be instructions sent to your email to turn off the two-step verification. Click **Ok.**
6. Click on the link in the email to turn it off accordingly.
# Submitting an eligible phone number for WhatsApp Business API
You need to submit a phone number that is eligible for WhatsApp Business API. This article will explain how to select a phone number, how to delete a WhatsApp (Personal or Business) App account, as well as how to delete phone number in WhatsApp Business account (WABA), in order to fulfill the requirement of WhatsApp Business API.
If you wish to switch from another WhatsApp Business Provider(BSP)to chatalog, please [contact us](https://api.whatsapp.com/send?phone=85254854684\&text=I%20want%20to%20switch%20WhatsApp%20Business%20Provider%20to%20chatalog) directly for us to follow up your case.
### Requirements for phone number
The phone number for your business must meet the following criteria:
* Owned by you
* Has a country and area code, such as landline and cell numbers
* Able to receive voice calls or SMS
* Not a short code
* Not previously used with the WhatsApp Business Platform
### How to delete WhatsApp (Personal or Business) App Account
1. Open "WhatsApp" or "WhatsApp Business" App in Android or iPhone
2. Click Settings > Account > Delete my account
3. Enter your phone number and click the delete button
4. Select the reason for deletion
5. Click confirm to delete
{% hint style="info" %}
Please note that:
* Your phone number will temporarily unable to use WhatsApp solution for approximately 3 minutes
* Your conversation history will be all deleted
* You will leave all the WhatsApp Groups automatically
* For details, please refer to [WhatsApp Guideline](https://developers.facebook.com/docs/whatsapp/phone-numbers#)
{% endhint %}
If you are going to take the above actions, you are suggested to export your WhatsApp conversations as backup beforehand. Please see:
{% embed url="" %}
### Delete phone number in WhatsApp Business Account (WABA)
**Requirements**
* Only a business admin for the WhatsApp Business Account can delete a phone number.
* A number can not be deleted if the business has sent paid messages within the last 30 days using that number.
* If the business has sent paid messages in the past 30 days, you will be redirected to the Insights page showing the date of the last paid message. You will be able to delete the phone number 30 days after this date.
To delete a phone number, complete the following steps:
1. In the Business Manager, go to your Business Settings page.
2. Go to **Settings > Business Settings > WhatsApp Accounts > WhatsApp Manager > Phone Numbers**.
3. From the WhatsApp Manager, find the phone number that you wish to delete. Click on the trash icon under **Delete** in the upper right.
4\. You may be asked to provide the password for your Facebook account connected to the WABA if the phone number had the status “Connected” previously.
{% hint style="info" %}
Once a number has been deleted from the WhatsApp Business Platform, it can be used again in the WhatsApp app, or may be registered again in the WhatsApp Business Platform. Note that different rules apply to deleted phones that had been banned by the WhatsApp Business Platform.
{% endhint %}
# WhatsApp Business API Display Name Guideline
According to Meta, WhatsApp display name is displayed on your WhatsApp business profile and is what the customers see. The display name creates the certificate needed to establish a WhatsApp Business Platform account. WhatsApp has provided some clear formatting guidelines. It is important to adhere to these rules to get your display name approved.
### **Guidelines for WhatsApp Display Name**
#### **1.Comply with policies**
The display name should comply with WhatsApp’s [Commerce](https://www.whatsapp.com/legal/commerce-policy/) and [Business](https://www.whatsapp.com/legal/business-policy/) policies, such as not infringing or violating the trademark or copyright of any third party. For instance, a good example of an acceptable display name for a business selling wine glasses would be “ABC Wine Glasses” instead of “ABC Wine”.
If you have different divisions within your business, they can have their own WhatsApp business accounts, as long as they comply with the policies.
#### **2.Display Name must represent your Business Identity**
Your WhatsApp display name needs to **represent your business**, its product, service, or department. If it is a test or demo account, it needs to have a clear association with your business, reflected in the display name (**e.g. “Chatalog Test**”).
WhatsApp will probably reject a Display Name if it is a person’s full name, a generic term (such as “Fashion”), a generic geographic location (like “Hong Kong”), a slogan, or a long description. Also, note that an organization affiliated with a government will need to get the WhatsApp team’s specific approval.
#### **3. Be consistent with external branding**
The display name you pick should be the same everywhere from external sources, such as on a company’s website or any other marketing sources. The name should be all the same as you used in the title on your official website, without adding extra emojis, symbols, or words, unless it is for indicating:
a country or region;
a department or function;
a test or demo account.
* **Accepted:** Fresh Produce Cold Pressed Juices (how it is branded on your website).
* **Accepted:** Fresh Produce Cold Pressed Juices Mexico.
* **Not accepted:** Fresh Produce Juices (you changed branding by removing "Cold Pressed").
* **Not accepted:** FP Cold Pressed Juices (you added an abbreviation to the company name inconsistent with external branding).
#### **4. Show a clear relationship with your business**
A display name must have a clear relationship with your business (must be referred on the business's website or external media references).\
\
This means, for example, a charity's name that is stated on the website of a nonprofit organization will be approved, but a charity's name that is not published on any other websites will not be eligible.
If the relationship between the business and the brand is not obvious, you should indicate it using “by \[business name]”, such as “**Fruit Snacks by Fresh Produce**”.
If the display name represents a business that the company is working with (if the business is an agency, distributor, partner, or parent company), then the relationship between the business represented in the display name and end-client business must be evident and clear in both parties’ business websites.
#### **5. Comply with formatting requirements**
A display name **should not contain all CAPITAL LETTERS**. It must have grammatically correct capitalization, exactly the same as mentioned in your Business Name.
The spacing used in the **display name should not differ from the spacing in the Business name**. For example, If a Business named "Chatalog Store" uses the display name "Chat a log Store" then it won't get approved.
You **shouldn't add any extra words to your brand's Display name** unless they indicate country or region, department or function, or, Test or Demo accounts. For example, "Chatalog Hong Kong" or "Chatalog Customer Support" is acceptable but "Chatalog Official Account" isn't.
A display name **must contain at least 3 characters**. For example, for a Business named "HK Salon", the display name "HK Salon" is acceptable, but only "HK" isn't as "HK" has less than two characters.
A display name **should not be in the URL Format**. For example, "chatalog.ai" is not acceptable.
# Applying for Official Business Account (Green Tick)
There are two types of WhatsApp Business Accounts. By default, any account using the WhatsApp Business Platform or WhatsApp Business App is a business account. In contrast, Official Business Account has a green checkmark badge in its profile and chat thread headers.
Meta's criteria for WhatsApp Official Business Accounts (OBA) is based on a number of factors and is different from policies on other platforms. In addition to following WhatsApp's [Commerce](https://l.facebook.com/l.php?u=https%3A%2F%2Fwww.whatsapp.com%2Flegal%2Fcommerce-policy%2F%3Ffbclid%3DIwAR3xKLW3Q37FcJJgQv2TS3f9gKdZR697D5TmnwLN54PMdfD6Z52D249VjuQ\&h=AT2DLOY7cqSHlaeBwkA5cjrhGDg1YsCx_pdVLjYay-l7EQad3ep2_wcyOhlPGXQnTRKTYrRr4gZpnLTT5GwM5hPSw9jhJrMXlNYT9z9aqj3_ISJZ3JA9v57gJ66g1J0Z-v4uuabc) and [Business](https://l.facebook.com/l.php?u=https%3A%2F%2Fwww.whatsapp.com%2Flegal%2Fbusiness-policy%3Ffbclid%3DIwAR1JIIUWOBXS27DMDFTU8moPLPCATWTdWpuxPJ9qTV3eneHf45ZnV0MbLJk\&h=AT1WD-DraDCo0PweQU-cPk0aIgwXV5-7Oc2WVQqzIBP6F6FncwltPG-VSecl-8lUEhkks7_PVZw21KLnICdrejfw5hFpyOXYxXrU5t9yyt8-E2YzUMYqJm9A_w25Cntoj8CKSuzH) Policies, businesses need to be:
* [Notable](https://developers.facebook.com/docs/whatsapp/overview/business-accounts#notability): Represents a well-known business, often searched brand or entity
* Verified: Has gone through [Business Verification](https://www.facebook.com/business/help/2058515294227817?id=180505742745347), and
* 2FA: Has set up [two-step verification](https://developers.facebook.com/docs/whatsapp/api/settings/two-step-verification).
#### Requesting an Official Business Account
Follow these instructions to request an official business account:
* Access WhatsApp Manager from your Business Manager. Click on the phone number for which you want to request OBA within the **Overview** section
* Turn on 2 step verification for this phone number to apply for OBA. **Please note your Business Verification and Display Name approval needs to be complete before applying for OBA**
* If you have not set up two-factor verification for the phone number you want verified, follow the instructions in [Two-Step Verification](https://developers.facebook.com/docs/whatsapp/api/settings/two-factor) to enable it
* If you have not completed Business Verification, see [Verify Your Business](https://www.facebook.com/business/help/2058515294227817) for more information
* Click on Submit Request Button and fill out the required information. You can submit up to 5 supporting links to show that the business is notable.
Once Meta has reviewed your request, you will receive a notification letting you know if your account has been granted OBA or not. If your request is rejected, you can submit a new request after 30 days.
Once you obtain a green badge on WhatsApp, you will not be able to change the display name without having to re-apply.
# WhatsApp Business API Limitations
Chatalog is WhatsApp’s official WhatsApp Business API solution provider. However, due to WhatsApp policies, there are some limitations to using WhatsApp Business API.
#### Cross-App Limitation
Phone numbers using WhatsApp Business API can NOT be used in WhatsApp and WhatsApp business mobile apps.
#### 24-hour Limitation
To protect consumers from receiving spam messages and unwanted advertisements, WhatsApp has implemented a 24-hour limitation policy, which means:
* Businesses can only respond to customers after a customer initiates a message.
* Businesses are only given a 24-hour window to respond to customers.
If Businesses want to initiate a conversation with a customer or message a customer outside of the 24-hour window, you need to use WhatsApp Message Templates, which can be submitted for WhatsApp approval via Chatalog.
#### Features Limitation
Some WhatsApp Personal or Business version features are **NOT** supported using WhatsApp Business API, including:
* WhatsApp group feature
* WhatsApp voice or video calls
* Forwarding messages, audio, files, and contacts
* Delete messages
* Setting WhatsApp statuses such as "busy," "at work," or "in a meeting"
* Reply to messages in a thread
Emoji reactions and Reply to messages in a thread are NOT supported using WhatsApp Business API
#### Chat History
After setting up WhatsApp Business API, your previous WhatsApp conversation records **will not** be migrated to your WhatsApp Business API account. Therefore, backing up your WhatsApp conversation records in advance is necessary.
#### Further Information
If you want to know more about related WhatsApp policies, you may refer to:
* [WhatsApp Business Policy](https://www.whatsapp.com/legal/business-policy/?lang=en)
* [WhatsApp Commerce Policy](https://www.whatsapp.com/legal/commerce-policy/)
# WhatsApp Broadcast Limit and Setup Business Profile
For existing customers who wish to update WhatsApp business profile, including information such as name, description, address, profile image, or to check the daily broadcast message limit of WhatsApp phone number, please refer to the following steps:
**Step 1. Visit WhatsApp Manager**
Go to

You can view the WhatsApp phone number that you connected with your Facebook Page here. If no phone number exists, please refer to [WhatsApp Connection Guide](/platform-setup/whatsapp-connection-guide). In "Messaging Limit" field, you can see the daily broadcast limit. If you have connected phone number to a page without business verification, the daily limit is capped at sending business-initiated conversations to 50 unique customers.
{% hint style="info" %}
To verify your business, please visit the following website to select your Facebook Page and click "Start Verification"
{% endhint %}
Upon verification, you can send 1,000 business-initiated conversations with 1,000 unique customers in every 24 hour. To know more about how to increase messaging limits, please visit the following page:
{% embed url="" %}
**Step 2. Setup your WhatsApp Business Profile**
Click Settings in the same page :
Click "Profile" to update your Business Profile, editing your name, description, address, profile image etc. Click "Save" at the top right hand corner to apply changes.

# Regarding WhatsApp Business API being blocked
WhatsApp Business API Unblocking Tutorial
While the WhatsApp Business API is generally more stable and less prone to being blocked than other methods, there is still a significant chance of temporary suspension if you engage in business marketing activities without obtaining official green tick certification for your business account.
{% hint style="info" %}
The ‘green tick certification’ signifies an officially verified business account, greatly enhancing the account’s credibility in the eyes of WhatsApp. It also helps build customer trust when conducting marketing efforts. However, having a WhatsApp API number doesn’t grant unrestricted permission for business activities.
{% endhint %}
## Let’s first understand the reasons why WhatsApp API numbers get blocked:
1. **Excessive Promotional Messages**: Sending too many or overly obvious promotional messages can easily lead to account suspension by WhatsApp’s official policies. Excessive promotional messages can negatively impact other users’ experience and satisfaction.
2. **Sending Spam to Too Many Strangers**: Initiating conversations or sending spam messages to too many non-contacts (i.e., strangers) violates WhatsApp’s community guidelines and can result in account suspension.
3. **Using Unofficial API Numbers**: Obtaining or activating API numbers through unofficial or third-party channels without Meta’s review and certification can also lead to account suspension.
4. **Engaging in Restricted Industries**: Involvement in certain prohibited or restricted industries or domains can lead to account suspension. These include:
* Firearms
* Alcohol and tobacco
* Drugs (prescription, recreational, or other)
* Healthcare products
* Endangered species (wildlife)
* Non-endangered live animals (excluding livestock)
* Hazardous materials and substances
* Real, virtual, or false currency (including ICOs and binary options)
* Body parts or fluids
* Business models, products, items, or services that may be fraudulent, misleading, offensive, or exploitative, or that may exert undue pressure on target audiences
* Real-money gambling
* Adult products and services
* Dating services
* Multi-level marketing
* Payday loans, salary advances, P2P lending, debt collection, and bail bonds"
Remember that adhering to WhatsApp’s guidelines and policies is crucial to maintaining a functional and unblocked API number. If you encounter any issues, consider reaching out to WhatsApp’s official support for assistance.
**How to Unblock:**
1. First, open the [**Facebook Business Account Backend**](https://business.facebook.com/business-support-home/)Log in with your account information ,In the bottom right corner, find the **“View my accounts”** button.
2. Locate **Business accounts** and click on it. This is where you’ll find your **WhatsApp API number** (make sure not to click on the one for personal WhatsApp accounts).
3. Scroll down to the account information section. If your account is blocked, it will display **“Account disabled”**. Click on this account.
4. On the right side, find the **“Request review”** button.
5. You’ll be taken to the appeal page. Depending on the specific reason for your WhatsApp API account being blocked, you can submit an appeal. After submitting, wait for the review results.
## **Summary:**
Currently, unblocking a WhatsApp account without certification can be challenging, whether it’s a business number or an API number. To minimize the risk of being blocked, I recommend reading WhatsApp’s business marketing guidelines initially. If your account does get blocked, don’t worry—just ensure you haven’t violated any rules, send an appeal email, and the official team will handle it
# Export WhatsApp Conversations
{% hint style="info" %} **Sorry, the Back up WhatsApp Chat chrome extension is currently offline due to WhatsApp API Limitations.**
**We will put it back online as soon as those limitations are lifted.**
{% endhint %}
**The content below is deprecated since Apr 20,2023. 👇**
Download our Google Chrome Extension to export your recent WhatsApp conversations before deleting the associated WhatsApp account.
### 1. Install the Chrome Extension
Click here to download [**Back up WhatsApp Chat**](https://chrome.google.com/webstore/detail/back-up-whatsapp-chat/hdplchlpchhjjbaejfpkbhklohcdlcbh) chrome extension.
### 2. Open WhatsApp Web
Select our "Back up WhatsApp chat" from your installed extensions, then click on the "Open WhatsApp Web" button to access and connect to your WhatsApp account.
### 3. Select backup date range
When your WhatsApp Web has connected with your account, click on the **Back up WhatsApp chat extension** again. You can select the date range that you want to export your conversations.
{% hint style="info" %}
Please note that:
1. media files and group chats will **NOT** be exported.
2. The conversations that you exported must be from the same WhatsApp account that you are going to import.
{% endhint %}
### 4. Download WhatsApp Chats as .json files
Click on the **"Download WhatsApp Chats"** button, and then will start the download process.
{% hint style="info" %}
Please note that the download process may a few minutes to a few hours, depending on the amount of messages to be downloaded.
{% endhint %}
### 5. Complete download and prepare for importing conversations to chatalog
Your history conversations have been backed up. You can connect to chatalog and import your conversations now!
# WhatsApp Catalogue
### Creating Whatsapp catalogue
To create a WhatsApp catalog using Meta Commerce Manager, follow these steps:
1. **Sign Up for Meta Commerce Account:**
* As a WhatsApp API user, sign up for a Meta Commerce account.
* Obtain access to [Meta Commerce Manager.](https://business.facebook.com/commerce)
2. **Create Your Catalog:**
* In Meta Commerce Manager, navigate to the catalog section.
* Click on “Create New Catalog.”
3. **Add Product Details:**
* Fill in the product information:
* **Name**: Provide a descriptive name.
* **Description**: Write a brief overview.
* **Price**: Specify the cost.
* **Images**: Upload product images.
* **Product Code**: Add a unique identifier (optional).
4. **Save and Review:**
* Save the catalog entry.
* Review and ensure all details are accurate.
5. **Repeat for More Products:**
* If you have additional products, repeat the process.
* You can add multiple items to your catalog.
Remember to keep your catalog updated with accurate information. Happy catalog building! 🛒📲
For more details, you can refer to the [WhatsApp Catalog tutorial ](https://www.facebook.com/business/help/376573243388834?id=725943027795860)on Meta🌟
# Connect the catalogue to your number
### To Connect a catalogue to your WhatsApp Business API account
1. Go to[ Business Manager ](https://business.facebook.com/settings)and select your business
2. Click 
3. Click [**WhatsApp Manager** ](https://business.facebook.com/wa/manage/)
4. Click the account that your want to connect a catalogue
5. In the left-hand menu , click **Catalogue**
6. Click **Choose a catatlogue.**
7. From the drop-down menu , choose the catatogue that you want to connect.
8. Click **View catalogue** if you want to view or manange the catalogue,
9. Click **Connect catalogue.**
**The catalogue is connected to your WhatsApp !**
# WhatsApp Flow
## View the WhatsApp flow list
Go to Settings > Inbox > WhatsApp, and you can view the WhatsApp flow list on chatalog.
Click the Edit button if you want to create or delete a flow; it will redirect you to the WhatsApp Manager to update flows.
## Create a WhatsApp Flow
Watch the video to learn how to create a new flow in WhatsApp Manager.
{% embed url="" %}
## Attach a message template to engage with your customers
Add a new template in Broadcast > Templates page.
Set the template content and select a published WhatsApp flow as necessary.
When customers provide inputs in a WhatsApp flow's input fields, their responses are automatically saved as custom fields. You can then access and use these custom fields in your flow settings as needed.
These custom fields are determined by the WhatsApp flow content, and you can modify them in the JSON of flows within the WhatsApp manager.
# Instagram
To start using chatalog, you must first have either an Instagram Business Account or a Creator Account that has connected with a Facebook page. The following guide will illustrate how to get your account eligible for connection and sign up step-by-step.
#### **Step 1. Switch Instagram Account to Professional Account**
{% embed url="" %}
[Chatalog Tutorial - Connect IG Inbox Preparation Switch to Professional Account](https://youtu.be/3_2QuyRhjBw)
{% endembed %}
If your instagram account is personal account, please switch to Professional Account first. Click your account icon at the top right hand corner, then click "Settings".

Click "Switch to Professional Account".
{% hint style="info" %}
If it is already a professional account, you will see "Switch to Personal Account" instead. If so, you can skip this step.
{% endhint %}

Select "Business" and click "Next".

{% hint style="info" %}
Optionally, you may select "Creator" instead, but it is only available for account with less than 500K followers.
{% endhint %}
Select the category of your business and click Done.

Click "Continue".

Fill in your contact info (optional) and click "Save".

Your Instagram Business Account is Ready!
#### **Step 2. Create a Facebook Fans Page**
Go to

Fill in Page name and Category, then click "Create Page".

#### **Step 3. Connect your Facebook Page with your Instagram Professional Account**
{% embed url="" %}
[Chatalog Tutorial - Connect IG Inbox Preparation Connect FB page with IG](https://youtu.be/4DaVLz6ruUU)
{% endembed %}
Open your Facebook page, and click "Settings" at the bottom left.

Click "Instagram", and then select "Connect Account".

Switch ON "Allow access to Instagram messages in Inbox. Click "Continue". Then login to your Instagram Professional Account.

After logging in, the Instagram account is already connected.

#### **Step 4. Connect to Chatalog**
{% embed url="" %}
[Chatalog Tutorial - Connect Instagram Inbox](https://youtu.be/xLxgA0ODKXQ)
{% endembed %}
**Click Connect inbox button.** Click "Edit Settings" on the left.

Select the instagram Business account to connect.

Select the Facebook Page to connect.

Grant all the permissions and click "Done" and "OK".

Choose the page to connect. Then set an Inbox Name and click "Create Inbox".

#### **Step 5. Allow Access on Instagram**
On your Instagram account, go to Settings > Privacy > Messages. Click “Allow Access To Messages”.

Congratulations! You can now embark on your marketing automation journey with Chatalog!
# Facebook
The following guide will illustrate how to get your account eligible for Facebook connection and sign up step-by-step.
{% embed url="" %}
[Chatalog Tutorials - Connect Messenger Inbox](https://youtu.be/fgJsPj6u_Y8)
{% endembed %}
**Step 1. Create a Facebook Fans Page**
If you don't have a Facebook page yet, you can visit to create a new one. Skip this step if you already have a Facebook page.

Fill in Page name and Category, then click "Create Page".

**Step 2. Sign up Chatalog**
Sign up your Chatalog account [here](http://app.chatalog.ai/signup) by clicking "Sign up with Email". Simply fill in your name, email, password and phone number for finishing registration.
**Step 3. Connect Facebook inbox**
After finishing registration, [login to Chatalog](https://app.popcast.ai/signin). Click "Connect" on home page.
Select "Messenger" and click "Connect".
Click "Continue as \[Your Facebook name]" to continue.
Select the Facebook Page to connect.

Grant all the permissions and click "Done" and "OK".

Choose the page to connect. Then set an Inbox Name and click "Create Inbox".

Congratulations! You can start exploring our solution when you have finished connecting your inbox.
# WeChat
Follow this guide to connect your WeChat Official Account to chatalog as a new inbox so that you can manage all your channels in one place and set up different automation features!
{% hint style="warning" %}
If you do not have a WeChat Official Account, please register a WeChat Service Account [here.](https://mp.weixin.qq.com/cgi-bin/registermidpage?action=index\&lang=en_US\&token=) You may follow the step-by-step guide [here](https://kf.qq.com/faq/120911VrYVrA151013MfYvYV.html).
{% endhint %}
### Before you start
Before you start connecting your WeChat Official Account as a new inbox, you will need the following information from your WeChat Official Account :
* Original ID
* App ID
* APP Secret
### Where to find your Original ID, APP ID, and APP Secret?
Firstly, you need to log in to your [WeChat Dashboard](https://mp.weixin.qq.com/).
#### Original ID
Click **"Account Info"** in the *Settings and Development section* from the left sidebar. Scroll down to find the **Original ID** in the Registration information section. Copy the **Original ID** for later usage.
#### APP ID
Click **"Basic Configuration"** in the *Settings and Development section* from the left sidebar. You can find **Developer ID (AppID)** and **Developer Password (AppSecret)** below the Official Account development information. Copy the **AppID** for later usage.
#### APP Secret
To generate the **AppSecret,** you have to pass two verification steps.
You have to **scan a QR code** on the webpage. You'll need to **re-enter your account password.** Once you have completed the security measures, a brand new App Secret will be generated. Copy the **AppSecret** for later usage.
### Now you start connecting to WeChat Inbox
Go to your chatalog's home page, click '**Connect**,' and click on the WeChat inbox icon.
#### Step 1: Fill in the Inbox Name
Think of a good name that will help you easily know what this inbox is about)
#### Step 2: Fill in the following information copied from your WeChat Dashboard earlier
* Original ID
* App ID
* APP Secret
Click **Update** after you filled in the Inbox Name, Original ID, App ID, and App Secret.
#### Webhook URL and Token
After you click **Update** from the previous step, you will see the **Webhook Url** and **Token** provided by chatalog. Copy the Webhook Url and Token and paste them back into your WeChat Dashboard.
#### How to paste Webhook URL and Token into WeChat Dashboard
In the Basic Configuration page of your WeChat Dashboard, click on the **"Change Configuration"** button to open up the Configuration menu.
Copy the **Webhook Url** and **Token** provided by chatalog and paste them into their respective fields.
Generate an Encoding AES key and select **" 明文模式 | Plain Text Mode"** for message encryption.
Submit your changes. Remember to click “**Enable**” after making any configuration change.
### Add IP Whitelist
Also, you need to put chatalog's IP address in the IP whitelist.
Add these chatalog's IP addresses to your whitelist and confirm the modification.
> 35.229.153.39
>
> 34.96.220.218
>
> 34.96.222.188
Click [here](https://mp.weixin.qq.com/cgi-bin/announce?action=getannouncement\&key=1495617578\&version=1\&lang=zh_CN\&platform=2\&token=1390417593) if you want to read more about WeChat's added access white list protection for the access\_token interface document.
Then you can return to chatalog and find your WeChat inbox ready.
Congratulations! Now you've finished the setup for connecting a new WeChat inbox!
# Customer Service Messages
When a user has a conversation with your official account, you can continue to contact your customer within a period of time (currently 48 hours, new rules will be activated after June 12, 2023, [check the announcement](https://mp.weixin.qq.com/cgi-bin/announce?action=getannouncement\&announce_id=116853659399Heuo\&version=\&lang=zh_CN\&token=)), so that you can provide your customers with more Excellent service.
The current list of allowed reply states is as follows (the public platform will update this list according to operating conditions, and replies will be allowed after different actions are triggered)
\
1\. User sends message\
2\. Click on the custom menu (only three menu types, namely click push event, scan code push event, scan code push event and pop-up "message receiving" prompt box, will trigger the customer service interface) \
3\. Follow the public account \
4\. Scan QR code
{% hint style="info" %}
When the user clicks on the menu message, the click-on menu event is triggered, which corresponds to the message rules of scenario 2 when the user clicks on the customized menu, and will not generate the customer service message delivery quota for the user-sent message scenario.
{% endhint %}
List of allowed reply states after June 2023:
| Scenario | Message delivery quota | Period of time |
| ------------------------- | ---------------------- | -------------- |
| User sends message | 5 | 48 hours |
| Click on the custom menu | 3 | 1 minute |
| Follow the public account | 3 | 1 minute |
| Scan QR code | 3 | 1 minute |
# LINE
This guide walks you through connecting your LINE Business account to Chatalog, enabling you to manage LINE conversations, automate responses, and track customer interactions directly within the Chatalog platform.
### **Before You Begin**
* You need a LINE Business Account. If you don't have one, sign up [here](https://manager.line.biz/).
### **Step-by-Step Connection Guide**
#### **Step 1: Configure the Integration in LINE Official Account Manager**
1. Log in to your [LINE Official Account Manager](https://manager.line.biz/).
2. Click "Settings" in the top right corner.
3. Select "Messaging API" from the menu on the left.
4. Click "Enable Messaging API.
5. Enter the following details, and click "Agree" to proceed.
**Name: Chatalog.ai**
\ **Email: **
6. (Optional) You may be prompted to provide a Privacy Policy and Terms of Service for Chatalog.\
\- Privacy Policy : \
\- Terms of Service:
#### **Step 2: Get Your Chatalog Webhook URL**
1. Log in to your Chatalog account.
2. Click the button to connect your LINE account.
3. Back in your [LINE Official Account Manager](https://manager.line.biz/), go to the "Messaging API" settings.
4. Copy the channel ID & Channel secret
5. Paste to Chatalog related field, click "save"
6. Copy Webhool URL and click "Complete" to finish the setup.
**Step 3: Set up Webhook in LINE Official Account Manager**
1. Go back to your [LINE Official Account Manager](https://manager.line.biz/)
2. Paste the Webhook URL in "Messaging API"
3. In the left-side panel, under "Response settings," enable the Webhook button
# Contact
Contact section manages all your contacts as well as the labels that attach to them for customer relationship management purpose.
### Contact Overview
You can view contacts across all your channels in "Your Contacts". Contacts include all users who have interacted with you through Instagram, Facebook, WhatsApp, WeChat, Web Widget, and other channels.
* **Select inbox:** You can select an inbox to view its contacts.
* **Search contact**: You can search for contacts by name.
* **Filter:** You can use filters to display contacts with specific labels.
* **Delete**: You can select and delete contacts.
* **Actions:** You can create new contacts, add selected contacts to a contact list, or import/export contacts using the action drop-down menu.
* **Columns:** You can customize the information displayed on the contact overview dashboard.
### Contact Details
Click the view detail icon to see a contact's information.
On the contact info page, you can view the contact's name, labels, and past activities. For Instagram contacts, you can also see their user handle and profile link. Click the refresh button to update the contact's information, as Facebook and Instagram users can change their display names.
# Import, Export and Add Contact
You can manage your contacts within chatalog through three primary actions on the **Contact > Your Contacts** page:
1. Create contact
2. Import contacts (CSV)
3. Export contact list (CSV).
## 1. Create Contact (Add a single contact)
If you only need to add a single contact, fill in Name and Phone in the pop-up window and click Add to apply.
## 2. Import Contacts
After clicking the **"Import contacts"** button, you first need to download the .csv sample file to edit. Enter the columns of name and contact number. The phone number should be filled in together with the country code at the beginning, without extra brackets or a plus sign.
For example, if the country code is 852 and the phone number is 98765432, please fill in 85298765432. After saving the contact list file, you can drag the .csv file into the area to upload. Click **"import"** to wait for the upload to finish.
If you import a contact list that includes some existing phone numbers, the first name, last name, email, and custom fields will be updated. It will not create an extra contact when you import and update information for an existing contact with the same phone number.
***
When importing contacts via CSV, you can define how **labels** and **custom fields** should be handled for existing contacts.
This allows you to control whether imported data should overwrite, merge, or preserve existing information.
### Label Strategy
Choose how labels in the CSV file should be applied to existing contacts.
#### 1. Replace existing labels
**What it does:**
* All current labels on the contact will be removed.
* Only the labels provided in the import file will remain.
**Use this when:**
* You want the import file to fully define the latest label structure.
* You are cleaning up or restructuring label organization.
* You want to ensure outdated labels are removed.
**Example:**
* Existing labels: `VIP`, `Wholesale`
* CSV labels: `Retail`
* Result: `Retail` (VIP and Wholesale will be removed)
***
#### 2. Add to existing labels
**What it does:**
* Existing labels remain unchanged.
* Labels in the import file will be added to the contact.
* Duplicate labels will not be created.
**Use this when:**
* You are enriching contact segmentation.
* You want to tag contacts for campaigns without removing old labels.
* You want to preserve historical label data.
**Example:**
* Existing labels: `VIP`
* CSV labels: `Summer Campaign`
* Result: `VIP`, `Summer Campaign`
### Custom Field Strategy
Custom fields are handled more carefully to prevent accidental data loss.
By default:
* Existing custom field values are kept.
* Fields included in the CSV will update the corresponding fields in the system.
You can also define how the system handles **empty values** in the import file.
***
#### When the imported value is empty
**Option 1: Ignore — Keep the current value**
**What it does:**
* If the CSV field is empty, the system keeps the existing value.
* No changes are made to that field.
**Use this when:**
* You only want to update specific fields.
* Your CSV does not include complete data.
* You want to avoid accidental clearing of data.
**Example:**
* Existing phone number: `+852 91234567`
* CSV phone field: (empty)
* Result: Phone number remains unchanged.
***
**Option 2: Remove old value — Clear the existing value**
**What it does:**
* If the CSV field is empty, the system will clear the existing value.
* The custom field will become blank.
**Use this when:**
* You are intentionally removing outdated information.
* You are performing data cleanup.
* You want the CSV file to be the single source of truth.
**Example:**
* Existing Company Name: `ABC Ltd`
* CSV Company Name field: (empty)
* Result: Company Name becomes empty.
## 3. Export Contact
If you want to export all contacts, you just need to click **Actions > Export Contacts (CSV)**.
And if you want to export contacts with certain labels or within a certain label-added time, you may follow the steps below:
First, click **"Filter"** to expand the dropdown so that you can select labels and set a label-added time to filter. The contact list will then refresh to display contacts only with the selected labels and timestamps. Then, click **Actions > Export Contacts (CSV)**. The downloaded file will be a filtered contact list.
# Contact Info Page
Go to the **Contact Page > Your Contacts**.
Scroll the horizontal bar to right and click the "Eye" icon of a certain contact
You will see a Contact Info page. On this page, you can:
* View and edit contact information
* Add and manage labels
* Track conversation status changes in the Activities tab
* Create and update custom fields
* Add and maintain notes about your contacts
# Notes
Chatalog supports customer service personnel in making notes for every client. The notes made can only be seen by customer service staff themselves.
Click the add button on the contact info page of the client for whom you want to add a note.
The word limit of every note is 1000 words, and a maximum of 5 notes per client.
# Block/Unblock Contacts
The Block/Unblock Contacts feature allows you to manage your interactions by restricting communication with specific contacts. When a contact is blocked, you will not send or receive messages from them, and a blocked icon will appear next to their name in your contact list.
### How to Block a Contact
You can block a contact in two ways:
1. **From the Message Page**:
* Open the conversation with the contact.
* Select **Block Contact** on the page.
* Confirm the action in the pop-up window.
2. **From the Contact Info Page**:
* Navigate to your **Contact Page**.
* Select the contact you wish to block.
* In the contact’s info page, click **Block Contact**.
* Confirm the action in the pop-up window.
Once blocked, a **blocked icon** will appear next to the contact’s name in your contact list.
### Effects of Blocking a Contact
* You will **not receive** messages from the blocked contact.
* You will **not be able to send** messages to the blocked contact.
* **Messages During Blocked Period**: Any messages sent by the contact while they were blocked will **not** appear in your conversation history after unblocking. These messages are permanently inaccessible.
### How to Unblock a Contact
To unblock a contact:
1. **From the Message Page**:
* Open the conversation with the blocked contact.
* Select **Unblock Contact** on the page.
* Confirm the action in the pop-up window.
2. **From the Contact Info Page**:
* Navigate to your **Contact Page**.
* Select the blocked contact (identified by the blocked icon).
* In the contact’s info page, click **Unblock Contact**.
* Confirm the action in the pop-up window.
After unblocking, the blocked icon will disappear, and you can send and receive messages again.
# Delete Contact
To delete a contact:
1. **Select the contact(s)**: In the contact list, tick the checkbox next to the name(s) of the contact(s) you wish to delete.
2. Click "Delete": Click the "Delete" button.
3. Confirm deletion: A confirmation message will appear. Click "Delete" to proceed with the deletion or "Cancel" to abort.
# Contact List (WhatsApp)
Contact List contains all the lists either by import or creating a list segmented by conditions. Since only WhatsApp channel supports upload contact and reach contacts without time constraints, this feature is available for WhatsApp channel at the moment.
### Import a Contact List
Apart from importing a contact list from "Your Contacts", you can import a list from this page as well. Please view Import, Export and Add Contact from the documentation below:
{% content-ref url="/pages/amoei8yt6j9GN1BPEOKA" %}
[Import, Export and Add Contact](/contact-setup/contact/import-export-and-add-contact)
{% endcontent-ref %}
### Create a blank list.
Click on “Contacts,” then click “Add List.”
In the “Add List” window, follow these five steps:
* First, enter the list name.
* Set the list to be static.
* Uncheck the condition checkbox.
* After unchecking, remember to delete the condition column.
* Finally, click “Create.”
### Create a List by Conditions
Click on "Create List" to add a conditional list.
Step 1, set up the name of the list. Step 2, select whether the list is static or dynamic.
**A static list** captures a snapshot of contacts that meet the selected conditions. It will not be further updated.
**A dynamic list** is dynamically updated according to the selected conditions in real time.
For step 3, decide whether the contacts should "Meet all conditions". If the option is checked, all the conditions you set up below must be fulfilled. If it is unchecked, any one of the conditions below fulfilled can a contact be in the list.
Step 4, set up the condition(s). Each condition consists of a subject and an operator. The subject is either a label or a custom field.
If it is a label, you can check if the contacts has that label or not. See the example below:
To manage your contacts, you can use label to categorize them. For example, you can label your customers as VIP, subscriber, walk-in customer etc. In this case, you can select whether the contacts have a specific label or not by choosing "in" vs "not in".
If it is a custom field, you can check if the contacts' custom field contains/equals a specific value. See the example below:
To manage your contacts, you can use custom field as well if you want to store specific information for each of them. For example, you may store the order number of your customers last purchase, the location of the store that they last visited, the number of referrals did they make etc. Take order number as an example, if you want to filter contacts that have order number starting with "P13", e.g. "P21324154" "P21324152" "P21323152" etc. Then you can select "contains", which means the value of the field contains certain characters. You can select "not contains" if you want it not contain certain characters. Or if you want to check if contacts' field value is or is not exactly the same as specific characters, you can select "equals" or "not equals".
## Preview, Edit and Export Contact List
Getting into one of the contact list, you can preview the contacts in the list. If the list is static, you can remove contacts as step 1 and step 2. Dynamic list contacts are filtered by conditions, all the contacts in the list cannot be deleted. If there is a large number of contacts, you cannot view all of them in this preview page. Then, you can follow step 3 to export and retrieve the full list.
# Label Management
In Label Management page, you can add labels with different colors to segment your contacts. With these labels tagged to the contacts, handling customers is more easy. You could also only broadcast messages to contact with certain labels.
## **Create a new label**
1. Go to Contact > Labels Management
2. Click "Create Label."
3. Enter the desired label name.
4. Select a color for the label.
5. Click the button - "Create".
On the Label Management page, you can also search for a specific label/ edit label name / add or delete a label.
**You can easily update existing contact labels:**
1. Go to Contacts > Labels > Management
2. Locate the label you want to update
3. Click the pencil icon
4. Update the label's name or color as needed.
5. Click "Save" to apply your changes.
## Adding and removing labels by flow
You can add or remove a label by flow in conversation. For adding a label, you can use the block "Set label/custom field" to add a label with the keywords that fit the situation. You can also add a message block to auto-reply your client and add a label at the same time. Example as below.
For removing a label, you can use the block "Remove label" to remove the unnecessary label with the keywords. You can also add a message block to auto-reply your client and remove a label at the same time. Example as below.
## Label in the message page
For the labels added, you can see them in the inbox list once you turn on the label button on the message page.
# Custom Fields
Custom fields are additional data points you can add to store information beyond the standard fields in Chatalog. They help you track specific information relevant to your business needs.
### Create a custom field
Navigate to Contact > Custom Fields, and click the "New Custom Fields" button on the top right.
Enter the name, type, and description of the new custom field, and click the "Save" icon.
Chatalog supports various types of custom fields to accommodate different data needs:
* Text Fields: For storing names, descriptions, or other text-based information
* Number Fields: For storing numerical values like IDs, amounts, phone numbers, or quantities
* Date Fields: For storing important dates related to your contacts
* Date & Time Fields: For storing both date and time information for scheduling and time-sensitive data
* Boolean Fields: For yes/no values
### Manage custom fields
You can click the icon to edit the description or delete existing custom fields.
Drag and drop to customize the order in which custom fields appear on the message page, organizing information in a way that makes sense for your team.
### Using custom fields
You can use custom fields in flow blocks, including message blocks, condition funnels, and other blocks with custom field functions.
{% content-ref url="/pages/0RIdlpusrIgEeTXiXL9M" %}
[Custom Field and User Input Setup in Flow](/crm-quickstarts/customized-flow/custom-field-and-user-input-setup-in-flow)
{% endcontent-ref %}
You can also view and manage custom fields for specific contacts in the message page and contact info page.
Message Page
Contact Info Page
# Broadcast (WhatsApp)
Broadcast saves you time from sending identical messages to users one by one. You can create one single message and broadcast it to multiple users.
# Create or import a contact list for broadcast
Go to the **Contact** page, click on the "**Contact List**", and choose to import a contact list or create a new one.
Contact List
### How to import a contact list?
Step 1: Select the WhatsApp inbox you have connected for broadcast from the dropdown menu.
Step 2: Click the ***Import*** button at the top right.
Please notice that the telephone number must include the country code. For example, if the country code is 852, the number should be 85298765432.
{% embed url="" %}
### How to create a contact list?
{% content-ref url="/pages/U9TtEvWTmVUTIMjhJYip" %}
[Contact List (WhatsApp)](/contact-setup/contact-list-whatsapp)
{% endcontent-ref %}
# Create a WhatsApp message template
WhatsApp message templates allow businesses to send pre-approved messages to customers outside the 24-hour messaging window. Templates must be submitted to WhatsApp for approval.
## Create a Template
1. Go to the **Broadcast** page
2. Click the dropdown to select the **WhatsApp channel** you want to broadcast messages from.
3. Select the **Templates** tab.
4. Click **Create** to create a WhatsApp message template.
## Template Properties
In the **Template Properties** panel, configure the basic information of the template.
### Name of template
Enter an internal name to identify the template.\
This name is **not visible to customers**.
***
### Category
Select the template category required by WhatsApp.
**Marketing**
* Promotional messages
* Product recommendations
* Campaign announcements
* Discounts or offers
**Utility**
* Transactional updates
* Order confirmations
* Payment reminders
* Delivery notifications
***
### Sub-type
Choose the template format depending on the message structure.
* **Standard:** A regular message template with text, optional header, and buttons.
* **Multi-product:** Allows customers to view and select multiple products in one message.
* **Catalog:** Displays products directly from your WhatsApp catalog.
* **Carousel:** A horizontally scrollable message with multiple cards (images, titles, and buttons).
***
### Language
Select the language for this template.
WhatsApp requires templates to be created **per language**.\
If you need multiple languages, create a separate template for each language.
***
## Content Configuration
Configure the message content in the **Content** section.
### Header
The header appears at the top of the message.
Available types:
| Type | Description |
| -------- | ------------------------------- |
| None | No header |
| Text | A short title above the message |
| Image | Display an image |
| Video | Display a video |
| Document | Attach a document |
***
### Body Text
This is the **main message content**.
You can insert **parameters** to dynamically personalize messages.
Example:
```
Hi {{1}}, your order {{2}} has been shipped and will arrive on {{3}}.
```
Parameters will be replaced with actual customer data when the message is sent.
Click **+ parameter** to insert variables.
***
### Footer
Optional short text displayed at the bottom of the message.
Example:
```
Limited-time offer. Terms may apply.
```
***
### Buttons
Buttons allow customers to quickly interact with the message.
Click **Add button** to add one.
A template can support:
* **Up to 10 buttons**
* **Maximum 2 URL buttons**
* **Maximum 1 phone button**
Button Types
* **Text (Quick Reply):** Allows users to reply with a predefined response.
* **URL:** Opens a webpage.
* **Phone:** Allows users to call a phone number directly.
* **Flow:** Launches a WhatsApp Flow for interactive follow-up actions.
***
## Template Preview
The **Preview panel** on the right shows how the message will appear in WhatsApp.
Use this preview to verify:
* text formatting
* parameter placement
* button layout
***
## Submit for Approval
After completing the template:
1. Click **Submit**.
2. The template will be sent to **WhatsApp for review**.
3. Approval usually takes **a few minutes to several hours**, depending on WhatsApp's review process.
## Template Status
You can check the template status after submitting a template.
### Template Limitations
* The message template name field is limited to 512 characters.
* The message template content field is limited to 1024 characters.
* A template can only be edited when it is in a state of **APPROVED**, **REJECTED**, or **DRAFT,** can not be edited when in **PENDING**. A template can be edited once per day, up to 10 times per month.
can not be edited when in Pending
* WhatsApp Business Accounts can only create 100 message templates per hour.
### Common Rejection Reasons
WhatsApp commonly rejects message templates with the following patterns:
{% hint style="warning" %}
* Variables are placed at the beginning or end of the message.
* Variables are placed next to each other, such as `“{{1}} {{2}}”`.
* Variables have mismatched curly braces or use words instead of numbers. The correct format is `{{1}}`, not `{{one}}`.
* Variable parameters are not sequential. For example, `{{1}}`, `{{2}}`, `{{4}}`, `{{5}}` are defined but `{{3}}` does not exist.
* Call to action button URL contains a direct link to WhatsApp, such as "", which Meta no longer allows.
* Template is a duplicate of an existing template. WhatsApp rejects templates submitted with the same wording with a different name.
* Template contains content violating the [WhatsApp Commerce Policy](https://www.whatsapp.com/legal/commerce-policy/?fbclid=IwAR0qUSf97RVgUHFtGar3YUqZaz1wOG-arhNUd2inOHRo8qH6GgFlHccUBek) or the [WhatsApps Business Policy](https://l.facebook.com/l.php?u=https%3A%2F%2Fwww.whatsapp.com%2Flegal%2Fbusiness-policy%2F%3Ffbclid%3DIwAR1yvdZWGarAKSb9ia6FBUpuZ9KSU9q5wsFoKqRZCRPEtOaLYagxy4Ad7YA\&h=AT3lviDT9OysiltSzIaI5dZ3mgUQHRGxmh5I5sbd9oO6563HYCyub60wUHLfFcO-4zDNfxSpM7qZVrb2sVm4OEG22FxWncEo_PJribjH2NETyb3fvR_t4vxwQuEcWhxGfsaePLsoyaYZNURGDed_z3E). Do not request sensitive identifiers from users, such as payment card numbers, financial account numbers, or National Identification numbers. Requesting partial identifiers (ex: last 4 digits of their Social Security number) is OK.
* Template appears to encourage gaming or gambling. Including words such as "raffle" or "win a prize" almost guarantees template rejection by WhatsApp.
* Template is overly vague, such as `“Hi, {{1}}, thanks”`. This type of template could be abused to spam users. You need to surround the parameters with information so that it’s clear what type of information will be inserted.
* You are using the wrong language. For example, a template in English is submitted with Portuguese language selected.
* Grammatical or spelling mistakes. Even minor spelling or grammatical mistakes are likely to be rejected by WhatsApp.
{% endhint %}
# Create a Carousel Template
Carousel templates allow you to send a single text message accompanied by a set of up to 10 carousel cards in a horizontally scrollable view. Follow the below steps to create a carousel template.
In the Broadcast page, click the dropdown to select the WhatsApp channel you wish to broadcast messages. Then select the "***Templates***" tab.
Select "***Add Template***" and choose ***Carousel.***
You can follow the below steps to create a new carousel template:
Step 1: Name your template.
Step 2: Select the category that indicates the purpose of your broadcast.
Step 3: Select the language of your broadcast message.
Step 4: Create the content for your broadcast message. You can use our AI Writer to make the creation process easier.
Step 5: Add your carousel, and edit the description and the button. Please notice that you can add up to 10 carousel cards here and every card in the carousel should have the same combination of button types (e.g. URL, Quick Reply, Phone number).
Step 6: Preview and submit the template after completing all the necessary information.
{% hint style="info" %}
Below table is the details of supported type and size limit of media file for a carousel template
{% endhint %}
Media Type
Supported Types
Size Limit
audio
audio/aac, audio/mp4, audio/mpeg, audio/amr, audio/ogg (only opus codecs, base audio/ogg is not supported)
video/mp4, video/3gp Note: - Only H.264 video codec and AAC audio codec is supported. - We support videos with a single audio stream or no audio stream.
16 MB
sticker
image/webp
Static stickers: 100KB
Animated stickers: 500KB
# How to Send WhatsApp Broadcast
### Create a New Broadcast
After your template gets approved, go to the ***Broadcast*** page and add a new broadcast.
Step 1: Name the broadcast.
Step 2: Select the recipient list for the broadcast.
Step 3: Select the message template you want to broadcast.
Step 4: Determine whether to broadcast now or schedule a time for broadcast.
Step 5: Click "Submit" to broadcast when you are all done.
### Using Template Parameters in Broadcast
When your selected WhatsApp template includes parameters (e.g. `{{1}}`), you must assign values before sending the broadcast.
#### Body Parameters
If your template contains variables in the message body (e.g. `Hi {{1}}`), you will see a **BODY** parameter field.
**How to use:**
1. Locate the parameter field under **Template Parameters → BODY**.
2. Enter the value you want to replace the variable.
3. The preview on the right will update automatically.
**Example:**
* Template: `Hi {{1}}, check out our promotion`
* Input: `John`
* Final message: `Hi John, check out our promotion`
**Using contact data (dynamic values):**\
You can personalize messages by inserting custom fields:
* Format: `{{customFields.fieldName}}`
* Example: `{{customFields.firstName}}`
Each recipient will receive a message with their own data.
***
#### Button Parameters (Dynamic URL)
If your template includes buttons (e.g. **Visit website**) with dynamic values, you must define the parameter for the button URL.
**How to use:**
1. Go to **Template Parameters → BUTTONS**.
2. Find the button (e.g. *Visit website*).
3. Enter the parameter value that will be appended to the URL.
**Example:**
* Base URL: `https://chatalog.ai/`
* Parameter input: `promo2026`
* Final URL: `https://chatalog.ai/promo2026`
***
#### Important Notes
* All required parameters must be filled before submitting the broadcast.
* Parameters support both:
* Static text (same for all recipients)
* Dynamic variables (e.g. custom fields)
* Always check the preview to confirm the final message format.
# Selective Display of Templates
Now we support customized manual send templates on the message page, making it easier for users to find and send out the most-used templates during the conversation.
## Template
You can go to the broadcast - template page to turn on or turn off the manual send button by clicking.
The message page will only display the templates that are allowed to be sent in the conversation.
# Create a WhatsApp message template
Single message mode allows you to send a text message or a message with an image/video/document. Please follow the steps below to create a single message mode template
In the Broadcast page:
Step 1: Click the dropdown to select the WhatsApp channel you wish to broadcast messages.
Step 2: Select the "Templates" tab.
Step 3: Select "Add Template" to create a WhatsApp Message Template.
Broadcast - Templates
Step 4: Select "Single Message" to create a WhatsApp Message Template.
Create a new template
You can follow the below steps to create a new template:
Step 1: Name your template.
Step 2: Select the category that indicates the purpose of your broadcast.
Step 3: Select the language of your broadcast message.
Step 4: Select the header for your message. You can choose Text, Image, Video, or Document as header. Select none means default.
Step 5: Fill in the broadcast message.
Step 6: Optionally add buttons for your broadcast message. There are two types of buttons: call-to-action (i.e. URL or Phone) and quick reply (i.e. text). You can add up to 2 call-to-action or 3 quick reply buttons. Each template only allows one type of button.
call-to-action (i.e. URL or Phone)
quick reply (i.e. text)
Each template only allows one type of button
Step 7: Preview and submit the template after completing all the necessary information, or Submit as "Draft " then you can edit it later.
### Template Status
You can check the template status after submitting a template.
#### Template Limitations
* The message template name field is limited to 512 characters.
* The message template content field is limited to 1024 characters.
* A template can only be edited when it is in a state of **APPROVED**, **REJECTED**, or **DRAFT,** can not be edited when in **PENDING**. A template can be edited once per day, up to 10 times per month.
can not be edited when in Pending
* WhatsApp Business Accounts can only create 100 message templates per hour.
#### Common Rejection Reasons
WhatsApp commonly rejects message templates with the following patterns:
{% hint style="warning" %}
* Variables are placed at the beginning or end of the message.
* Variables are placed next to each other, such as `“{{1}} {{2}}”`.
* Variables have mismatched curly braces or use words instead of numbers. The correct format is `{{1}}`, not `{{one}}`.
* Variable parameters are not sequential. For example, `{{1}}`, `{{2}}`, `{{4}}`, `{{5}}` are defined but `{{3}}` does not exist.
* Call to action button URL contains a direct link to WhatsApp, such as "", which Meta no longer allows.
* Template is a duplicate of an existing template. WhatsApp rejects templates submitted with the same wording with a different name.
* Template contains content violating the [WhatsApp Commerce Policy](https://www.whatsapp.com/legal/commerce-policy/?fbclid=IwAR0qUSf97RVgUHFtGar3YUqZaz1wOG-arhNUd2inOHRo8qH6GgFlHccUBek) or the [WhatsApps Business Policy](https://l.facebook.com/l.php?u=https%3A%2F%2Fwww.whatsapp.com%2Flegal%2Fbusiness-policy%2F%3Ffbclid%3DIwAR1yvdZWGarAKSb9ia6FBUpuZ9KSU9q5wsFoKqRZCRPEtOaLYagxy4Ad7YA\&h=AT3lviDT9OysiltSzIaI5dZ3mgUQHRGxmh5I5sbd9oO6563HYCyub60wUHLfFcO-4zDNfxSpM7qZVrb2sVm4OEG22FxWncEo_PJribjH2NETyb3fvR_t4vxwQuEcWhxGfsaePLsoyaYZNURGDed_z3E). Do not request sensitive identifiers from users, such as payment card numbers, financial account numbers, or National Identification numbers. Requesting partial identifiers (ex: last 4 digits of their Social Security number) is OK.
* Template appears to encourage gaming or gambling. Including words such as "raffle" or "win a prize" almost guarantees template rejection by WhatsApp.
* Template is overly vague, such as `“Hi, {{1}}, thanks”`. This type of template could be abused to spam users. You need to surround the parameters with information so that it’s clear what type of information will be inserted.
* You are using the wrong language. For example, a template in English is submitted with Portuguese language selected.
* Grammatical or spelling mistakes. Even minor spelling or grammatical mistakes are likely to be rejected by WhatsApp.
{% endhint %}
# Broadcast - Recurring Notification (Facebook)
Recurring Notifications are ongoing messages that users have opted-in to via simple and upfront prompts outlining the frequency of messages that they agree to receive.
Recurring Notification is a feature for Facebook pages to send out opt-in requests to gather leads for broadcasting messages beyond the 24-hour messaging window. Depends on the frequency of the opt-in topics, messages can be sent on daily, weekly or monthly frequencies.
{% embed url="" %}
Chatalog Tutorial - Recurring Notification For Messenger
{% endembed %}
## Set up Opt-in Request in Flow
Go to flow and click "Create New Flow".
In the flow, set up a keyword that would trigger this opt-in request. If you wish your contact to trigger this flow despite whatever input, you can set "ANY\_KEYWORDS". Then you can drag the "Opt-in Request" block from the left and connect it to the trigger.
The Opt-in Request requires a topic. Upon clicking the dropdown, you can see the existing Opt-in topics that had been created before, as well as a button to "Create new topic".
If you create a new topic, you need to set up topic, message title, and button text. Topic is to indicate what this opt-in request is about. Once this request is created, it will be saved and can be selected again in other flows. The topics will be shown as options in the dropdown of Opt-in Request block. Secondly, set up the Message title that is shown as the title of the opt-in request message. Thirdly, select the button text. It is not flexibly configurable. You can only select the few button text patterns allowed by Meta. Optionally, you can upload an image for this Opt-in request.
{% hint style="info" %}
The optimal resolution for setting up the opt-in Request message is 909px wide x 476px high.
{% endhint %}
You will see the look and feel in the preview section. If it is fine, click Create to finish setting up this Opt-in topic.
Then, you need to set up the frequency of notification, either daily, weekly, or monthly. Save the flow to apply changes.
{% hint style="info" %}
Here is the period you are allowed to broadcast messages to those who opted-in among different frequency:
* Daily over 6 month period after opt-in (one message per calendar day)
* Weekly over 9 month period after opt-in (once every calendar week)
* Monthly over 12 month period after opt-in (once every calendar month)
{% endhint %}
Turn on the flow to let your contact trigger this flow.
## Set up Recurring Notification in Broadcast after collecting leads
When there are some users that have triggered your flow with Opt-in request, you can move on to sending notification messages to those who opted-in the topics you set up.
In Broadcast, select the facebook channel as you set up the flow in. Then click "Create Recurring Notification".
In the set up page, you can select the topic that you have set up for sending opt-in requests and select the frequency. Then you will be able to see the list of audience who opted in to this topic at the right. You can then create the message for this audience. The message has two type: carousel message or single message. If it is a carousel message, you can set up a list of scrollable cards with an image, a title and a description. If you wish to send a single message, click "Switch to single message" to switch the message type.
Finally, you can choose to broadcast now or schedule the broadcast. And then decide whether to select specific audience to send or click "Send To All".
# Broadcast
To use the broadcast feature, start by setting up a message template on the broadcast page
Broadcast status page
1. **Number of broadcasts created**
2. **Number of broadcasts sent**
3. **Number of people who clicked or interacted with the broadcast**
4. **Number of unsuccessful broadcast deliveries**
5. **Number of broadcasts pending to be sent**
6. **Only the owner can top up WhatsApp credit** (Before sending templates/broadcasts, you must have a balance)
7. **Where to create the template** (For use in broadcasts/opening 24-hour free conversation time with customers)
8. **Add/create the broadcast you will send**
9. **Status of broadcast delivery** (You can view the progress)
10. **Number of broadcasts that cannot be sent during delivery**
11. **You can view detailed progress and reasons for broadcast delivery**
{% hint style="info" %}
Unsuccessful deliveries can occur due to several reasons:
* **Message Undeliverable**: The recipient has blocked unknown messages.
* **Non-WhatsApp Number**: The phone number isn’t registered with WhatsApp.
* **Terms & Privacy Policy**: The recipient hasn’t accepted WhatsApp’s updated terms and privacy policy.
* **Outdated WhatsApp**: The recipient is using an older version of the app.
{% endhint %}
# Broadcast (Non-WhatsApp)
Broadcast saves your time from sending identical messages to users one by one. You can create one single message and broadcast to multiple users.
{% embed url="" %}
Chatalog Tutorials - Broadcast Non WhatsApp
{% endembed %}
### View Broadcasts Dashboard

Step 1, view your daily message limit. The daily message limit is to prevent abuse of this function in order to conform to Instagram policy. Step 2, select the date range to search the broadcast history. Step 3, view all the broadcast status. See the description as below:
**Broadcasts**: The number of broadcast activities created in the period.
**Failed**: The number of broadcast message failed to send in the period.
**Sent**: The number of broadcast message sent in the period.
**Opened**: The number of broadcast message opened in the period.
**Replied**: The number of broadcast message replied in the period.
**Send Queue**: The number of broadcast message waiting to be sent in the period.
Step 4, view all the broadcast activities. If you want to know more about a specific broadcast, click the button as Step 5 to view broadcast details. Step 6, add a new Broadcast.
### View Broadcast Details

In Broadcast Details page, you can see the list of recipients of the broadcast with their status. You can also see the total broadcast time here. If you wish to reuse this broadcast message, click Duplicate Broadcast to create a new broadcast.
### Create a New Broadcast

Create a basic broadcast comprises several simple steps. Step 1, name your broadcast. Step 2, set up the message to broadcast, maximum 1000 characters. Step 3, schedule the broadcast. It can be immediately or a specific date range to fulfil your business needs. Step 4, determine to switch on or off the **Human Agent Tag**. When it is off, by default you are only allowed to respond to user messages within 24 hours. When it is on, it will allow you to broadcast message as a human agent, so that you can respond to user messages as much as 7 days of their messages. Please only use human agent tag when a user's issue cannot be resolved in the standard messaging window. Step 5, click "Next" to continue.
{% hint style="info" %}
If you have set a custom field to users and wish to display its value in the broadcast message, you can input {{customFields.*fieldvalue*}} to the message field as Step 2. If the custom field that you want to display is "membership", where the value is "diamond" for one user, then you can input {{customFields.membership}}. When the broadcast message is blasted, that user will see the value "diamond" in the message.
{% endhint %}

In the next page, Step 1, you can select a recent time range that users messaged you. For **Human Agent Tag** off, the time range selected must be any time within 24 hours. If it is on, the time range must be any time within 7 days. When you have selected the time range, you can see all the available audiences for broadcast at the left. Select them and follow Step 2: click "Add X contact". If you want to select users out from the audiences, click their checkbox from the list at the right. Then, follow Step 3: click "Remove X contact".
When the audience list is confirmed, follow Step 4: view the Estimated Broadcast time. It is calculated from the number of users in your audience list. Finally, Step 5: click "Create Broadcast".
# Messages
The Message page is the most frequently used section in chatalog. Here, you can view and manage conversations across all your platforms and inboxes. For more detailed information about specific functions, please refer to the relevant subpages.
# Message Page Overview
The Message Page allows you to manage conversations efficiently. It features an inbox to view messages, a conversation panel to interact with contacts, and tools to organize and respond to messages.
## Conversation List (Left Panel)
1. **Conversation Status Filter**: Use the "All" dropdown to filter messages by status, such as "Unassigned", "Assigned", or "Resolved".
Conversation Status Filter
2. **Filter**: Click the "Filter" icon to filter messages by criteria like unread status, handling status, assigned to you, agent name, team name, or label.
3. **Start a New Chat**: Click the "+" icon to initiate a new conversation.
4. **Channel Filter**: Select which channels to display in the conversation list.
Channel Filter
5. **Label Toggle**: Switch between displaying the conversation list with or without labels.
Label Toggle
6. **Select Messages**: Check the boxes next to conversations to select multiple messages for bulk actions.
7. **Action Dropdown**: Select multiple conversations to assign them to an agent/team or export the selected conversations.
Action Dropdown
8. **Message Searching**: Enter keywords or a phone number to search for contacts, conversations, or message content.
9. **Mark conversations as unread/read**: You can now mark conversations as read or unread from the conversation list, helping you easily track which messages require follow-up.
## Conversation View (Center Panel)
1. **Conversation Status:** Click to change the status to "Unassign" "Mark as Resolved" or assign it to an agent/team.
Conversation Status
2. **Bot Toggle**:
1. **Bot Enabled**: The bot is ready to respond when its trigger conditions are met. This conversation is not currently in a bot flow.
2. **Bot is handling**: This conversation is currently being processed by a bot flow. Replying to the customer will automatically take over the conversation.
3. **Bot disabled**: The bot is turned off and will not respond to messages in this conversation.
Bot Toggle
3. **Message Actions and emoji reaction:** When you hover on a message, you'll find a "…" and an emoji icon. Click "…" to copy, reply to, or translate the message, and to check message info. Click the emoji icon to select an emoji and react to the message.
Message Actions and emoji reaction
4. **Private Note**: Switch to the "Private Note" tab to send internal messages that are visible only to your team.
Private Note
5. **Response Options**: Send Attachments, Emojis, Message Templates, or Quick Send (including Bot Flow, Saved Replies, WhatsApp Flow). You can refer to [Quick Send](https://docs.chatalog.ai/crm-quickstarts/messages/quick-send-bot-flow-saved-replies-whatsapp-flow) for more details.
Response Options
6. **AI Tools**: Click to use AI Writer or Doc Reply. For more details, please refer to [AI Tools - AI Writer & Doc Reply](/ai-tools/ai-tools-ai-writer-and-doc-reply).
7. **Pause Auto Follow-ups**: Click to pause or resume the Auto Follow-ups function. For more details, please refer to [Auto Follow-ups](broken://pages/VLsguXtP0Feas1XnTx2Z).
AI Tools and Pause Auto Follow-ups
## Contact Info (Right Panel)
1. **Contact Info**: View the contact's name, user ID, phone number, and other details. Click "Edit" to update the contact info.
Contact Info
2. **Notes**: View, add, or edit notes about the contact to keep track of important details.
Notes
3. **Custom Fields**: Add custom fields to store additional information specific to your needs.
4. **Labels**: Create or manage labels for the contact to categorize and organize conversations.
5. **Activities**: View recent conversation activities, such as conversation status changes or assignee updates. Click "More Details" to get more history records.
Activities
6. **Block/Unblock Contact**: Block or unblock the contact as needed to manage communication.
Custom Fields/Labels/Block or Unblock Contact
# Message Status Icons Guide
Chatalog uses various status icons to help you track the delivery status of your messages. Here's what each icon means:
### Message Status Icons
* **Clock**: Sending - Your message is in the process of being sent
* **Single grey tick**: Sent - Your message has been sent successfully
* **Double grey tick**: Delivered - Your message has been delivered to the recipient's device
* **Double blue tick**: Read - The recipient has read your message
* **Alert**: Fail - Your message failed to send
* **Golden note**: Private note - This is a note visible only for internal
# Inbox Permissions
The account **owners** can associate specific inboxes with teams, ensuring that members of each team can only access the inboxes related to them. This feature is particularly useful for organizations with different stores or teams managing different inboxes, as it allows for better organization and control over inbox access.
Step 1: Go to ***Settings*** page > ***Team,*** and click the edit button of the team you'd like to edit inbox permission.
Step 2: Turn on the ***Inbox Access*** toggle. And select the inboxes for this team. Click ***Save*** after you finish.
If you don't edit the inbox access for a specific team, the default setting will be all teams and team members can access all inboxes.
# Export Conversation
You can select users and export their conversations for record use. In Messages, there is a checkbox beside each contact in the conversation list. Select at least one contact and click **"Actions"**.
In the Actions dropdown, select **"Export Conversations"**.
You can select export "This Week", "This Month", "This Quarter", or "Custom Range". You can export conversations for at most 3 months. Click **"Confirm"** to download the zip file. Each conversation is a .csv file that records the conversation in the selected period.
{% hint style="info" %}
If a selected contact has no conversation with your account in the selected period, then there will be no file generated for that particular contact.
{% endhint %}
# Auto message for assigning conversation
On the message page, you can assign a conversation to another agent or team by clicking the button shown in the picture below.
You can directly assign the conversation.
Or you can turn on the toggle to send out a remark message to the customer if necessary.
# Import new contacts and open - individual import
First, click the ‘+’ in the message.
Select the "channel", and fill in "phone number" and "first name",
After adding, remember to select ‘Show All’. Then you will see the newly added customer in ‘New Contact’. Send a message to your customer using a template and then wait for the customer’s reply to reopen the 24-hour free conversation window.
# Import new contacts and open - multiple imports
First, go to ‘Contacts,’ select the destination (platform) in the top left corner after adding, and click ‘Import+’
You can download the template and enter the new customer’s information according to the format provided.
{% hint style="info" %}
If you’re unable to import the file into Chatalog, try using Google Sheets to assist you.
{% endhint %}
The image below is for reference only (the section after ‘Lastname’ is where you can set the Label/Custom Data for the contact; each template is different).

After import, the contacts will appear in the contact list. Then, please return to the Broadcast section.
Broadcast
TOP UP CREDIT
{% hint style="info" %}
Before broadcasting, please note:
Whether the template has been created and approved, and if there is sufficient balance in the WhatsApp Credit (only the owner can top up WhatsApp credit)."
{% endhint %}
After clicking ‘Add Broadcast,’ you will be taken to the following screen, where you should enter and fill in the content as instructed.
Broadcast Properties page
After clicking ‘Submit,’ you will be redirected to the page below, where you can check the status of the broadcast
Broadcast status page
{% hint style="info" %}
Reasons for unsuccessful delivery include: **Message Undeliverable**, which means the phone number has previously blocked unknown messages, the phone number is not a WhatsApp number, the recipient has not yet accepted WhatsApp’s new terms of service and privacy policy, or the recipient is using an outdated version of WhatsApp.
{% endhint %}
# Quick Send - Bot Flow, Saved Replies, WhatsApp Flow
### Quick Send Feature
The Quick Send feature on the Message Page streamlines communication by allowing you to send saved replies, bot flows, or WhatsApp Flows directly within an active conversation window. This feature is designed to enhance efficiency and engagement during real-time interactions with customers.
To use the Quick Send feature, locate the **Quick Send** icon on the Message Page. This icon is available during an active conversation window, ensuring you can send messages only when the conversation is live.
### Bot Flow
This tab allows you to trigger a pre-configured bot flow to automate responses or guide the conversation based on predefined rules.
You can select a bot flow from the available options to send an automated response. Only active flows could be displayed here. To manage the flow, click the "**Bot Flow**" button can be directed to the flow list page.
### Saved Replies
This tab provides access to pre-written responses, enabling you to quickly send standardized messages. Choose a saved reply from the list to send a pre-crafted message.
You can also create a new text/attachment message or edit the existing one.
### WhatsApp Flow
{% hint style="info" %}
Only for the WhatsApp inbox.
{% endhint %}
This tab allows you to send published WhatsApp Flows to engage users interactively. Only WhatsApp Flows that have been published in the WhatsApp Manager can be sent here. Once a WhatsApp Flow is selected, it can be sent directly within the active conversation window at no additional cost.
Select a published WhatsApp Flow from the list. Add a title, content, and a button label for it.
To create, edit, or manage WhatsApp Flows, click the "WhatsApp Manager" button to navigate to the WhatsApp Manager.
# Send Template Messages
# Basic Flow
Flow is a visual builder that connects all messages, actions and transitions together to create Direct Message auto reply.
Within each flow, you can view and edit the entire conversational interaction. Flow is like a map of different types of messages and some other blocks. There are two types of flow: **Basic Flow** and **Customized Flow**.
**Basic Flow** includes:
* First Direct Message
* Ice Breaker
* Story Mention
* Non-business Hours
{% hint style="warning" %}
Remember to turn off the automated responses set-up on Meta to prevent crashing the chatalog flow setups.
{% endhint %}
How to turn off inbox automations set-ups on Meta?
1. go to
2. turn off automations status (refer to the image blow)

# First Direct Message, Ice Breaker, Story Mention
**Basic Flow** includes **First Direct Message**, **Ice Breaker**, **Story Mention**, and **Non-business Hours**.
### Ice Breaker
{% hint style="info" %}
Ice Breaker and Story Mention is only available for Instagram channels.
{% endhint %}
Image 2: Ice Breaker
With **Ice Breaker**, you can set up to 4 clickable guided questions for new users who have never talked to you in your DM inbox. They can see the guided questions you set up; when they click on it, the bot will return the flow that you connected to the corresponding question. You can drag the questions to prioritize them.
{% embed url="" %}
### **First Direct Message**
The First Direct Message is triggered when users talk to you in your DM inbox for the first time.\
After activating this feature, the First Direct Message will be triggered when customers send you a message for the first time. It can be triggered more than once every 7 days. For example, if a customer sends you a message after 7 days and the message doesn't trigger other higher priority flows, the First Direct Message will be triggered again.
### Story Mention
Story Mention is triggered when users create a story and mention your brand. Reply to contacts who mentioned you in their story. This is only applicable to contacts that set their Instagram account as public.
# Setting up non-business hours
Non-business hour settings allow you to customize your operating hours for clients. During non-business hours, a customized flow will be triggered to reply to your clients.
To set non-business hours in chatalog, please follow these steps:
Step 1: Click the **Edit** button to enter **Non-business Hours** in the **Chat Flow** feature.
Step 2: Set your weekly business hours by selecting **Open** and setting a specific time for every workday.
Please note that currently, we only display the time in local Hong Kong time.
Step 3: Set your **Exceptions**. The priority of Exceptions will be higher than the basic business hours setting. This means that the exceptions will always be triggered first.
For example, if you set "Friday - open - 09:00 am to 6:00 pm" and also set "2023-07-07 (Friday) as closed", the exception "2023-07-07 (Friday) as closed" will take priority and trigger your customized flow.
You can also set **Public holidays** in the Exceptions setting. Currently, we support applying Hong Kong public holidays.
Step 4: Select the customized flow you have set up in advance for replying to the clients during your non-business hours. And click **Save**.
Step 5: Go back to the Chat Flow page and **activate** your non-business hours setting.
# Flow management tools
Some flow management tools help you to manage your flow and enhance your efficiency of flow management.
## Duplicate flow blocks
The tool allows you to copy and paste a block that contains the same block setting, reducing the time of creating a new block.
Click the button to duplicate the block
## Multi-selection and drag
The tool allows you to select multiple blocks and move them by pressing SHIFT and dragging the mouse.
Select serval blocks by pressing SHIFT and drag
## Align with horizontal layout
This tool allows you to tidy up all the blocks by clicking one button.
Click the button to align the blocks
All blocks will turn into horizontal layout after clicking
# Selective Display of Flows
Now we support customized manual send flow on the message page, making it easier for users to find and send out the most-used flow during the conversation.
## Flow
You can go to the page chat flow to turn on or turn off the manual send button by clicking.
Display the flow by clicking the button "Allow"
The message page will only display the flows that are allowed to be sent in the conversation.
The displayed flow will not show in the flow in the inbox page
# Customized Flow
Flow is a visual builder that connects all messages, actions and transitions together to create Direct Message auto reply.
Within each flow, you can view and edit the entire conversational interaction. Flow is like a map of different types of messages and some other blocks. There are two types of flow: **Basic Flow** and **Customized Flow**.
**Customized Flow** includes:
* Basic Flow Blocks
* Message Block
* Private Note
* Message with URL button
* Condition Funnel
* Carousel (only for Instagram)
* User Input
* Whatsapp Template Message (only for WhatsApp)
* Quick Connect To Block
* Quick Connect To Flow
* Smart Delay
* Advanced Flow Blocks
* External URL
* Opt-in Request
* Custom Payload
* Assign Conversation
* Set Label/Custom Field/Variable
* Remove Label
* Set User Input
* Conversation Window Checker
* Add Template
* AI Funnel (only for Business Plan and above)
* Call API
* Ending Point
* AI Reply from Document (only for Business Plan and above)
* AI Dialog (only for Business Plan and above)
{% hint style="warning" %}
Remember to turn off the automated responses set-up on Meta to prevent crashing the chatalog flow setups.
{% endhint %}
How to turn off inbox automations set-ups on Meta?
1. go to
2. turn off automations status (refer to the image blow)

# Flow Blocks
Flow is a visual builder that connects all messages, actions and transitions together to create Direct Message auto reply
### **Message Block**
Message Block allows you to send text messages along with buttons or upload an image. By adding more buttons, you can add more blocks to connect to the button to create a diversified conversational experience. Uploading an image and sending a text message in a block are mutually exclusive. Make sure to create one block to send either type of message.
If you have set up buttons together with the message, users sometimes may not select from the buttons but rather input text replies. If you want to catch this exception and continue the flow, you can drag a block to connect to the dot of "If not a quick reply, direct flow here.
{% embed url="" %}
When you create more than three buttons in the message block, you can edit the button list name and add a description for each button.
### Private Note
Private note is a flow block that allows users to send internal messages. When triggered, these notes appear with a yellow background in the conversation, visible only to internal users—not to customers. You can send text messages with custom fields as needed.
### Condition Funnel
Condition Funnel is a block that creates conditions for directing conversations to different blocks. You can create one-to-many conditions. If none of the conditions are met, there is one condition at the bottom with the message "If the above conditions are unmet, direct flow here." After setting the conditions, drag a line to connect each condition to the corresponding blocks. The above example illustrates how to branch conditions by the variable "age."
More details: [Condition Funnel](https://docs.chatalog.ai/crm-quickstarts/customized-flow/condition-funnel)
### **Carousel**
Carousel is a block to create up to at most 10 cards to display products, photos, or services. In each of the cards, you can upload an image, a title, a subtitle, and optionally up to 3 buttons. For buttons of a card, apart from other ordinary blocks, you can connect them to the exclusive.
{% embed url="" %}
**External URL** block for opening URL in a new tab.
{% hint style="info" %}
Please note that External Url is only connectable to Carousel buttons.
{% endhint %}
{% embed url="" %}
{% hint style="info" %}
Currently, the WhatsApp button does not support connecting to external URLs. As an alternative, you can connect the button to a Message Block with the link as text content.
{% endhint %}
### **User Input**
User Input is a block to ask user-specific questions and collect the answer as the value of a variable. There are 3 input types: text, number, and email.
If the input type is **text**, whatever the user inputs will pass this block, and the input value will be stored in the variable. It is the input type without constraints.
If the input type is a **number**, the user must input a number in order to pass this block. Please design a question so that the user understands you expect a number-only response (e.g., age, number, phone number, quantity, etc.). If the user inputs a non-number, the same question will prompt until a number is typed.
If the input type is **email**, the user must give an email-format reply. Otherwise, it will trigger a re-ask.
Name the variable in the field "Store as." When the variable is stored with value, you may call the variable in a Message Block with curly brackets, such as {{age}}. Putting a variable in a message block can make your conversations more dynamic.
{% embed url="" %}
### **Keep Conversation Open Block**
Keep Conversation Open block allows conversations to remain in the Open status after automation is completed, helping teams continue follow-up actions without manually reopening conversations.
### **Quick Connect To Block**
Quick Connect To Block is a shortcut block that you can go to any other existing block. For example, if you wish to create a restart button, what you need is to create a Quick Connect To Block. Then, click "Select block" and click on the block you want to connect to. In the above example, the selected block is the first message block so that a user can go back to the first message upon clicking "Restart."
### **Quick Connect To Flow**
Quick Connect To Flow is a shortcut block that you can go to any other existing flow. Imagine your conversation design is sophisticated. What you need is a connector to connect between different flows to curate a logical user experience. By creating Quick Connect To Flow, you can select and hence go to another flow that you have already created.
# Flow template reference
You need to set up custom field in the ‘Contacts’ page on the right side of Chatalog beforehand. Then, return to the ‘Flow’ page to set up a new process.
Contact page
Custom Fields page
# Event reservation Flow
Event reservation flow: Used to collect participant information for future reference
You need to set up custom field in the ‘Contacts’ page on the right side of Chatalog beforehand. Then, return to the ‘Flow’ page to set up a new process.
Contact page
Custom Fields page
After returning to the flow page, you can create a new process by following the method shown in the image below. (Use the following process blocks: Message Block, User Input, Set Label/Custom Field).”
Since the user input variable {{age}} is stored in the custom field named ‘age,’ you will get the same result whether you enter the user input variable {{age}} or the custom field {{customFields.age}}.
# Subscription cancellation Flow
Subscription cancellation flow: For customers who decline or wish to unsubscribe from promotions
You need to set up custom field in the ‘Contacts’ page on the right side of Chatalog beforehand. Then, return to the ‘Flow’ page to set up a new process.
Contact page
Custom Fields page
After returning to the flow page, you can create a new process by following the method shown in the image below. (Use the following process blocks: Message Block, User Input, Set Label/Custom Field).”
Subscription cancellation flow
# Flow Trigger
Custom keywords (partial match/exact match), any keyword
### How to trigger a flow?
You can set **a custom keyword (partial match/full match)** or select **any keyword** to trigger the process.
#### Custom Keywords
You can set one or more custom keywords for a flow. The flow will be triggered when the user's message contains the keyword you set. English keywords are not case-sensitive.
**Partial match**\
\
For example, your customer inputs: `Is there any CS?` \
Some of the **Partial match** keywords have the word **CS** in their settings, which will trigger the flow.
**Exact match**
For example, your customer directly enters: `check my order`\
The keyword is set to contain the word **check my order** , the flow will be triggered.
{% hint style="warning" %}
If your customer enters: I want to check my order\
Please note that no flow will be triggered.
{% endhint %}
#### Any Keyword
You can select Any Keyword in the flow, which means any user input can trigger this flow when it is active.
{% hint style="warning" %}
If Any Keyword flow is in the active state and has a higher priority than other Custom Keyword flows, even if the user inputs a custom keyword, Any Keyword flow will be triggered first due to its higher priority.
{% endhint %}
For example, the "Welcome" flow is an Any Keyword Flow, and the "Price Inquiry" flow is a Custom Flow. When these two flows are active, if the user inputs the keyword - "price," the "Welcome" flow will be triggered due to its higher priority.
When the user's message contains one of the keywords that you set up in this Keyword Trigger, it will get this flow triggered. Every flow must have at least one block that is connected to it to get it working.
Starting Point and most of the blocks have at least one dot at the end. Try dragging a block from the left and dragging a line to connect both ends!
{% hint style="info" %}
If you want to delete a block or a line that connects between blocks, for Windows users, single click the block or line and enter "Backspace." For Mac users, single-click the block or line and enter "delete."
{% endhint %}
### What is the priority of a flow trigger?
#### Non-business Hours
If you set and activate the Non-business Hours, the flow you connected to this feature will be triggered during your non-business hours. **When Non-business Hours is active, other flows will not be triggered.** You can set an appropriate flow connected to this feature, and it will help you provide information and service for your clients during non-business hours.
{% content-ref url="/pages/a0hPNYVKVOJBrC1oMO3k" %}
[Setting up non-business hours](/crm-quickstarts/basic-flow/setting-up-non-business-hours)
{% endcontent-ref %}
#### Story Mention
If the message is a story mention, then within the business hours, it will always trigger a story mention. Please notice that Story Mention is only for Instagram.
#### Keyword Flow Trigger Priority
Each Keyword Flow has a priority in triggering. User input has a chance of containing more than one trigger keyword; at this moment, the flow has the highest priority among all the flows that have keywords contained in user input. You can drag flows at the left to alter their priority.
If a user has already triggered one flow, and during the conversation, the user's reply happens to match the keyword you've set for another flow, it will trigger this new flow.
For example, if the user initially triggered a "Welcome" flow, and during the conversation, they input the content containing the word "price," and "price" is the keyword you've configured to trigger another "Price inquiry" flow, then the user will trigger the "Price inquiry" flow.
### Why is the flow not being triggered?
#### 1. Inactive flow or low-priority flow
* Check if the flow status is **active**.
* Make sure you put the flow on a **higher priority.**
#### 2. The conversation has been assigned to a certain team or people
If you can not trigger your flow, check if the conversation has been assigned to a certain team or people. The flow could be triggered only when the conversation status is **Closed**.
**3. Wrong trigger keywords**
The flow will be triggered once the keywords are entered correctly, regardless of whether they are uppercase or lowercase.
Make sure you are using the correct keywords to trigger flows.
**4. Your last AI conversation has not ended.**
In an AI sales dialog or AI Reply from document conversation, if you don't actively choose to end the conversation or if the conversation ends automatically due to exceeding the set time, the conversation is still in progress. You cannot successfully trigger another flow while the AI sales dialog is still in progress.
Also, it's important to note that replies in the flow, especially in the AI sales dialog, may be slower and require patience. If you enter keywords multiple times while waiting for a reply, it may also cause the trigger to fail.
# Assign Conversation
There are two options available for assigning conversations: **Basic Assign** and **Advanced Assign**.
### Basic Assign Conversation
With Basic Assign, you can select a specific team or agent to handle the conversation. Conversations will be assigned to your selected agent or team automatically.
Select a team
Select an agent
### Advanced Assign Conversation
With Advanced Assign, you can set team and agent statuses (online/away/offline) to automatically assign new conversations based on advanced assignment rules. Conversations will be assigned to the agent with the fewest assigned conversations in the team at that moment, ensuring efficient customer support.
Step 1: Select a team. You can manage your team and team members in the setting page.
Step 2: Select the agent's statuses: Online, Away, Offline. You can choose more than one status.
Step 3: Select the extra assigned rules. Now we support "Assign to agent with the least assigned conversation."
Step 4: Set a solution for an exception. For example, set a message block to respond to your client if no agent is found based on the conditions at that moment.
{% hint style="info" %}
The switch option "Keep the flow run" at the end of the block will have 2 different actions:
1. Off (default state): When a conversation is assigned to the agent, the conversation status will change to "assign to xxx team/agent/open", and the agent will receive a notification to remind a conversation assigned to him/her. Other flows can't be triggered until this current flow ends.
2. On: When a conversation is assigned to the agent, the agent will receive a notification to remind a conversation assigned to him/her. The conversation could stay in "closed" so that clients can still trigger other flows.
{% endhint %}
# Condition Funnel
The **Condition Funnel** block lets you route a conversation into different paths based on variable values, user input, or message content.\
It is commonly used to validate inputs (such as email or phone number), check user attributes, or control logic using numeric or text-based conditions.
***
### 1. Condition Funnel Overview
#### Main components
1. **Select a variable**\
Choose the variable you want to evaluate (for example: user input, custom field, or system variable).
2. **Condition operator**\
Defines how the selected variable will be compared to the value or rule you provide.
3. **Enter value / rule**\
The comparison value.
* For basic operators, this is a text or number.
* For regex, this is a regex pattern.
4. **Add condition (+)**\
Add multiple conditions. Each condition creates its own branch.
5. **Otherwise path**\
If none of the conditions are met, the conversation will follow the **Otherwise** path.
***
### 2. Condition Operators Explained
#### Equality & comparison operators
| Operator | Meaning | Example |
| ------------------------- | ---------------------------------- | ----------------- |
| **Equal** | Variable value is exactly the same | `country = USA` |
| **Not Equal** | Variable value is different | `country ≠ SG` |
| **Less Than** | Numeric comparison | `order_count < 3` |
| **Less Than or Equal** | Numeric comparison | `score ≤ 60` |
| **Greater Than** | Numeric comparison | `order_count > 5` |
| **Greater Than or Equal** | Numeric comparison | `amount ≥ 1000` |
> 💡 Numeric operators should only be used with number-based variables.
***
#### List & Text Matching Operators
| Operator | Meaning | Example |
| ------------ | ------------------------------------ | --------------------------- |
| **In** | Variable matches any value in a list | `country in [USA, SG]` |
| **Contains** | Variable includes the given text | Message contains `"refund"` |
| **Is Empty** | Variable has no value | Phone number is empty |
***
### 3. Matches Regular Expression (Regex)
The **Matches Regex** operator allows advanced pattern matching using regular expressions.\
It is useful for validating formats such as email addresses, phone numbers, or structured user input.
#### How it works
* Enter a regex pattern between `/ /`
* Optionally enable regex flags for additional control
* The condition passes if the variable matches the regex pattern
#### Common examples
| Use case | Regex example | Example |
| --------------------------------------- | ---------------------------- | ---------------------- |
| Validate email format | `^[^\s@]+@[^\s@]+\.[^\s@]+$` | `example@chatalog.com` |
| Validate phone number with country code | `^\+[1-9]\d{6,14}$` | `+14155552671` |
| Only numeric input | `^\d+$` | `123456` |
***
### 4. Advanced Regex Flags Explained (Optional)
Regex flags control how the pattern is evaluated.
| Flag | Name | Description |
| ----- | ---------------- | --------------------------------- |
| **g** | Global | Matches all occurrences |
| **m** | Multi Line | `^` and `$` apply to each line |
| **i** | Case Insensitive | Ignores letter casing |
| **x** | Extended | Allows whitespace and comments |
| **s** | Single Line | `.` matches newline characters |
| **u** | Unicode | Enables Unicode matching |
| **U** | Ungreedy | Makes quantifiers lazy by default |
| **A** | Anchored | Forces matching from the start |
| **J** | Jchanged | Allows duplicate named groups |
***
### 5. Example Scenarios
#### Example 1: Email validation
* **Variable:** `User Input`
* **Operator:** **Matches Regex**
* **Pattern:** `^[^\s@]+@[^\s@]+\.[^\s@]+$`
**Result**
* Matches → Continue to the next step
* Does not match → Ask the user to re-enter a valid email address
***
#### Example 2: Route by country
* **Variable:** `Country`
* **Operator:** **In**
* **Value:** `USA, SG`
**Result**
* Matches (USA or SG) → Route to the regional flow
* Otherwise → Route to the global/default flow
***
#### Example 3: Empty phone number check
* **Variable:** `Phone Number`
* **Operator:** **Is Empty**
**Result**
* Empty → Ask the user to provide their phone number
* Not empty → Continue the flow
***
### 6. Best Practices & Tips
* Start with **simple operators** (Equal, In, Contains) before using regex.
* Always configure an **Otherwise** path to prevent dead ends.
* When using regex:
* Anchor patterns with `^` and `$` to avoid partial matches
* Test patterns with real user input
* Keep condition logic readable—multiple simple conditions are often clearer than one complex rule.
# Custom Field and User Input Setup in Flow
## Printing Custom Field in Message Block
If you have set a custom field to users and wish to display its value in a message, you can input {{customFields.*fieldvalue*}} to the Message Block. If the custom field that you want to display is "membership", where the value is "diamond", then you can input {{customFields.membership}}. When the user triggers this flow, he will see the value "diamond" in the message.
{% hint style="info" %}
print custom field value of the contact with {{customFields.*fieldvalue*}}
{% endhint %}
This example shows a message with clickable options that set custom field and print out the custom field value.
This is the actual result upon clicking the option "Moisturizers" from the above flow.
## Printing User Input Variable in Message Block
If you have set a user input block, you should have already set the variable that stores the user input. When the variable is stored with value, you may call the variable in a Message Block with curly brackets, such as {{age}}. Putting a variable in a message block can make your conversations more dynamic.
{% hint style="info" %}
print user input variable value of the contact with {{*userinputvariable*}}
{% endhint %}
This example is a user input block with condition funnel that determines whether the age is over 18. If below 18, the message will print the actual age and explain that the business can't proceed.
This is the actual result upon replying "17", a digit below 18, which returns the result from the above flow.
## Storing User Input Variable into Custom Field Block
For more sophisticated scenarios, you may wish to collect user input value while storing the value into a custom field. What you need to do is to create a custom field block right after the user input block. Then, you need to put the variable into the field value. For example, if you name the user input variable as "age", you should put {{age}} into the field value.
This example is a user input block with custom field that stores the user input variable.
This is the actual result upon replying "16", a digit below 18, which returns the result from the above flow.
The above example is a complicated version of the previous flow. The difference is an additional Set Custom Field Block inserted in between User Input and Condition Funnel Block. The user input variable is stored in the field value of the field "age". And the final message block is also adjusted to be {{customFields.age}}.
The message displayed is all the same as the previous flow, but the user input variable is stored into custom field, so that you can keep the value for other purposes, such as keeping conversation history, filtering contact according to custom field result, exporting contact with custom fields etc.
{% hint style="info" %}
Since the user input variable {{age}} is stored into the custom field called "age". Therefore, no matter you try to print the user input {{age}} or the custom field {{customFields.age}}, you can still get the expected result.
{% endhint %}
{% embed url="" %}
# Setting up Call API Block in Flow
Call API Block provides automated HTTP callback functions that you can use to perform an API request by various methods, including GET, POST, PUT, DELETE etc.
### URL & Method
Choose a Request method and enter your URL endpoint of the external API.
You can make your URL dynamic by inserting variables into the path. For the user input variable that you set up in the flow, for example, it is called "order\_num", you can call it with {{order\_num}}. For custom fields, for a field called "membership", you can call it {{customFields.membership}}.
### Customize Header
Headers in HTTP webhook requests are used to specify the purpose of the API or its content type.
It is optional to use headers. It is under Additional Settings and is turned off by default. Headers are set as key-value pairs.
e.g. key = Content-Type & value = application/json
### Customize the Body
The body of the API request is added here. This is also optional and set as off by default. The body must always be in JSON format.
Formatting Tips:
* Strings and Variables must be wrapped in quotes > {{name}}
* A comma is needed between 2 key-value pairs > "Email": "{{email}}", "Name": "{{name}}"
* If the variable is a custom field but not a default field (i.e. name, email, phone), for example the field name is membership, the format should be > “{{customFields.membership}}“
### **Set your test variable**
Manually set your test variables by clicking "Add Variables".
### Test the Request
You can test the API request by clicking on the 'Test the request' button.
### Save Responses as Variables
You can also save the response of a request into variables or custom attributes. If your API response is a JSON with a key-value pair, you can store each of the values by passing the key name.
**Storing Response Values that are Inside an Object:**
If you want to store the response value that is inside an object, you need to use the `objectkey.keyname` format.
Example: if you want to store the `userId`, you have to use `Result.userId` in the **"Entire response Body"** above
```
{
"Result": {
"userId": "xxxxx",
"PhoneNumber": "xxxxxx",
"PurchaseHistory": null,
}
}
```
**Storing Responses that are Inside an Array of the Object:**
If you want to store the response value that is inside an Array of an object, you need to use the `[0].objectkey.keyname[0].value` format
Example: if you want to store `shipping_status`, you have to use `[0].order_tracking.shipment_track[0].shipping_status` in the **"Entire response Body"** above
```
[
{
"order_tracking": {
"track_status":0,
"shipment_track" : [
{
"id":123342515,
"shipping_status":"On the way"
}
]
}
}
]
```
### **Response Routing**
\
You can use response routing to split your flow according to response status codes. By default each Call API Block has "success" and "failed" node. You can optionally add custom status code as you need.\
# Smart Delay
### What is the Smart Delay Flow Block?
The Smart Delay Flow Block allows you to set a custom delay between messages in a flow. This feature enables you to control when a follow-up message is sent to users, creating a more seamless and timely communication experience.
### How to Use the Smart Delay Flow Block?
* **Add the Smart Delay Block**: In your flow builder, drag the Smart Delay Flow Block to the position where you want a delay between messages.
* **Set the Delay Duration**: Customize the delay by setting a specific amount of time (e.g., minutes, hours, or days) after which the following message will be sent. This ensures follow-ups reach users at the right time.
* **Required Toggle**: At the bottom of the block, you’ll see a “Required” toggle:
* **Inactive**: When the toggle is off, other triggered flows can interrupt the smart delay. If interrupted, the blocks following the smart delay will not be sent.
* **Active**: When the toggle is on, the smart delay cannot be interrupted by other flows. Even if the user triggers another flow, the follow-up messages after the smart delay will still be delivered as planned.
* **Save and Test**: Save your flow and test it to ensure the timing and interruption settings work as expected.
{% hint style="info" %}
Each platform has different conversation window duration limitations. We can’t guarantee that the following message blocks after a smart delay will be successfully delivered due to these limitations.
{% endhint %}
# Send Email
The **Send Email** block allows you to automatically send emails to customers during a chat flow. This is useful for sending confirmations, notifications, or follow-up information without manual effort.
***
### 🔧 When to use
Use this block when you need to:
* Share follow-up information after a conversation
* Trigger email notifications based on user actions
* Send booking or appointment confirmations
* Deliver order or payment details
***
### ⚙️ How to set up
#### 1. Add recipient(s)
* Enter email address(es) in the **To** field
* You can add multiple recipients using: `,`
**Example:**
```
user1@email.com, user2@email.com
```
***
#### 2. Set email content
* **Subject**: Enter the email title
* **Body**: Write the email content (plain text)
💡 You can include dynamic variables (if supported) to personalize the message.
***
#### 3. Configure SMTP settings
To send emails, you need to connect your email service provider via SMTP.
| Field | Description |
| --------- | ------------------------------------------------------- |
| SMTP host | Your email provider’s SMTP server (e.g. smtp.gmail.com) |
| Port | Common ports: `587` (TLS) or `465` (SSL) |
| Use TLS | Enable if your provider requires secure connection |
| Username | Your SMTP username (usually email address) |
| Password | Your SMTP password or app password |
💡 Check with your email provider for the correct SMTP configuration.
***
#### 4. Set sender information
* Define the **From** field
* Format:
```
Name
```
**Example:**
```
Support Team
```
***
#### 5. Handle delivery results
The block includes two outcomes:
* **Success**: Email sent successfully → continue the flow
* **Failed**: Email failed to send → handle errors (e.g. retry, notify agent)
***
### ⚠️ Important notes
* Make sure your SMTP credentials are correct, otherwise emails will fail to send
* Some providers require **app passwords** instead of your login password
* If the **From address does not match your SMTP account**, delivery may fail or be marked as spam
* Always test your setup before using it in a live flow
***
### 🚨 Common issues
| Issue | Possible cause |
| -------------------- | ----------------------------------------------- |
| Email not sent | Incorrect SMTP settings |
| Authentication error | Wrong username/password or missing app password |
| Email marked as spam | Sender not verified or domain not trusted |
# Sticky Notes
The **Sticky Notes** block allows you to add internal notes anywhere in the Flow Builder. These notes are only visible to your team and are never sent to customers.
Use Sticky Notes to document your flow logic, leave reminders, explain complex sections, or provide implementation instructions for teammates.
### When to use Sticky Notes
Sticky Notes are useful for:
* Explaining the purpose of a flow section
* Adding implementation notes for teammates
* Recording business rules or requirements
* Leaving reminders for future updates
* Organizing large or complex flows
### Add a Sticky Note
1. Open **Flow Builder**.
2. Select **Sticky Notes**.
3. Enter your note.
4. Drag the block to any location in the flow.
The Sticky Note is saved together with your flow and can be edited at any time.
### Edit a Sticky Note
1. Click the Sticky Note block.
2. Update the note content.
3. Click outside the editor or save the flow.
# Business Hour Checker
The **Business Hour Checker** block determines whether the current time falls within your configured business hours and routes the conversation accordingly.
This allows you to create different customer experiences during business hours and non-business hours, such as routing customers to different flows, sending automated replies, or collecting customer information for follow-up.
### Configure Business Hours
Before using the Business Hour Checker, you need to configure your business hours.
1. Open **Flow Builder**.
2. Add a **Business Hour Checker** block.
3. Click the **Business Hours** link in the block.
This opens the **Business Hours** settings page, where you can configure:
* Business hours for each day of the week
* Specific date exceptions
* Public holiday schedules
Click **Save** after completing your configuration.
### Add a Business Hour Checker
1. Open **Flow Builder**.
2. Select **Business Hour Checker**.
3. Connect both output paths to the appropriate flow blocks.
The block has two outputs:
#### Business Hours
Routes customers to this path when the current time is within your configured business hours.
#### Non-Business Hours
Routes customers to this path when the current time is outside your configured business hours.
# AI Agent
AI Agent allows you to build AI-powered conversations in Flow Builder. By defining the AI's role, goals, and completion criteria, the AI can understand customer requests, answer questions, and optionally perform actions such as searching your Knowledge Base, creating bookings, or interacting with Google Sheets.
{% hint style="info" %}
AI Agent is currently available in Beta for **Business Plan** and above.
{% endhint %}
***
## Before you start
Before configuring an AI Agent, make sure you have:
* A **Business Plan or above**.
* A Flow created in **Flow Builder**.
* (Optional) Booking items created if you want the AI to create bookings.
* (Optional) Google Sheets connected if you want the AI to access spreadsheet data.
* (Optional) Knowledge Base documents uploaded if you want the AI to answer using your documents.
> **Note:** AI Agent is currently in **Beta**. Features and supported actions may change in future releases.
***
## Add an AI Agent block
1. Open **Flow Builder**.
2. Drag the **AI Agent** block onto the canvas.
3. Connect it to your flow.
4. Click **Configure**.
***
## Configure the AI Agent
The AI Agent is configured using three sections.
### Role
Describe who the AI should act as.
This helps define the AI's identity, expertise, or tone when interacting with customers.
**Example**
> You are a customer service representative for a beauty salon.
***
### Goal
Describe what the AI should achieve.
Clearly define the tasks or objectives you expect the AI to accomplish.
**Example**
> Answer customer enquiries, recommend suitable treatments, assist customers with appointment booking, and collect the required booking information.
***
### Completion criteria
Define when the AI has successfully completed its task.
You can add one or multiple completion criteria depending on your use case.
**Examples**
* The customer's question has been answered.
* A booking has been created successfully.
* All required booking information has been collected.
* The customer no longer needs assistance.
***
## Actions (Optional)
Actions extend what the AI Agent can do.
You may configure one, multiple, or no actions depending on your use case. If no actions are configured, the AI Agent will respond according to its Role, Goal, Completion Criteria, and the available conversation context.
***
### Set Custom Field
Allow the AI Agent to save collected information into contact custom fields.
Typical use cases include:
* Customer name
* Membership ID
* Preferred language
* Product preference
***
### Set Label
Allow the AI Agent to automatically apply labels to conversations.
Example labels:
* VIP
* New Customer
* Interested
* Follow-up Required
***
### Search Knowledge Base
Allow the AI Agent to search your uploaded Knowledge Base documents when answering customer questions.
This is useful for:
* Frequently asked questions
* Product information
* Internal documentation
* Company policies
* Service guides
***
### Create Booking
Allow the AI Agent to create bookings for customers.
After adding this action:
1. Select a booking item.
2. (Optional) Add booking instructions.
3. Configure the metadata fields.
4. Mark fields as **Required** if customers must provide the information before a booking can be created.
#### Metadata fields
Metadata fields tell the AI what information it should collect for the booking.
For example:
| Field | Description |
| --------------- | ------------------------------- |
| CustomerName | Customer's full name |
| PhoneNumber | Contact number |
| AppointmentDate | Preferred appointment date |
| SkinConcern | Customer's primary skin concern |
You can customize each field description to help the AI understand what information should be collected.
***
### Google Sheet
Allow the AI Agent to interact with a connected Google Sheet.
#### Step 1
Select a spreadsheet from Google Drive.
#### Step 2
(Optional) Specify a sheet title.
If left empty, the default sheet will be used.
#### Step 3
Provide instructions describing how the AI should use the spreadsheet.
**Example**
> Search customer membership records before answering customer enquiries.
***
#### Configure columns (Optional)
You may specify which columns the AI can access.
For each column, choose one or more permissions:
* **Read** – Read data from the column.
* **Append** – Add new values to the column.
* **Update** – Modify existing values in the column.
If no columns are configured, the AI Agent may use all available columns according to the permissions you have granted.
***
#### Sheet permissions
Select how the AI can interact with the spreadsheet.
* Allow AI to read from this sheet
* Allow AI to append rows to this sheet
* Allow AI to update rows in this sheet
Grant only the permissions required for your use case.
***
## Continue building your flow
After configuring the AI Agent:
1. Click **Done** to save the AI Agent configuration.
2. Continue building your Flow by connecting the AI Agent to other Flow blocks as needed.
3. Once your Flow is complete, click **Save** and **Publish** to make it available to customers.
***
## Best practices
* Clearly define the AI Agent's role and responsibilities.
* Keep goals focused on a specific business task.
* Use completion criteria to define when the AI should finish the conversation.
* Only enable the actions required for your use case.
* Provide clear descriptions for booking metadata fields.
* Grant Google Sheet permissions based on the minimum access required.
* Test your AI Agent thoroughly before publishing your Flow.
# AI Tools - AI Writer & Doc Reply
{% hint style="info" %}
AI Tools - AI Writer & Doc Reply is only available for the **Business Plan** and above.
{% endhint %}
## AI Tools - AI Writer
### What is the AI Writer?
The AI Writer is a user-friendly AI tool designed to assist users in crafting responses to customer messages quickly and efficiently. By leveraging AI, this feature generates suggested replies based on user-provided prompts, streamlining communication while allowing full customization.
### How it works?
#### Step 1: Enter a prompt
Click the "AI Tools" icon at the bottom of the message page and select the AI Writer tab. Type a prompt that describes the purpose of your message.
(e.g., "Send a thank-you note to a client" or "Write a friendly message to a new subscriber welcoming them to our monthly newsletter and offering a discount code for their first purchase.").
You can also select the checkbox for "include message history" if necessary. If you enabled it, the AI will consider the last five messages as context to generate response.
#### Step 2: Generate a Response
Click the "Generate Text" button. The AI Writer will process your prompt and provide a suggested reply within seconds.
#### Step 3: Edit and Finalize
Review the AI-generated text, make any desired changes, and use the edited version to send or reply to your customer directly.
### AI Tools - Doc Reply
#### What is the Doc Reply?
The Doc Reply is an advanced AI tool designed to enhance your messaging experience by generating tailored responses based on documents you’ve uploaded. This feature allows you to leverage the content of your published documents to craft quick, accurate, and contextually relevant replies, saving time while maintaining full control over the final message.
### How it works?
#### **Step 1: Upload and publish your document**
Navigate to the "AI Reply from Document" page, upload and publish your document. This step makes the document available for use in the Doc Reply feature.
#### **Step 2: Access Doc Reply**
Go to the Message page when you're ready to use this feature. Click the "AI Tools" icon at the bottom, then select the "Doc Reply" tab from the available options.
#### **Step 3: Generate a response**
Choose the published document you’d like to base your reply on from the list of projects. Once selected, click the "Generate Text" button to create a suggested response derived from your document’s content.
#### **Step 4: Edit and send**
Review the generated text, make any necessary edits or adjustments to suit your needs, and send the message directly from the Message page.
Please note that the bot will provide answers based on the last five messages in the conversation as context, in addition to the selected document. To get better answers, consider refining your published document to include concise, up-to-date details that align with your typical messaging needs. This ensures the generated responses are as accurate and helpful as possible!
# Manage projects for AI Reply from Document
The "AI Reply from Document" feature enables you to create automated responses for your chat flows. By uploading a document, linking to a static URL, or using a dynamic site, the AI can extract relevant information and provide accurate answers to user inquiries. This is ideal for businesses or organizations looking to provide quick, consistent responses to common questions.
{% hint style="info" %}
* New users have a free 14-day trial for all AI tools. 👉 [Try it Now!!!](https://app.chatalog.ai/signup?_gl=1*sf1e4z*_gcl_au*MTgwMTQyOTY0MS4xNjkwMTY1NDY0LjIxODI5Mzk4MS4xNjkxNTQ4NjIyLjE2OTE1NDg2MjE.&_ga=2.262018634.61542387.1691292315-2054968759.1664915439)
* AI Reply from Document is only available for the **Business Plan** and above.
{% endhint %}
## How to manage the projects for "AI Reply from Document" ?
Log in to your account and navigate to the **AI Reply from Document** page. Select or create a project where you want to set up.
### Step 1: Upload Documents or URLs
You have three options to provide the content for the AI to use:
#### **Option 1: Upload Documents**
1. Click on the box labeled **"**Choose a file or drag and drop your file here**."**
2. Select a supported file from your device, such as a Word document, PDF, Markdown (.md), or Excel (.xlsx) file.
3. Once uploaded, the file will appear in the "Select documents" section with details such as the file name, upload date, and size.
#### **Option 2: Provide a Static URL**
1. If your content is hosted online as a static page, select the **"Static URL"** option.
2. Enter the URL of the webpage containing the information (e.g., ).
3. The AI will fetch the content from the provided static URL to use in its responses.
#### **Option 3: Provide a Dynamic Site**
1. If your content is on a dynamic site (e.g., a webpage that updates frequently, such as a blog or news site), select the **"Dynamic Site"** option.
2. Enter the URL of the dynamic site.
3. The AI will periodically fetch the latest content from the dynamic site to ensure responses are up-to-date.
{% hint style="info" %}
Ensure the document, static URL, or dynamic site contains clear, relevant information for the AI to generate accurate responses.
{% endhint %}
### Step 2: Select Documents
1. Check the box next to the document, static URL, or dynamic site you want the AI to use to generate replies.
2. If you no longer need a document or link, you can delete it by clicking the trash can icon next to the entry.
3. Select the documents and try them out in the right-side testing area. Modify your documents to provide better answers to your customers.
### Step 3: Edit the Prompt (Optional)
1. Check the box next to each language for which you want to set a prompt. You can set different prompts for different languages to tailor responses for multilingual audiences.
2. Edit the prompt to provide specific instructions for the AI. Customizing the prompt allows you to control the tone, style, and specific instructions for the AI, ensuring responses align with your brand or project goals. If you choose not to set a custom prompt, the AI will use the system default: **"**Provide the answer based on the published documents or URLs."
### Step 4: Select Model
1. A drop-down menu will display available models. Select the one that best suits your needs.
2. If you’re unsure which model to choose, the default model is typically a good starting point for most use cases.
### Step 5: Publish Document
1. Once you’ve uploaded your document, static URL, or dynamic site and selected the appropriate model, it’s time to publish.
2. Your document is now published, and the AI will use it to generate responses in your chat flow when you select this project.
# AI Reply from Document Flow Block
The "AI Reply from Document" feature enables you to create automated responses for your chat flows. By uploading a document, linking to a static URL, or using a dynamic site, the AI can extract relevant information and provide accurate answers to user inquiries. This is ideal for businesses or organizations looking to provide quick, consistent responses to common questions.
{% hint style="info" %}
* New users have a free 14-day trial for all AI tools. 👉 [Try it Now!!!](https://app.chatalog.ai/signup?_gl=1*sf1e4z*_gcl_au*MTgwMTQyOTY0MS4xNjkwMTY1NDY0LjIxODI5Mzk4MS4xNjkxNTQ4NjIyLjE2OTE1NDg2MjE.&_ga=2.262018634.61542387.1691292315-2054968759.1664915439)
* AI Reply from Document is only available for the **Business Plan** and above.
{% endhint %}
### **How to set AI knowledge in the chat flow?**
In the chat flow, you can design a flexible dialogue experience, send a variety of messages and buttons, set the tags to order information, assign conversation, and so on. You can also embed the AI knowledge into part of the chat flow, And AI will answer customers' questions in specific scenarios.
The following are the six steps of the knowledge base:
#### **Introductory Question**
The AI reply from document will first ask questions and provide guidance. The purpose of this question is to remind customers to ask questions about a certain theme and let the customer ask you the questions from the file that you uploaded.
{% hint style="info" %}
If you switch on the button "Send user input when entering", the AI reply will skip the introductory question and start to answer question from users right way.
{% endhint %}
#### **Published Knowledge Project**
Choose the published knowledge, and AI will answer the customer's question about the document in the knowledge.
#### **Disclaimer**
The drop-down menu can select the Chinese/English -Disclaimer or N/A. The statement will be displayed in the same message as the AI answer, but the position will be at the end of the message.
#### **System Prompt**
You can give specific guidance to the AI Chatbot’s response. For better performance, you need to provide the prompt in both English and Chinese.
Here is an example for setting system prompt in English and Chinese:
*You are a helpful Customer Service Assistant. If anyone asks who you are, just explain that you are a helpful assistant who is here to answer inquiries. Use the provided context information to answer the question in detail and in a polite and professional tone.*
*您是一位非常幫得手的客戶服務助理。請利用所提供的情境資訊,詳盡、禮貌且專業地用繁體中文回答問題。如果有人問起你是誰,您可以禮貌地解釋你是一位專門在此回答查詢的助理。*
#### **Ending the conversation condition**
Now, we support three end conversation conditions: only end when users click on any buttons, end after answering once, and timeout. You can only choose one of them to close your AI Reply from document conversation. Please note that if the AI Dialog is not closed, you may not trigger other flows.
#### Set options for exceptions
When AI fails to respond or there is a mistake, you can set its follow-up process, such as sending text messages and buttons to let the customer leave.
#### Set whether to allow user input to trigger other flows.
We have added a new "***Required***" toggle for exiting the AI flow by triggering keywords.
If the toggle is **inactive**, when the client's input matches another flow's keywords, the conversation with AI will end, and the client will be directed to that flow. Please note that only specific keyword flows can be triggered; it will not trigger an "ANY KEYWORD" flow.
For example, when your client is in the AI customer service conversation, they ask about the delivery question first, and your AI CS assistant provides answers. Then the client inputs "check order," and "check order" is the keyword you set for another order checking flow, so the client's input triggers another flow, and they will be directed to the order checking flow immediately.
If the toggle is **active**, it means the AI flow is required. Therefore, even if the client's input matches keywords for other flows, they will remain in the AI flow.
### **AI Reply from Document Example - Pricing**
The above is a process of asking pricing questions. The trigger condition of the process is the customer inputs the keyword "Pricing."Then, you will enter the AI Reply from Document.
The AI Reply from Document will first ask the question and guide the question. The purpose of this question is to let the customer ask questions about a certain theme. For example, "Feel Free to Ask Anything Pricing of Chatalog :)" helps prevent customers from asking questions and not being deviated to get reasonable answers.
Then, select "Published Knowledge," the knowledge should be the same theme as the guidance problem. After that, choose a Disclaimer; you should choose the same language as the file. Then, you can set your system prompts in English and Chinese. And set the end of the conversation condition. Because after the customer gets the answer, you need to set the logic of leaving this block. You can choose "Only end when users click on any buttons" to leave. If you set "Only end when users click on any buttons," you need to set a text message with a button, prompting the customer to click the button after the query is completed. Finally, set the options for exceptions.
# AI Writer & Consultant
AI Writer converts key information into a piece of writing in seconds, powered by ChatGPT.
AI Writer is an independent feature from other CRM features of chatalog that boosts the speed of curating all kinds of content. We provide templates for common broadcast or marketing message scenarios. With only providing a few lines of brief description, AI Writer will do the rest and deliver the writing according to the requirements in the next minute.
{% hint style="info" %}
* New users have a free 14-day trial for all AI tools. 👉 [Try it Now!!!](https://app.chatalog.ai/signup?_gl=1*sf1e4z*_gcl_au*MTgwMTQyOTY0MS4xNjkwMTY1NDY0LjIxODI5Mzk4MS4xNjkxNTQ4NjIyLjE2OTE1NDg2MjE.&_ga=2.262018634.61542387.1691292315-2054968759.1664915439)
* AI Writer & Consultant is only available for the **Pro Plan** and above.
{% endhint %}
### **Provide Requirements to Create Content - Product Descriptions**
Image 1: AI Writer creates content by requirements (Product Descriptions)
First, select a template at the left according to your needs. For Product Descriptions, you need to select the output language, either English, Traditional Chinese or Simplified Chinese. Since the output text has a limit from ChatGPT, you can generate at most 300 words at the moment. Then, provide the name that your product / service is called, followed by a description of your product for the AI to better understand your product. If you wish the AI to describe your product more precisely, you can provide more information for it to digest. Finally, select an appropriate tone that you wish the content to be.
Click "Create Content" when the template is all set up. A loading wheel will appear on the right while the content is still on the way to be delivered. The result will be shown in around 1 minute. You can click "Copy" button at the bottom right to copy the message. Then you can freely use it in our Broadcast, Messages, Flow, or Post Bot etc.
Image 2: modify generated content by AI Writer
If the content generated still has flaws that you need to modify, you can click on the paragraph. The whole text will become editable. After modification, you can click "Copy" at the bottom right if you find it good enough. Or if you find the information inaccurate that you want to regenerate it, you can click "Remove" button at the bottom right and edit on the template again instead to generate another content copy that meets your needs.
### **Provide Requirements to Create Content - Non Product Descriptions**
Image 3: AI Writer creates content by requirements (Social Media Bio)
First, select a template at the left according to your needs. Then, you need to select the output language, either English, Traditional Chinese or Simplified Chinese. Since the output text has a limit from ChatGPT, you can generate at most 300 words at the moment. For any template except Product Descriptions, the two core questions are "What are you looking to create" and "What are the main points you want to cover". It is prefilled with part of the content around the template topic. As the example above, you see bracketed words or phrases like \[social media] \[bullet point 1]. We suggest you only replace those brackets into your own content accordingly. After choosing the tone, you can click "Create Content" for the result in a minute.
{% hint style="info" %}
AI Writer provides content based on limited information. Please read through the entire message to validate the authenticity before publishing. We hold no liability in case of AI providing inaccurate information.
{% endhint %}
# AI Dialog Flow Block
The AI Dialog is a powerful feature that leverages ChatGPT to ask targeted questions and collect detailed client requirements. With this information, the AI can then recommend the best products and services to meet the client's needs.
It will help you increase efficiency in the sales process, improve customer satisfaction, and provide the ability to personalize recommendations based on the client's unique requirements.
{% hint style="info" %}
* New users have a free 14-day trial for all AI tools. 👉 [Try it Now!!!](https://app.chatalog.ai/signup?_gl=1*sf1e4z*_gcl_au*MTgwMTQyOTY0MS4xNjkwMTY1NDY0LjIxODI5Mzk4MS4xNjkxNTQ4NjIyLjE2OTE1NDg2MjE.&_ga=2.262018634.61542387.1691292315-2054968759.1664915439)
* AI Dialog is only available for the **Business Plan** and above.
{% endhint %}
### How to set up an AI Dialog?
You can find the AI Dialog in the chat flow.
#### Step 1: Set a keyword for triggering the flow.
#### Step 2: Write the system prompt.
In simple words, a system prompt is a set of instructions for ChatGPT. While ChatGPT possesses a vast amount of knowledge, it requires specific guidance on how to utilize that knowledge effectively to assist you. So you need to give concrete, detailed instructions.
{% content-ref url="/pages/3GJV05KCywLB66DStgrp" %}
[How to write good prompts for your AI Dialog?](/ai-tools/ai-dialog-flow-block/how-to-write-good-prompts-for-your-ai-dialog)
{% endcontent-ref %}
#### Step 3: Write the initial user prompt. (Optional)
It acts as the first message of the conversation with chatGPT, which provides the immediate context that the AI should be responding to. This field is optional. \
\
An example of an Initial user prompt for the AI Wine Sales Assistant:
*"Greet me and introduce yourself as AI Wine Sales Assistant."*
#### Step 4: Select the disclaimer.
#### Step 5: Set the End Conversation Condition.
Now we support three end conversation conditions: custom condition, only end when users click on any buttons, and timeout. You can only choose one of them to close your AI Dialog conversation. Please note that if the AI Dialog is not closed, you may not trigger other flows.
**Custom Condition**
You need to describe clearly when ChatGPT should consider that the conversation has ended.
Example for this field "Conversation ends when...":
Y*ou have gathered all the preferences from the customer regarding "wine type," "price range," "taste," and "other requirements." customers do not have further questions or inquiries.*
**Click on button**
You can set buttons. When users click on the button, the conversation will be ended.
**Timeout**
Additionally, you can choose timeout and set the duration. Remember to add a Message Block and set a timeout reminder for your customers. Your customers will receive this message after a timeout.
#### Step 6: Set the error message.
#### Step 7: Set whether to allow user input to trigger other flows.
We have added a new "***Required***" toggle for exiting the AI flow by triggering keywords.
If the toggle is **inactive**, when the client's input matches another flow's keywords, the conversation with AI will end, and the client will be directed to that flow. Please note that only specific keyword flows can be triggered; it will not trigger an "ANY KEYWORD" flow.
For example, when your client is in the AI customer service conversation, they ask about the delivery question first, and your AI CS assistant provides answers. Then the client inputs "check order," and "check order" is the keyword you set for another order checking flow, so the client's input triggers another flow, and they will be directed to the order checking flow immediately.
If the toggle is **active**, it means the AI flow is required. Therefore, even if the client's input matches keywords for other flows, they will remain in the AI flow.
#### Step 8: Save and activate your AI Dialog flow.
# How to write good prompts for your AI Dialog?
### What is prompt?
"Prompt" is a tool used for generating content, such as blog posts or social media captions, using artificial intelligence. It works by analyzing a given topic or keyword and generating suggestions for what to write based on that input.
### What is a good or bad prompt?
In order to better explain this concept, we will use wine sales as an example. Let's assume that we want to create an AI wine sales dialog.
#### Example of a bad prompt:
*“You are an AI Wine Sales Assistant. Ask customers about their wine requirements and give recommendations.”*
This prompt is considered inadequate because it lacks explicit instructions for the AI Wine Sales Assistant. Without clear guidance, the assistant may struggle to understand the desired actions and objectives. To improve the prompt, it is crucial to provide specific instructions on how the assistant should interact with customers, what information it should gather, and how it should provide wine recommendations based on those requirements.
#### Example of a good prompt:
You are a Wine Requirement Asking Bot, an automated service to understand what type of wine the users are looking for.
Treat me as your customer. Ask question by question. Add emojis to the conversation.
You first greet the customer, then asks what language do user prefer. Please talk in that language, even if they change their language afterward.
Then asks if the user is looking for red or white.
Then asks for the price range the user is looking for.
Then ask the user for any specific taste or flavor.
Finally, ask if the user has any other requirements.
After collecting the Wine Recommendation Bot. Now based on the user requirement, recommend three wines with the payment link to the users.
# AI Funnel Flow Block
{% hint style="info" %}
AI Funnel is only available for the **Business Plan** and above.
{% endhint %}
AI Funnel is an innovative flow block that enhances your ability to manage and respond to user queries efficiently. With AI Funnel, you can set custom prompts that allow our advanced artificial intelligence to classify incoming queries into specific categories. Based on this classification, the AI can trigger predefined flows to handle the situation appropriately.
### **How Does It Work?**
#### **Step 1: Access the AI Funnel Flow Block**
Navigate to the flow builder page and drag the AI funnel flow block to create your setup.
#### **Step 2: Create and Define Prompts**
Write clear, detailed instructions for how the AI should process incoming messages. Add new prompts by clicking the "+" button as needed.
#### **Step 3: Connect with Flows**
Link each prompt to its corresponding flow blocks.
To improve response accuracy and classification, you can fine-tune the prompts by adjusting keywords, adding more specific examples, and incorporating contextual cues.
# Create and Manage Bookings
The Booking feature allows your team to manage customer appointments directly within Chatalog. You can create booking items, collect booking information from customers, review booking records, and manage booking statuses from both the Booking page and the Messages Inbox.
{% hint style="info" %}
This is an add-on feature. Please contact your account manager if you would like to enable it for your organization.
{% endhint %}
Bookings can be created in two ways:
* Automatically through the AI Agent
* Manually by agents
## ⚙️ Configure Booking Items
Before creating bookings, you must first create a booking item.
Examples:
* Massage Service
* Consultation Session
* Event Registration
* Product Demo
### How to Create a Booking Item
1. Go to **Booking > Settings**
2. Click **Actions**
3. Select **Add New** to create a booking item
1. Enter:
* Name
* Description
* Required Fields
2. Click **OK**
### Required Field Types
You can define custom booking fields using the following field types:
| Type | Description | Examples |
| ------- | ------------------- | ------------------ |
| String | Text input | Customer Name |
| Number | Numeric input | Contact Number |
| Date | Date or date-time | Appointment Date |
| Boolean | True / False option | First-time Visitor |
***
## 🤖 Create Booking Automatically with AI Agent
The AI Agent can automatically collect booking information from customers and create bookings during conversations.
### Setup Steps
1. Open **Flow Builder**
2. Add an **AI Agent** block
3. Configure:
* Role
* Goal
* Completion Criteria
4. Under **Actions**, configure:
1. Set Custom Field (optional)
2. Set Label (optional)
3. Select Knowledge Base (optional)
4. Select a booking service
5. Connect with other flow blocks and save.
***
## 👤 Create Booking Manually
Agents can also manually create bookings directly from the Messages Inbox or the Booking management page.
### How to Create a Booking
1. Open a customer conversation
2. In the **Upcoming Bookings** section, click **Create**
3. Select a booking item
3. Fill in the booking information
4. Click **Save**
The booking will then appear in:
* Booking list
* Customer conversation sidebar
***
## 📅 Manage Bookings
Go to **Booking > Bookings** to review all booking records.
You can:
* Filter bookings by item
* View upcoming bookings
* Review booking status
* Open booking details
***
## ✅ Confirm or Cancel Bookings
Booking statuses can be updated either manually by agents or automatically by the system.
**Supported statuses:**
* **Pending** – The booking has been created and is awaiting confirmation.
* **Confirmed** – The booking has been confirmed by an agent. This status must be updated manually.
* **Cancelled** – The booking has been cancelled by an agent. This status must be updated manually.
* **Completed** – The booking was previously **Confirmed**, and the scheduled booking time has passed. This status is updated automatically by the system.
* **Expired** – The booking was previously **Pending**, and the scheduled booking time has passed without being confirmed. This status is updated automatically by the system.
### How to Update Booking Status
1. Open the booking record
2. Update the booking status
3. Save changes
This helps teams track appointment progress and customer confirmations.
***
## 💬 Booking Information in Messages Inbox
When a customer has an upcoming booking, the booking card will appear in the conversation sidebar.
Agents can:
* View booking details
* Review booking status
* Open the booking record
* Create additional bookings
This allows agents to manage conversations and appointments in one place.
***
## 📝 Additional Booking Information
Booking records support:
* Remarks
* Custom fields
* Additional booking metadata
This allows teams to store extra customer or appointment information when necessary.
# Send Booking Confirmation, Cancellation & Reminder Messages
Automatically send confirmation, cancellation, and reminder messages to customers for your booking items.
{% hint style="info" %}
This is an add-on feature. Please contact your account manager if you would like to enable it for your organization.
{% endhint %}
### Before You Begin
After creating a booking item, you can configure **Customer Messaging** and **Reminder Flows**.
**Navigation**
**Booking** → **Settings** → **Booking Items** → Select a booking item
***
## Customer Messaging
Customer Messaging allows you to automatically send messages when a booking status changes. These messages are optional and can be customized for each booking item.
### Confirmation Message
Sent automatically when a booking status is updated to **Confirmed**.
**Example**
> Your booking on {{date}} is confirmed. We look forward to seeing you!
### Cancellation Message
Sent automatically when a booking status is updated to **Cancelled**.
**Example**
> Your booking on {{date}} has been cancelled. If you have any questions, please contact us.
### Supported Variable
You can personalize your messages using the following variable:
| Variable | Description |
| ---------- | ----------------------------------- |
| `{{date}}` | Displays the booking date and time. |
**Example**
Message:
> Your booking on {{date}} is confirmed.
Customer receives:
> Your booking on Jul 15, 2026, 2:00 PM is confirmed.
> **Note:** Currently, Customer Messaging supports only the `{{date}}` variable.
***
## Reminder Flows
Reminder Flows allow you to automatically send reminder messages before a scheduled booking.
Unlike Customer Messaging, Reminder Flows are configured in **Flow Builder**, allowing you to build more flexible customer journeys.
With Reminder Flows, you can:
* Create a reminder flow for the booking item.
* Choose when reminders are sent before the booking time.
* Customize the reminder message.
* Connect reminder messages with other Flow Builder blocks to create more advanced workflows.
# Coupon
The Coupon feature allows you to create and distribute redeemable coupons directly through your chatbot flows. You can manage coupons from the E-commerce page and automatically send them to customers using the new **Distribute Coupon** flow block.
{% hint style="info" %}
This is an add-on feature. Please contact your account manager if you would like to enable it for your organization.
{% endhint %}
## Overview
With the Coupon feature, you can:
* Create and manage coupon campaigns
* Set coupon validity periods and redemption limits
* Customize the coupon redeem page
* Distribute coupons automatically through chatbot flows
* Track coupon redemption records
***
## Accessing the Coupon Feature
Go to: **E-commerce → Coupons**
From this page, you can:
* Create new coupons
* View existing coupons
* Check redemption records
* Configure the redeem page
***
## Create a Coupon
Click **Create Coupon** to add a new coupon.
### Required Fields
| Field | Description |
| ------------- | -------------------------------------------------------------------------------------------------------------------------------------- |
| Code | The coupon code customers will redeem. You can either let the system automatically generate the code or create a custom code manually. |
| Name | Coupon name |
| Active Period | Coupon validity period |
### Optional Fields
| Field | Description |
| ----------------------------- | ------------------------------------- |
| Overall Redemption Limit | Maximum total redemptions allowed |
| Per-customer Redemption Limit | Maximum redemption count per customer |
| Active | Enable or disable the coupon |
### Notes
* Coupons outside the active period cannot be redeemed.
* Disabled coupons cannot be distributed or redeemed.
* Redemption limits are checked automatically during redemption.
***
## Configure the Redeem Page
Each coupon can have a customizable redeem page shown to customers. You can click **View** on the list after creating a new one.
### Available Configurations
| Setting | Description |
| ------------------------------------------- | -------------------------------------------------------------- |
| Code on Page | Select how the coupon code is displayed |
| Redeem Button | Configure redeem button behavior |
| Button Label (When you set a redeem button) | Customize button text |
| Copy Code Button | Enable a copy coupon code button |
| Page Background | Customize background color |
| Brand Icon | Upload your brand logo |
| Campaign Image | Upload campaign banner/image |
| Terms and Conditions | Add the coupon usage rules, restrictions, and redemption terms |
### Redeem Page Preview
A mobile preview is available on the right side to help you review the customer experience before saving.
Click **Save Redeem Page** after configuration.
***
## Distribute Coupons in Flow Builder
You can automatically send coupons to customers using the new **Distribute Coupon** flow block.
### How to Use
1. Open **Flow Builder**
2. Add the **Distribute Coupon** block
3. Select a coupon
4. Configure the message content, button title, image URL, and fallback flows.
5. Connect with other flow blocks as needed
6. Save and publish the flow
### Configurable Content
| Field | Description |
| ---------------- | ------------------------------------------- |
| Coupon Selection | Choose which coupon to distribute |
| Message Content | Text message shown before coupon redemption |
| Button Title | Customize redeem button text |
| Image URL | Upload an image/banner |
***
## Flow Outcomes
The **Distribute Coupon** block supports different routing outcomes based on redemption results.
### Available Outcomes
| Outcome | Description |
| ------------------------- | ---------------------------------------------------------- |
| Coupon Expired | Triggered when the coupon validity period has ended |
| Customer Max Uses Reached | Triggered when the customer exceeds their redemption limit |
| Coupon Max Uses Reached | Triggered when the coupon reaches total redemption limit |
| Error | Triggered when redemption fails unexpectedly |
These outcomes can be connected to different follow-up flow blocks.
***
## View Redemption Records
You can monitor coupon usage from the redemption records page.
### Available Information
| Field | Description |
| ------------- | --------------------------- |
| Redemption ID | Unique redemption record ID |
| Customer ID | Customer identifier |
| Inbox ID | Inbox/channel identifier |
| Status | Redemption status |
| Redeemed At | Redemption timestamp |
# Post Auto Reply
Applicable only to Instagram and Facebook profiles
Post Auto Reply Page
When your Instagram or Facebook is connected, all your previous posts can be viewed here. If a post is missing, update your Instagram permissions on Chatalog’s homepage. See the [guide’s](https://docs.chatalog.ai/faqs) end (and screenshots) for ‘[Instagram Access](https://docs.chatalog.ai/platform-setup/instagram-connection-guide)’ settings.
# Post Auto Reply Setup
This feature is to reply users automatically when their comment on post fulfils the matching strategy as you designed.
They can be created from either of the three tabs: **All Posts**** , ****Post Bots**** or ****IG Live Bots.**
## Create a bot with a single post
### Click **All posts** to select **a single post** to set up an automatic reply.
Click **"+New Bot"** to create Bot
**Step 1,** give a name to the bot for your record. You may name it as a campaign name plus the created date for traceability.
**Step 2,** Click " Add Bot Rule"
**Step 3**, select one of the **Matching Strategy: Any content / Partial match / Contains all / Exact match**. **Partial match** is the most common, hence, the default option. Refer to their description as below:
**Any content**: all comment will match with the rule.
**Partial match**: comments that contain ANY keyword will match with the rule.
**Exact match**: comments that is exactly the same as any keyword will match with the rule.
**Contains all**: comments that contain all keywords will match with the rule.
**Step 4,** set up a set of keywords that you wish to trigger the auto reply. If you selected **Any content**, please skip this field to the next step.
**Step 5,** set up **Public reply**. The message in this field is sent to reply on the comment that fulfils the matching strategy. Use **AI Writer** to help you to writhe the Public reply.
**Step 6,** set up **Private reply**. The message in this field is sent to reply users with dm when their comment fulfils the matching strategy.
Creating a **Private Reply** can be in different formats, Including : Singel Message, Singel Image,Carousel.
## Private Reply in Single Message mode
**Step 1,** input message into the text field with maximum 1000 characters. You can also insert **emojis** in your message from the smile icon at the right of the text field.
**Step 2 ,** to insert an image. Switch mode to Single Image, Sending an image as Private reply will clear the Single Message mode, clean the text message and **Quick Reply**.
**Step 3,** click on the add button to create a **Quick Reply** option. A **Quick Reply** option is a button underneath the text message. You can create up to 13 **Quick Reply** options in total.
**Step 4,** for each created **Quick Reply** option, you can name the button at the left, and select the existing flow users go to upon clicking the button. Refer to[ **Flow**](https://docs.chatalog.ai/crm-quickstarts/basic-flowa) Quickstart for detailed [flow](https://docs.chatalog.ai/crm-quickstarts/basic-flowa) setup guide.
If you wish to set up the Private Reply as **carousel** instead of text with **Quick Reply** or image, i.e. scrollable cards, click "switch to carousel". Switch mode will clear the Single Message mode, clean the text message and **Quick Reply**.
## Private Reply in Carousel mode
A **Carousel** is a set of scrollable cards. Each card must have at least a title and any of the following elements: image, subtitle, button. You can create up to 11 cards for the **Carousel**. After adding the number of cards you need.
**Step 1,** click on the image area to upload an image.
**Step 2**, set up a title and optionally a subtitle below. Then you can add up to ***3 buttons*** with the plus sign button below the subtitle. Represents a button with its name and the flow that it connects with. Or represents a button with its name and the url that it connects with. By clicking the exchange icon at the right of the button name row, you can switch between **Go to flow** and **Go to url**.
If you need more cards, click the **" Add carousel +"** button. Optionally, click "switch to single message" mode if you don't want the **Private Reply** to be a **Carousel**.
Under private reply, you can see a **"Show advanced setting"** button. Click on it and you will see a label section. You can see all the existing labels here and you can select the labels for this bot rule. When a user's comment fulfils the matching strategy, one is tagged with the labels selected with the bot rule. With these labels, you can better understand and re-engage your customers in the future easily.
Follow **step 1** to "Hide advanced setting" if you do not need this setting. At the left, you can see all the existing labels. If none of the existing labels can represent this bot rule, you can create a new label with **Step 2**. Then, select a color below and add label with **Step 3.** Every label's name must be unique. When you successfully created a label, you can see it showing at the left. Select the label you need as **Step 4**. **Step 5**, see the row of labels you have selected.
After creating Bot Rule
**Step 1,** you can decide when to launch the Bot. Choose "Any Time" if you wish to launch it immediately. Otherwise, choose "Custom Time" to specify the time you wish to launch.
**Step 2,** decide whether to switch users' conversation status to **Bot** or **Open** with . By default it is **Bot**. If you want to engage with users manually instead of bot handling their reply after they have received the reply, choose **Open**.
**Step 3,** click Create Bot to apply the bot.
## Create or manage all bots
You can view all bots by selecting **"Post Bots"** tab. Click the plus icon if you want to create a new bot with Step 1. You can also view, edit, or delete the existing bots with Step 2.
If you create a bot from "Post Bots" tab, you can select post to attach the Bot With **"SELECT POST",** you can select one to many posts to apply the Bot.
If you want the Bot apply to *all posts* of your account, choose **"APPLY TO ALL"**
can select one to many posts to apply the Bot.
## Create IG Live Bot

In "Bot" section, you can find "IG Live Bot" tab. Creating an IG Live Bot is largely the same as Post Bot as explained above, where you can set up keyword matching strategy and auto reply, as well as its active time. However, due to the API limitation, only private reply is allowed and it is time-based instead of post-based.
{% hint style="info" %}
To avoid message spamming, each rule of Post Bot and IG Live Bot only triggers once to each user. For example, when a user repeat the message on IG Live, if criteria matched, the user will receive the auto reply once only.
{% endhint %}
# Post Auto Reply Setup - Multiple
Before setup, ensure that at least one bot is created for use.
First, press ‘Edit’ to display the following page.
Click the ' Select Post '
Select the post you need
After selection, the post will turned to grey.
Remember to press the ‘Save’ button at this time.
Decide to set the user conversation status to Bot or Open. The default option is Bot.
If you prefer to handle customer responses manually instead of automatic replies by a bot, you can choose Open.
If you want to run the Bot at specific times, you can press the custom time button.
Click to select the time range
After completion, pressing ‘Save’ will automatically execute the bot according to the rules you have set.
{% hint style="info" %}
Selecting multiple or all posts for the auto-reply bot will trigger a single automatic response to the first comment on each post. If the same bot rule is set for multiple or all posts, users will get a reply for each comment they make under posts with that rule. (For instance, two comments on different posts will result in two replies).
{% endhint %}
# Manage The Bot
How to manage the bot
You can view all bots through the ‘Post Bots’ tab. To add a new bot, **step 1**: click the plus icon. **Step 2**: you can also view, modify, or delete existing bots
When creating a bot from the ‘Post Bots’ tab, an additional line appears to select the posts to apply this bot to. By selecting ‘Choose Posts,’ you can apply the bot to one or multiple posts. Selecting ‘Apply to All’ will apply the bot to all posts.
You may select your posts to attach the bot
# Create an IG Live Bot
How to Create an IG Live Bot
In the Bot section, you can find the IG Live Bot tab. As mentioned above, setting up an IG Live Bot is roughly the same as setting up a Post Bot. You can set up keyword matching strategies and automatic replies, as well as their effective times.
{% hint style="info" %}
However, due to API limitations, only private replies are allowed. Additionally, you only need to set the effective times without having to choose which posts to apply it to. To prevent information overload, each rule of the Post Bot and IG Live Bot will only trigger once for a user. For example, if a user repeats the same message during an IG Live, assuming it meets the matching conditions, the user will only receive that automatic reply once.
{% endhint %}
# Analytics Page
{% hint style="info" %}
The analytics page is only for the admin and owner role users.
{% endhint %}
### Basic Channel Info
* **Active Sessions**: A conversation session is still considered "active" if it has been resolved for less than 24 hours.
* **Number of Contacts**: The total count of unique customers who have interacted with your chatbot or agents. Each customer is counted once.
* **Messages Sent:** The total number of outbound messages your chatbot or agents have sent to customers within the past 7 days.
* **Messages Received**: The total number of inbound messages received from customers within the past 7 days.
You can select a certain inbox and view the data on the top drop-down menu.
### Messages
* **Agent Sent**: The total number of messages sent by human agents during the selected time period.
* **Bot Sent**: The total number of messages automatically sent by the chatbot during the selected time period.
* **Broadcast Sent**: The total number of broadcasts sent to customers during the selected time period.
* **Received**: The total number of inbound messages received from customers during the selected time period.
### Conversations
* **Active Sessions**: A conversation session is still considered "active" if it has been resolved for less than 24 hours. You can check the number of unassigned/assigned/resolved active conversation sessions here.
* **New Incoming Sessions**: A new session is created when a new customer texts you or when an existing customer texts you after the previous session has ended.
### Contacts
* **New Contacts**: Customers who have never messaged you before.
* **Active Customers**: Customers currently engaged in an ongoing conversation session.
* **Idle Customers**: Customers who have messaged you in the past but whose conversation sessions have ended.
### Performance
#### View by Agent
You can view the following data for a specific agent:
* **Active Sessions**: The number of active sessions for this agent at the moment.
* **Times Assigned**: The number of conversations assigned to this agent during the last 7 days.
* **Messages Sent**: The number of messages this agent sent during the last 7 days.
* **Response Time**: The average time it takes for this agent to first reply to customers during the last 7 days.
You can also click on any specific agent to view detailed charts of these metrics. And click the arrow to switch between different chart views.
#### View by Team
You can view the following data for a specific team or all members in the team:
* **Active Sessions**: The number of active sessions for this team/all members at the moment.
* **Times Assigned**: The number of conversations assigned to this team/all members during the last 7 days.
* **Messages Sent**: The number of messages this team/all members sent during the last 7 days.
You can also click on any specific team to view detailed charts of these metrics. And click the arrow to switch between different chart views.
### Chat Flows
* **Flows Triggered**: The total number of flows that have been triggered during the selected time period.
* **Number of Times Triggered**: The count of how many times the flows have been triggered during the selected time period.
* **Popular Flows**: The flows that were triggered the most within the selected time period, showing which flows are most frequently used.
### Payment
* **Credit Usage:** The cost (in USD) of WhatsApp template messages sent, broken down by template category (e.g., Marketing, Utility, Authentication, Other).
* **Total Credits Used:** The total amount of credits spent on WhatsApp template messages within the selected time period.
* **Balance:** The remaining credits available in your account after deducting usage. This is the amount you can continue to spend on sending WhatsApp template messages.
* **Usage History:** A day-by-day record of credit consumption, showing how many credits were used (if any) on each date. This helps you track when and how credits are being spent.
### Feature Usage
* **Usage Count for AI Tool - AI Writer/Doc Reply:** The count of usage for AI Tool - AI Writer or AI Tool - Doc Reply feature during the selected time period.
* **Average Accuracy:** This figure is calculated based on the editing distance between the AI's suggested reply and the agent's final sent reply. If the user utilized the translation function in Doc Reply during this process, it will be excluded from the calculation.
### Select Time Period
You can select the time from the time selection drop-down menu. Now we support
* Last 7 days
* Last 15 days
* Last 30 days
* Custom Range (Max 90 days)
### Export Report
You can click the "Export" icon to export the data of the current page in your selected time period.
# Upgrade Plan
We offer different plans that meet your business needs. If your current plan is insufficient for your business, you can click on the button "Upgrade Plan" on the top right.
We offer Free, Business, and Enterprise plans. If you are free plans, you can click "Upgrade Plan" to Business plans. If you have a high usage or you have additional requirements beyond the current plans can offer, please click "[Contact Us](https://api.whatsapp.com/send?phone=85254854684\&text=Upgrade%20to%20Enterprise)". Our team will follow up on your case.
After clicking "Upgrade Plan", you can see the available plans, billing period, and add-ons. We suggest you select annual billing period to enjoy a discounted price averaged by month.。Add-ons include user and contact quota. User means the number of user accounts that you can add to manage your social channels. Contact means the total number of contacts accumulated from all your connected channels.
When you have selected all the items that you need, you can fill in your credit card information and proceed to pay and upgrade.
# Account Details
You can manage and update your profile and password in Account Details, as well as reviewing your plan usage.
## Managing Profile
In Profile section, you can view your icon image, first name, last name, login email, user id, account id, and organization id. Icon image, first name and last name are the editable information.
After clicking Edit button, you can reupload your icon image or edit your name. Click save to apply changes.
## chatalog Plan
You can view your current payment plan, contact limit, user limit, and number of contacts. If you need more quota for the above, please click "Upgrade Plan" in the top bar.
## Update Password
You only need to input old password, and input new password and re-enter to confirm. Click Update to apply your new password.
---
[Next Page](/llms-full.txt/1)

 Copy and paste the following script into the ***Console*** to check your browser timezone.
```
Intl.DateTimeFormat().resolvedOptions().timeZone
```

Check if your browser timezone is consistent with your computer system.
**Step 2: Fix the browser timezone issue.**
Click on the three-dotted menu -> Click on ***More*** ***tools** ->* ***Sensors**.*

Select the location according to your current situation, making the browser timezone consistent with your computer system.

Copy and paste the following script into the ***Console*** to check your browser timezone.
```
Intl.DateTimeFormat().resolvedOptions().timeZone
```

Check if your browser timezone is consistent with your computer system.
**Step 2: Fix the browser timezone issue.**
Click on the three-dotted menu -> Click on ***More*** ***tools** ->* ***Sensors**.*

Select the location according to your current situation, making the browser timezone consistent with your computer system.


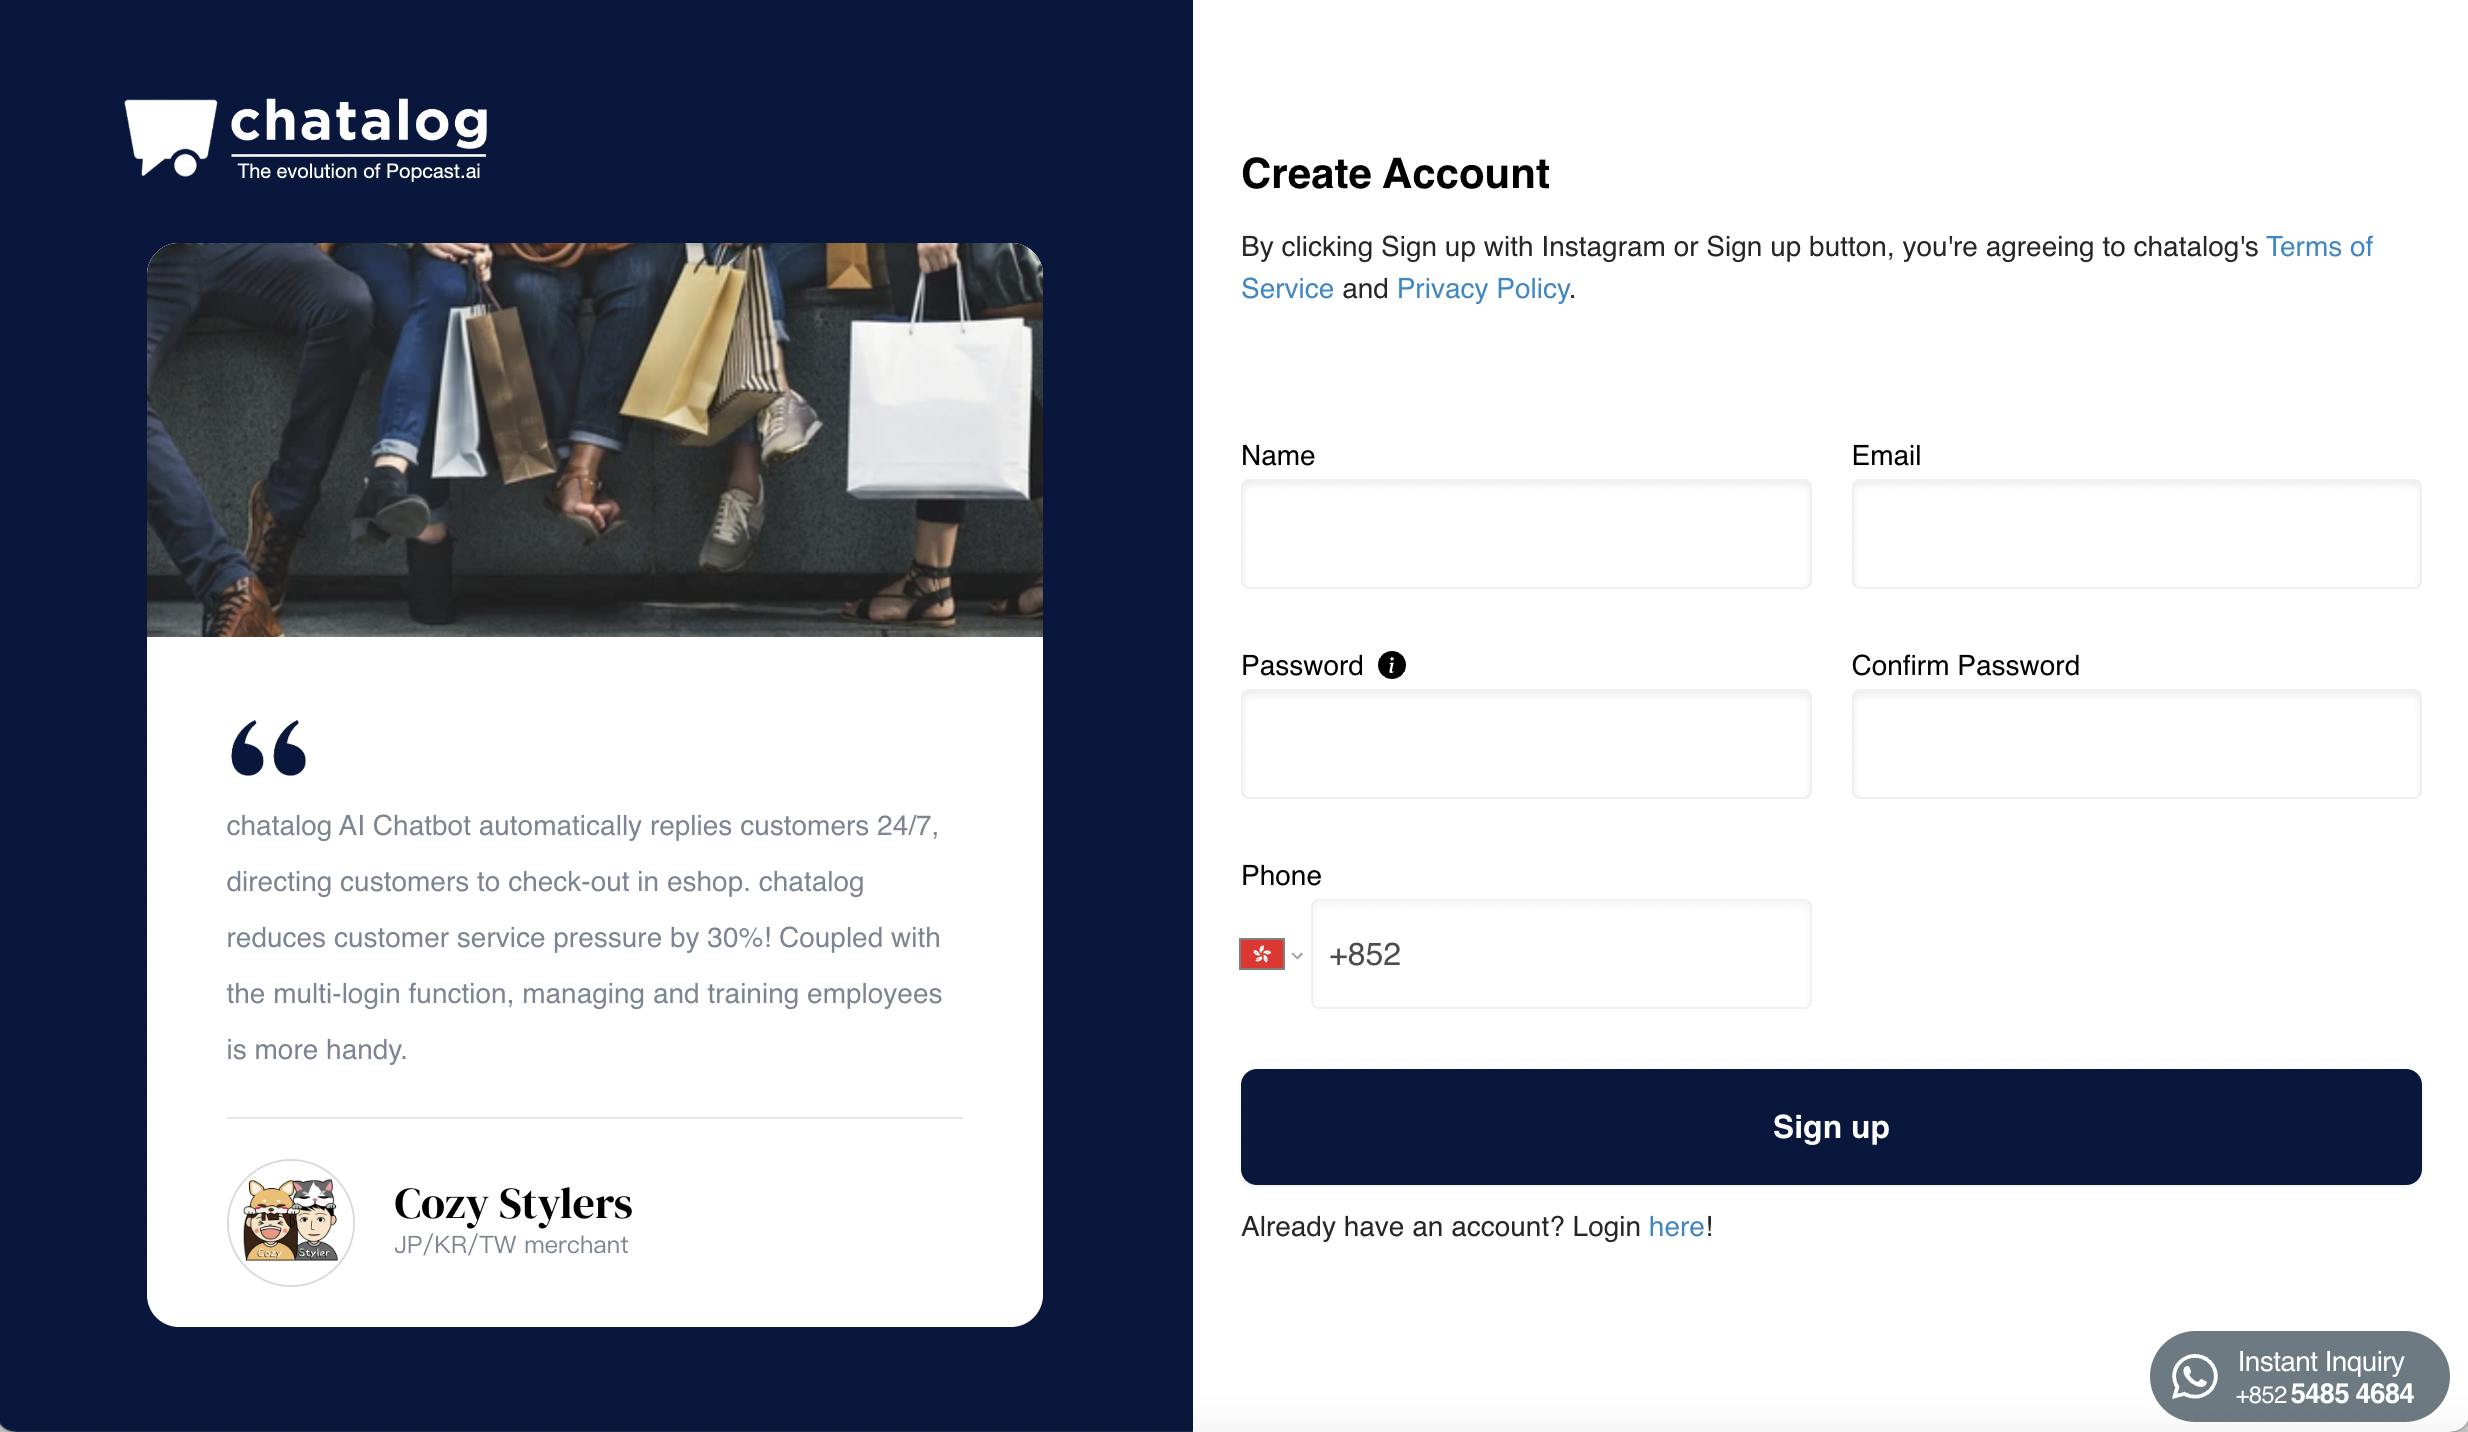

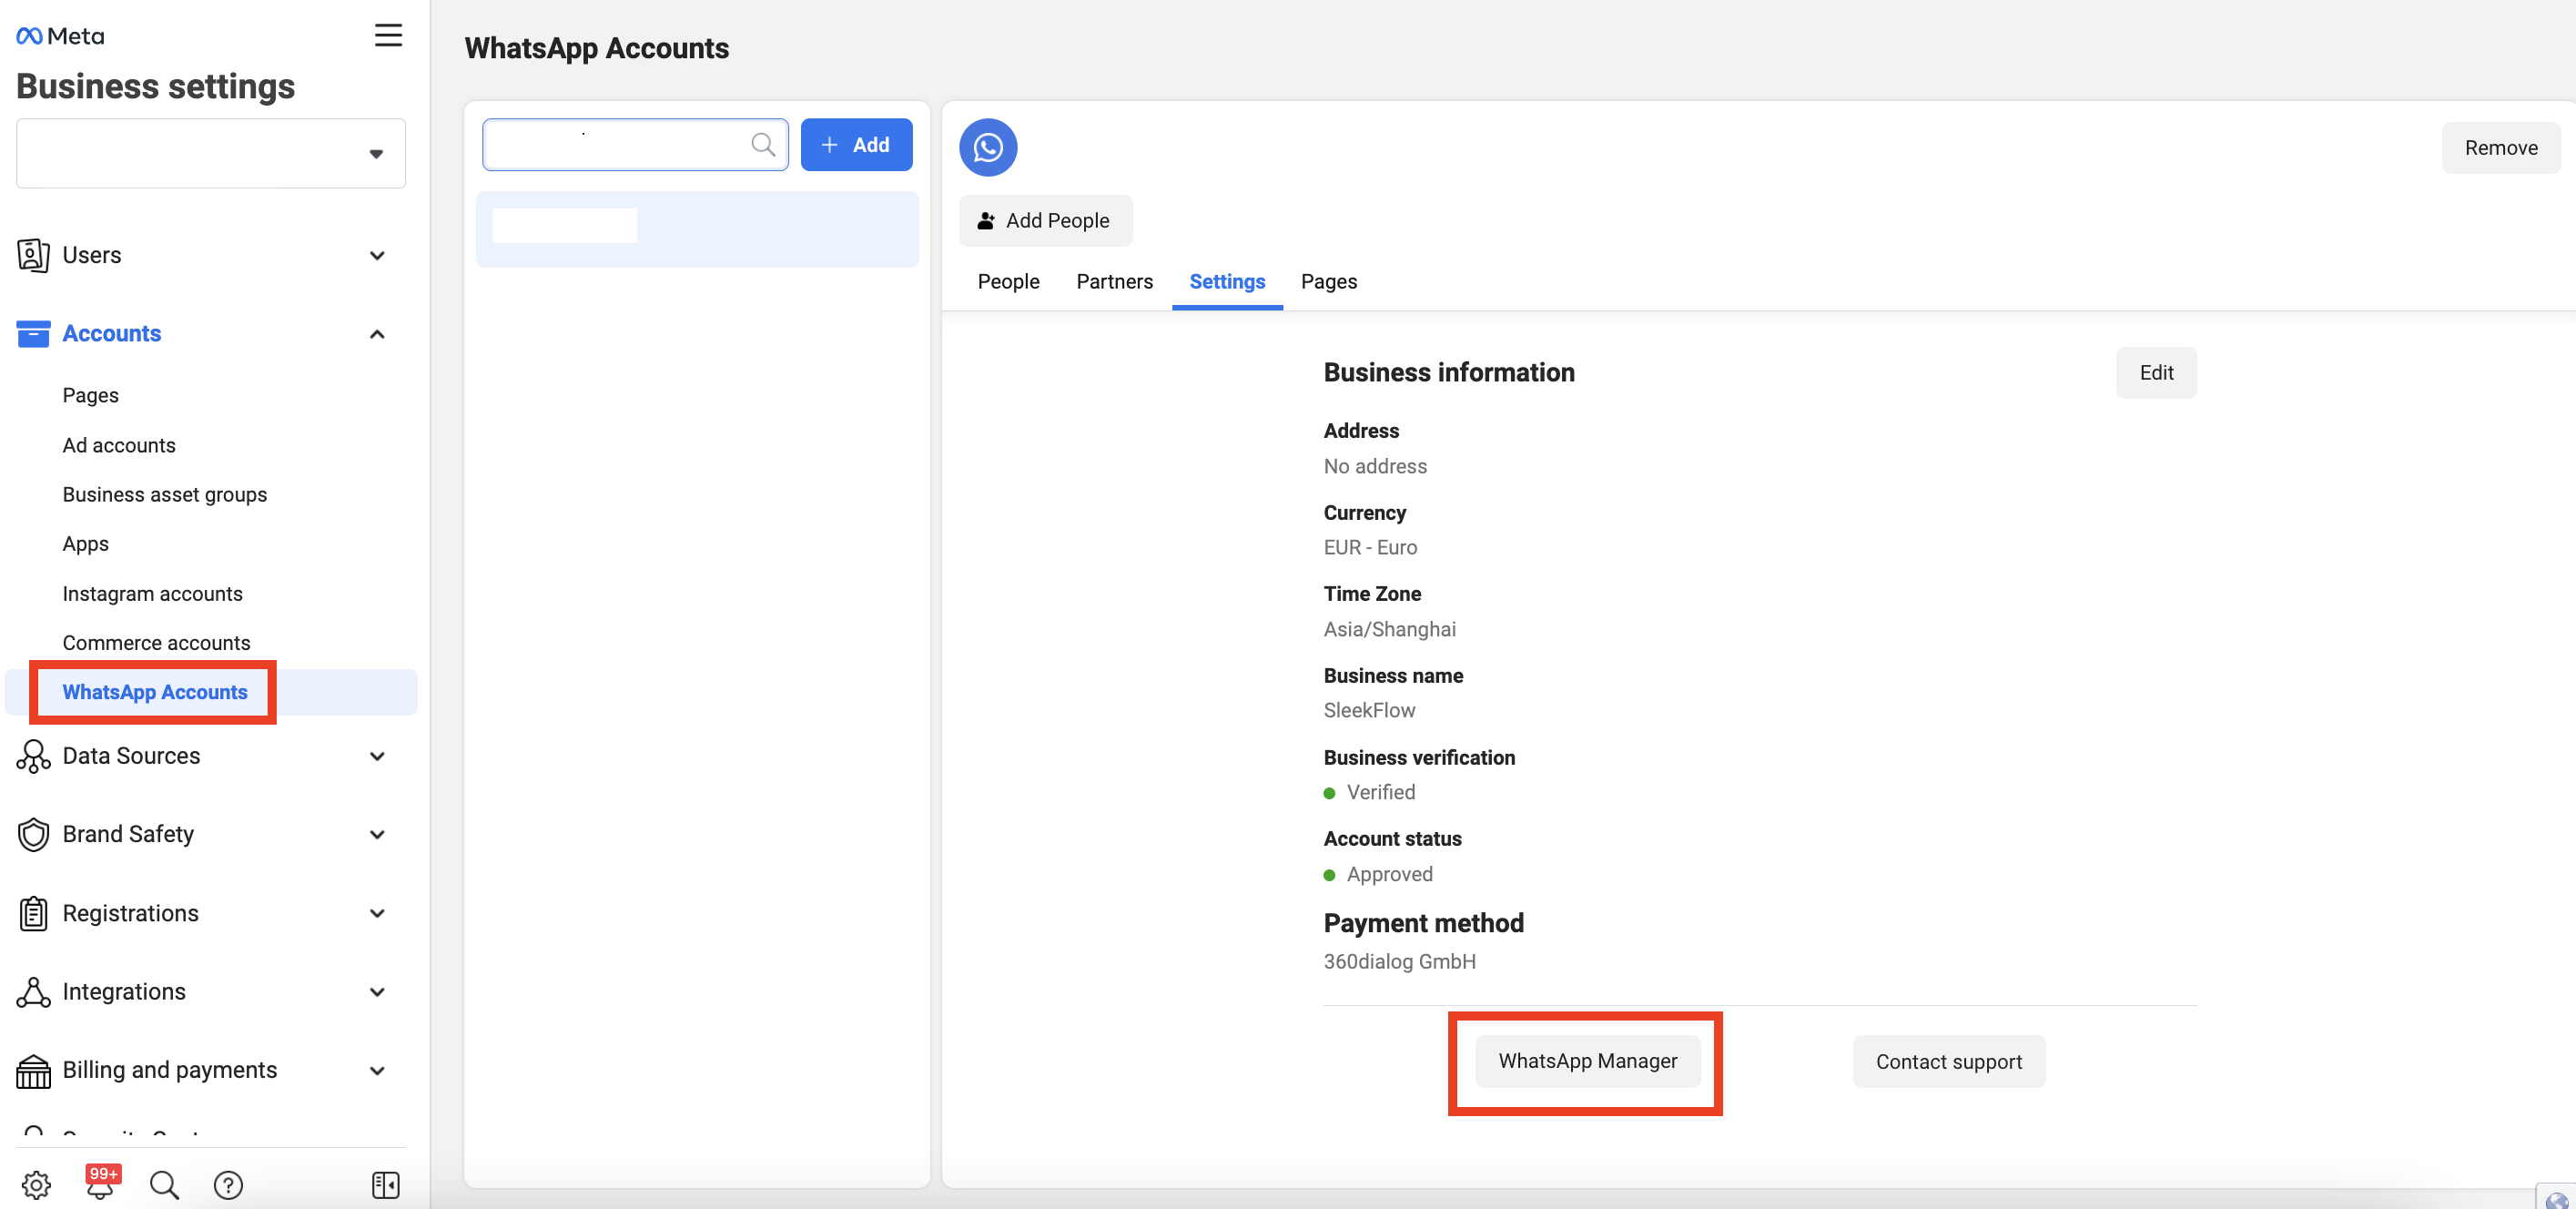
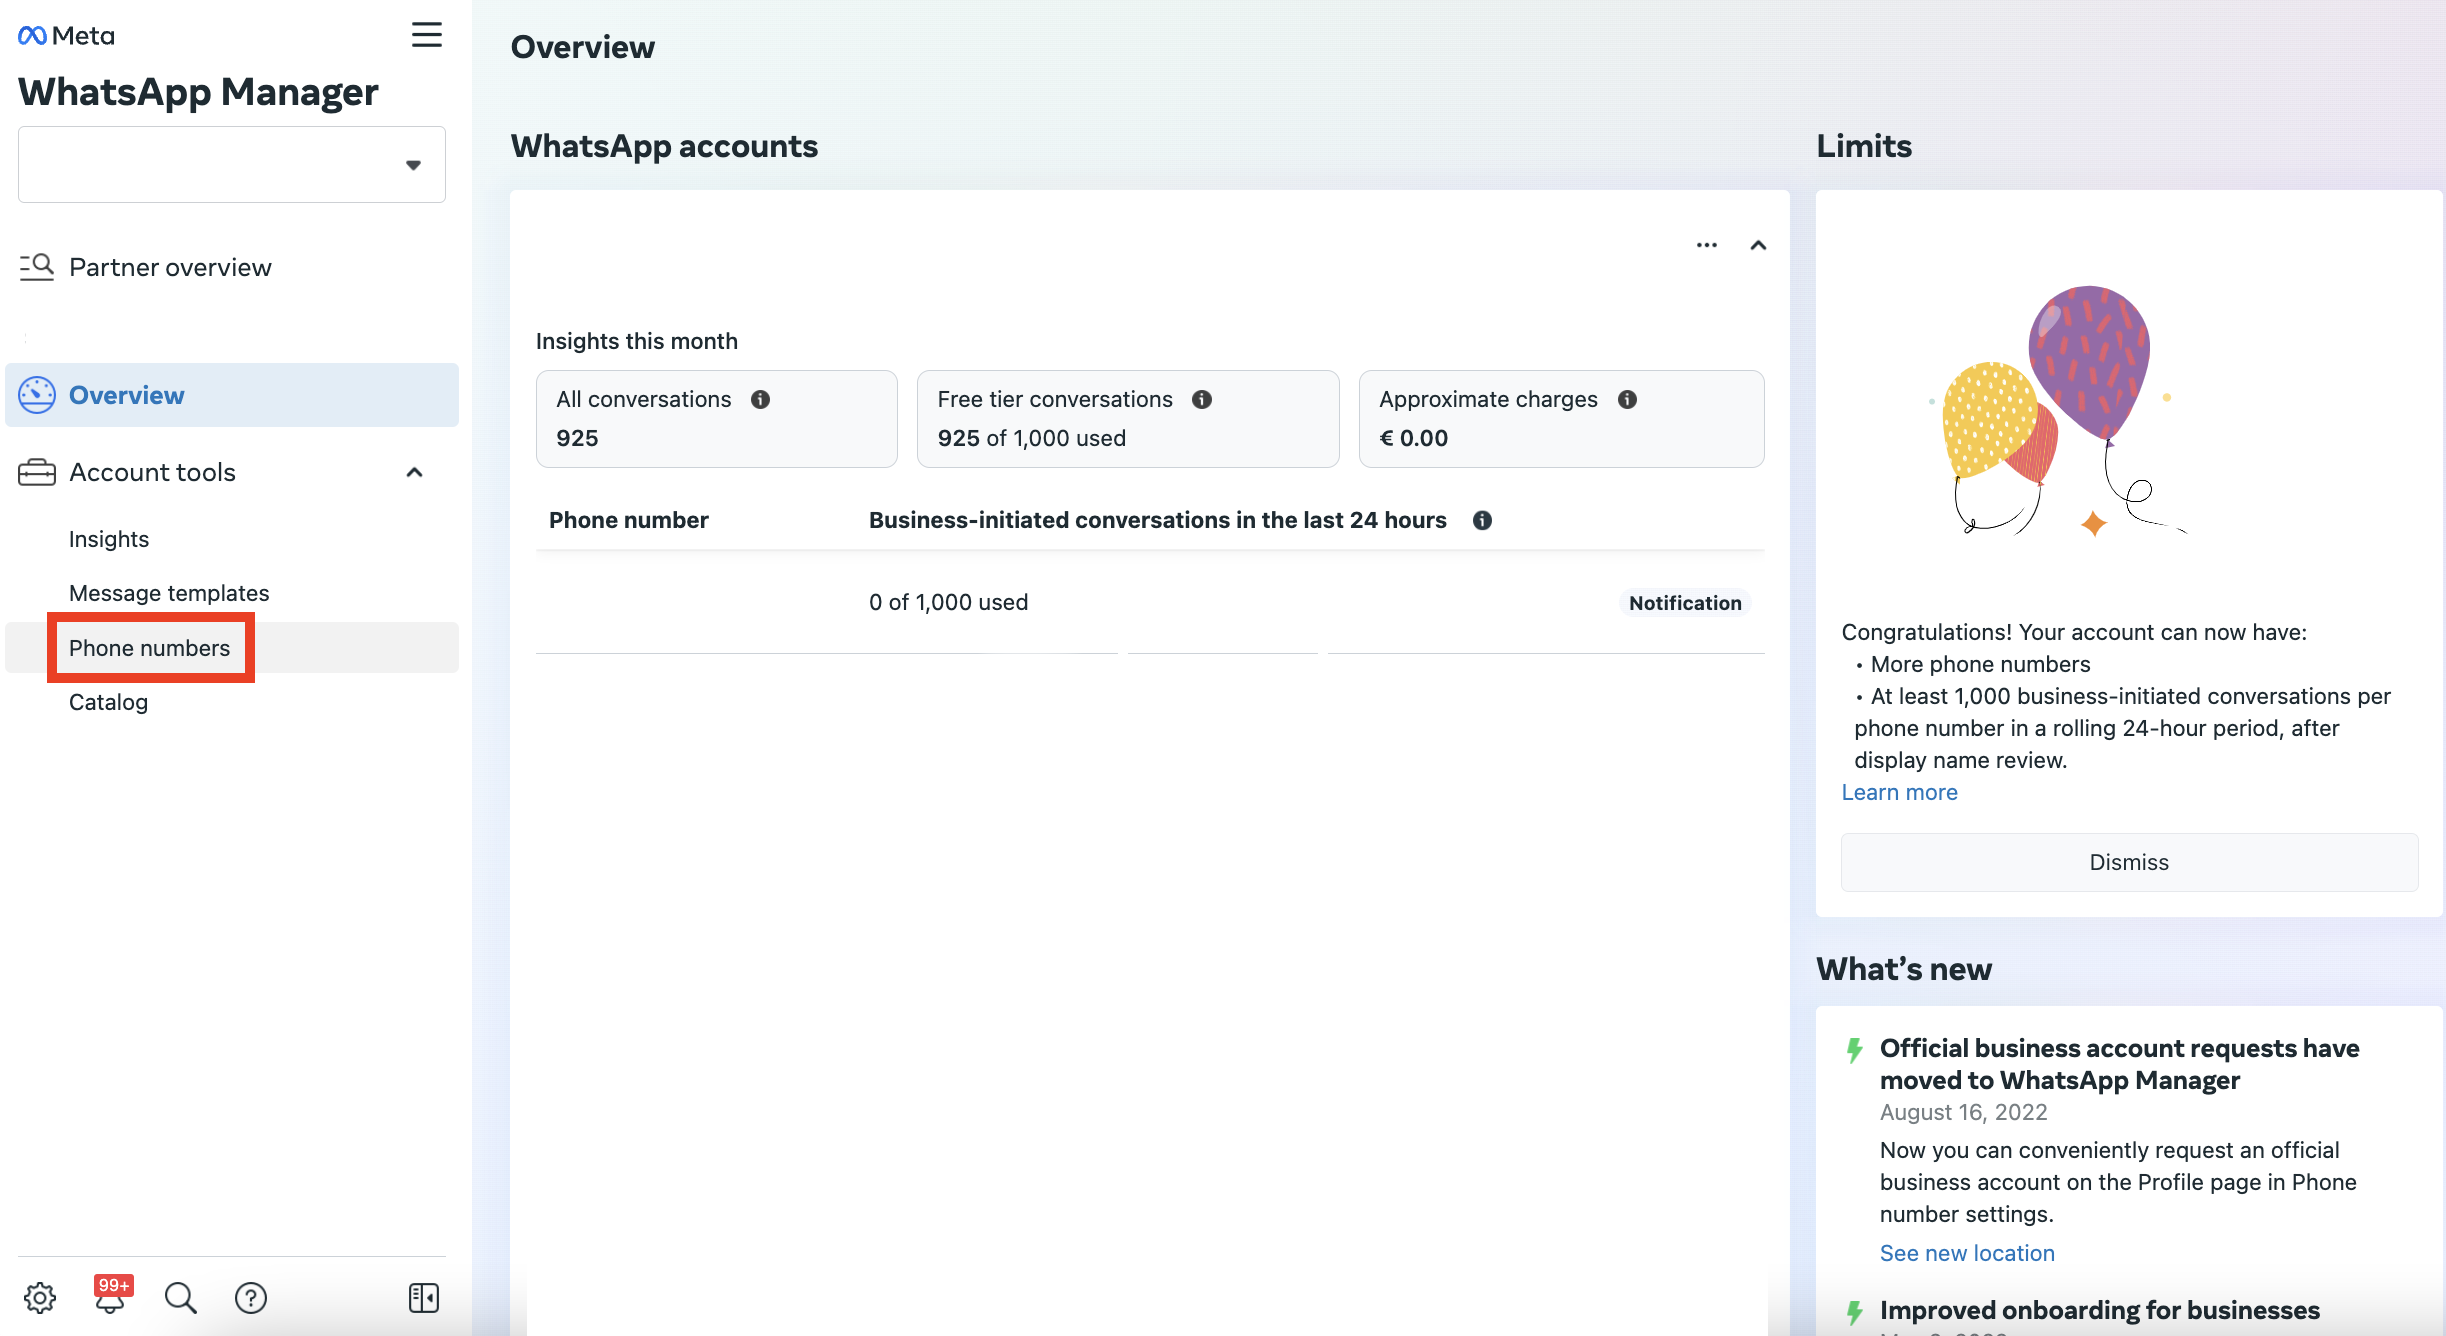
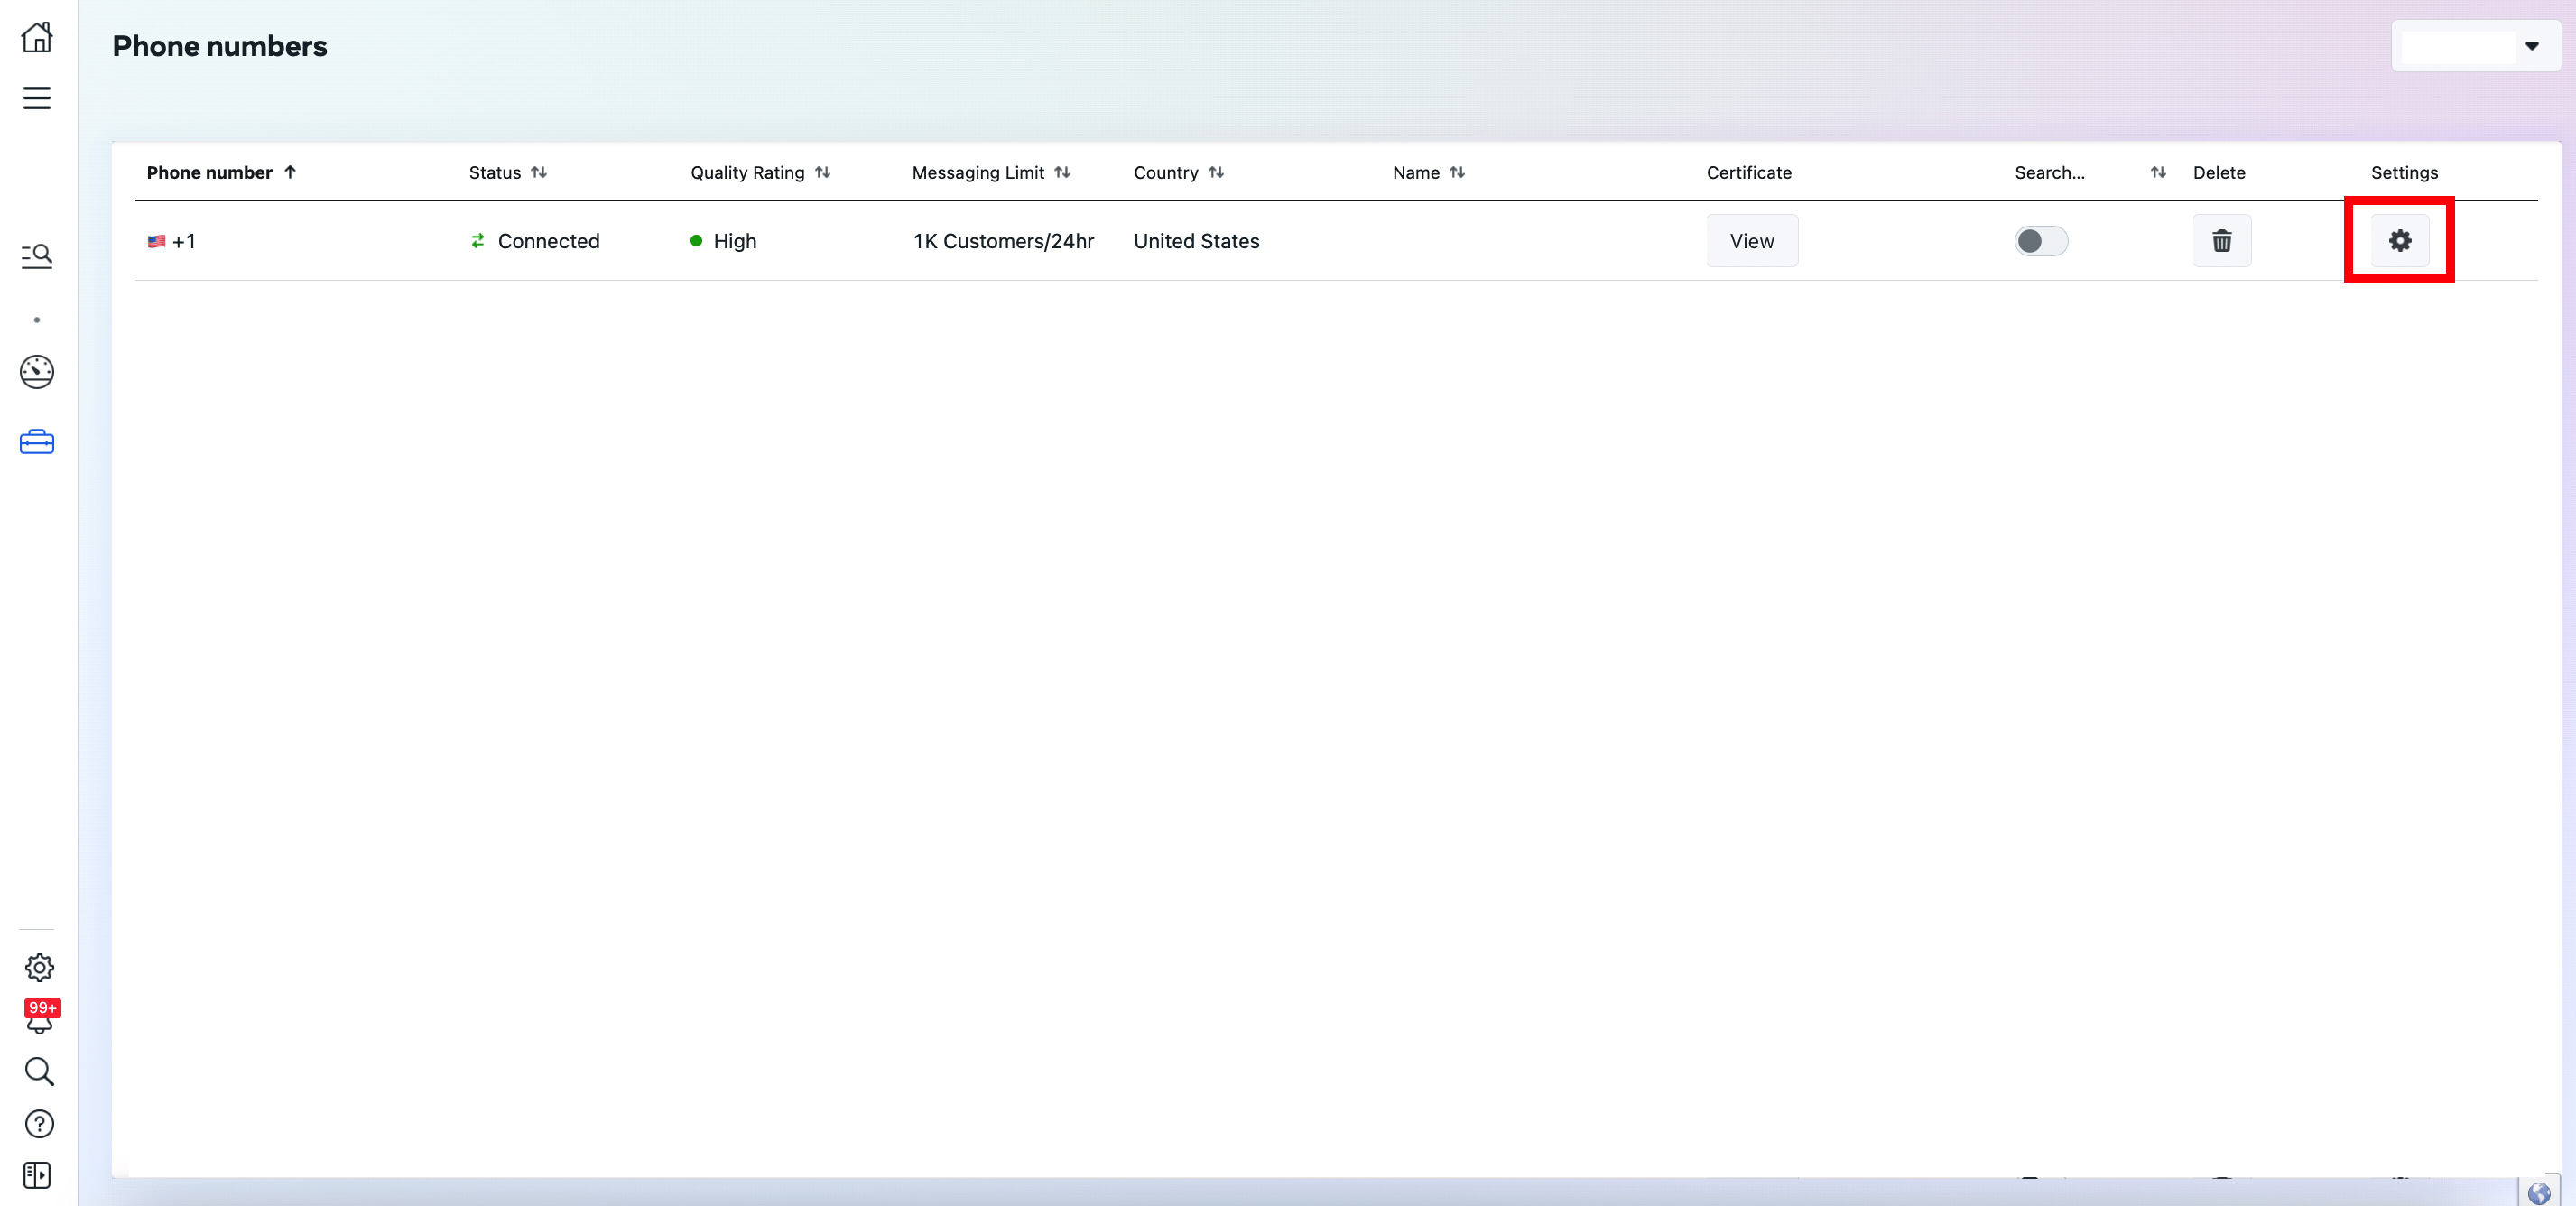
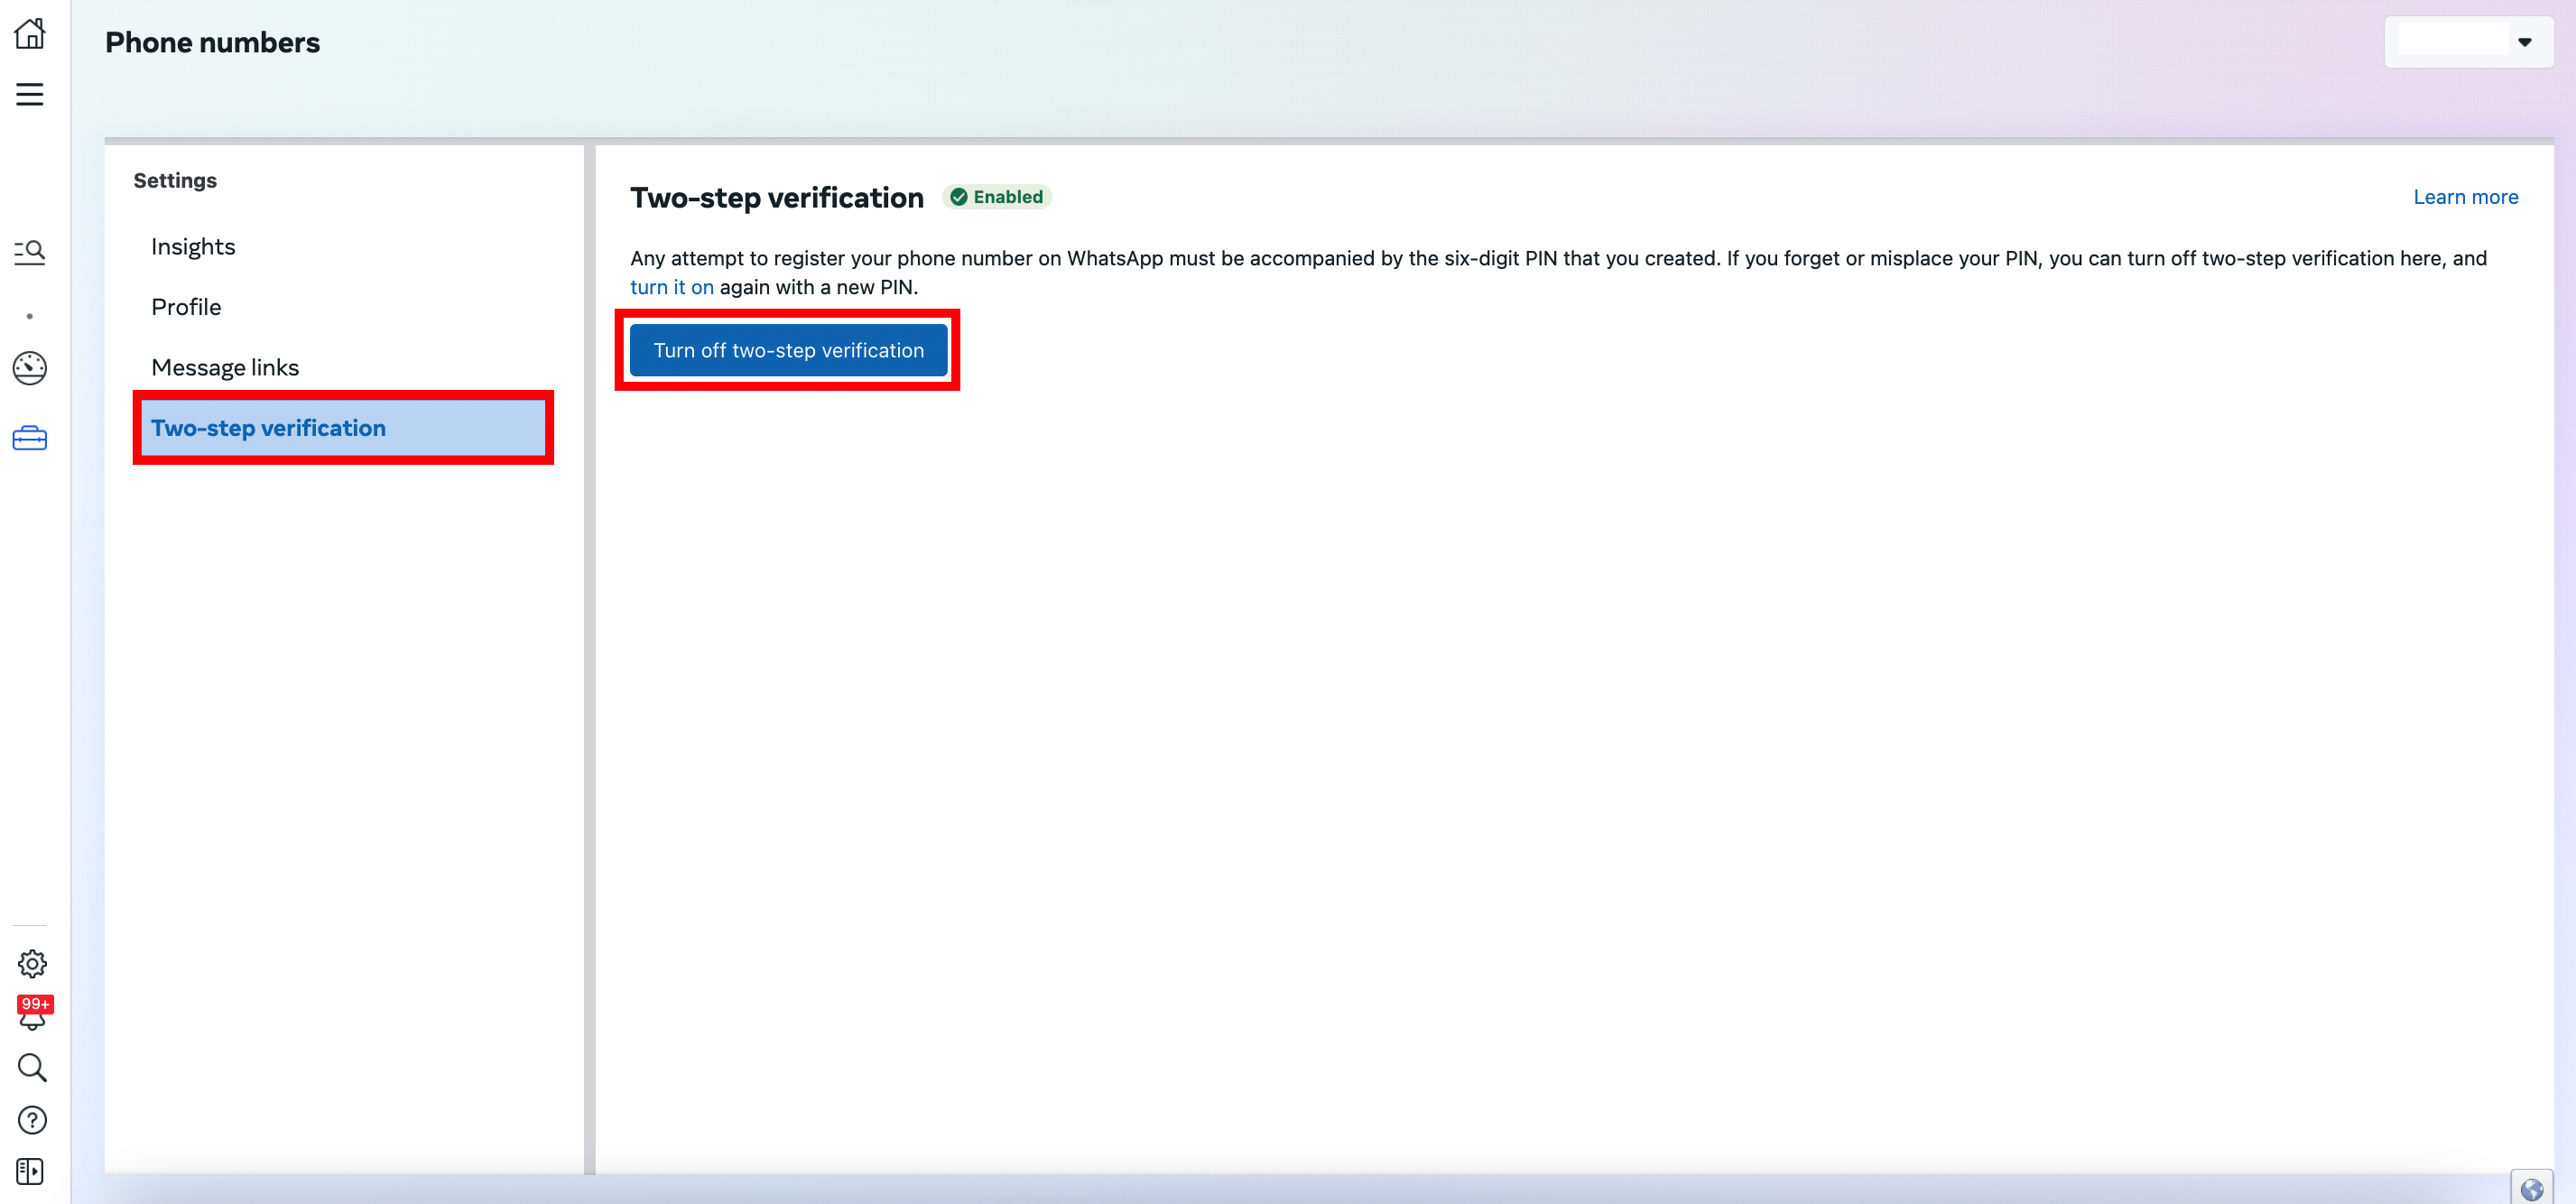
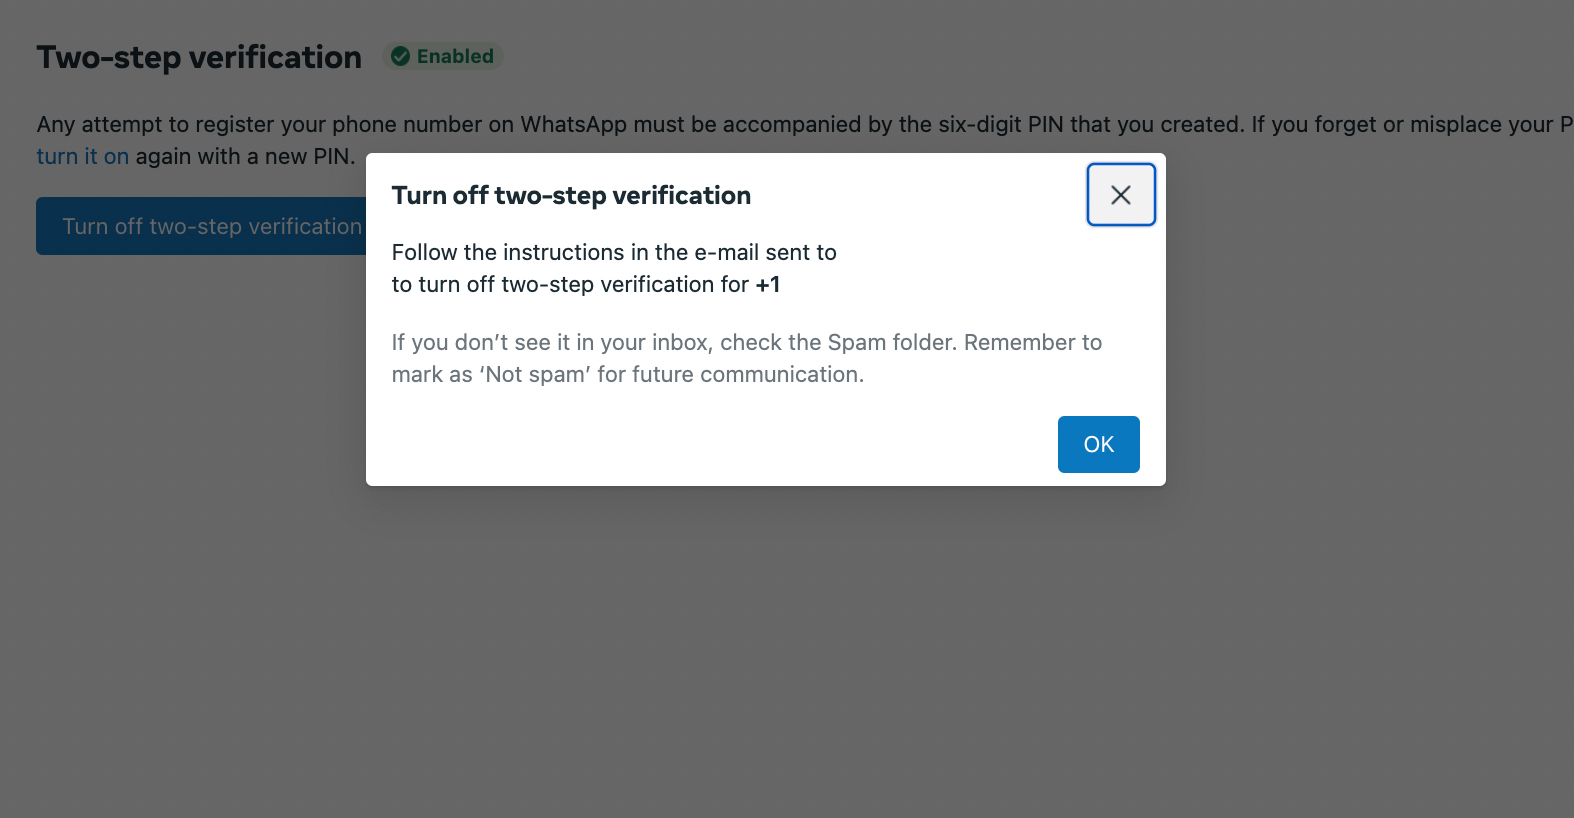
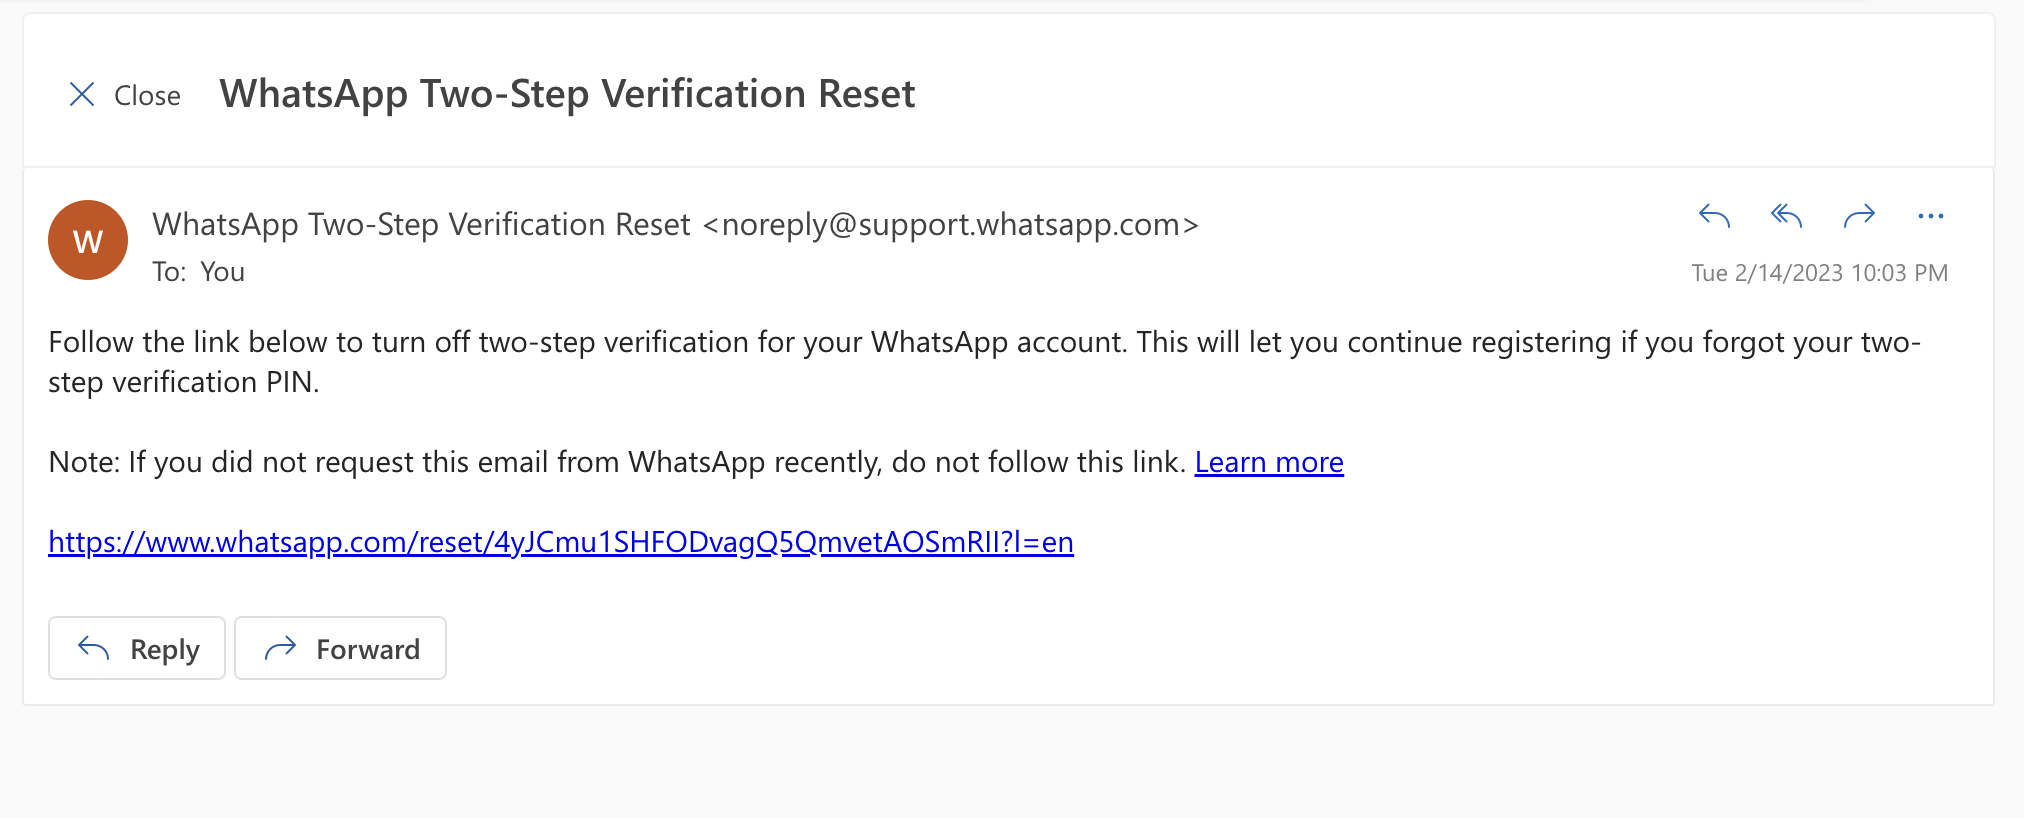


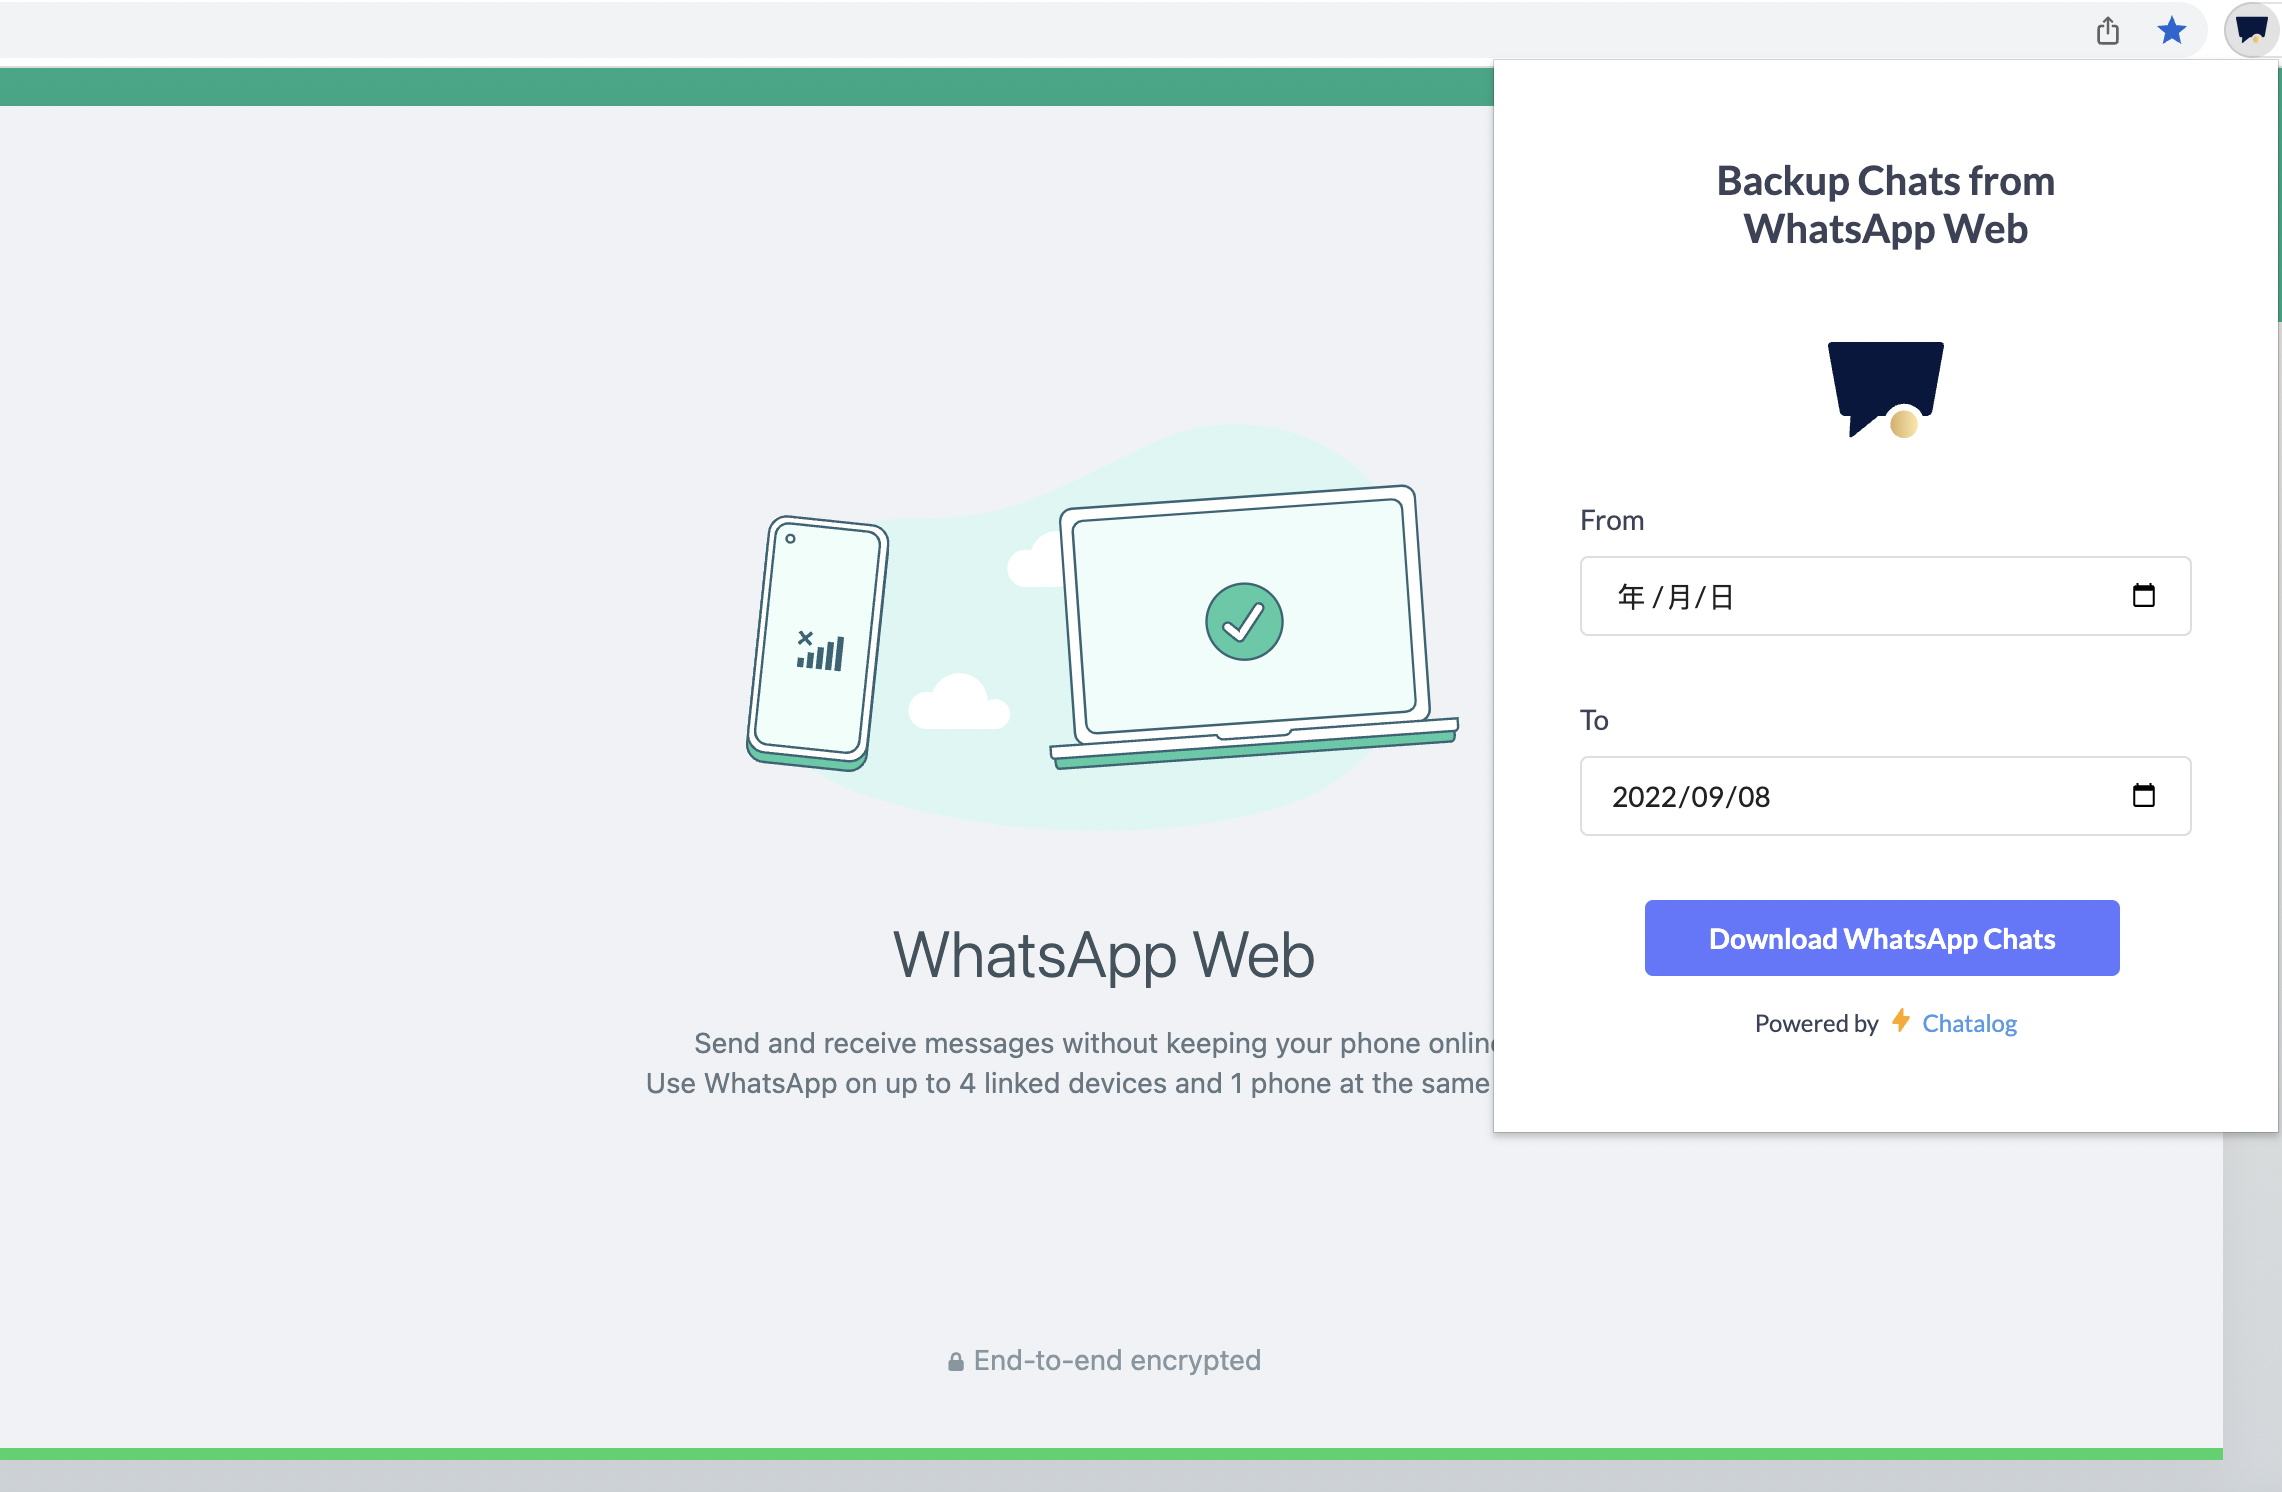
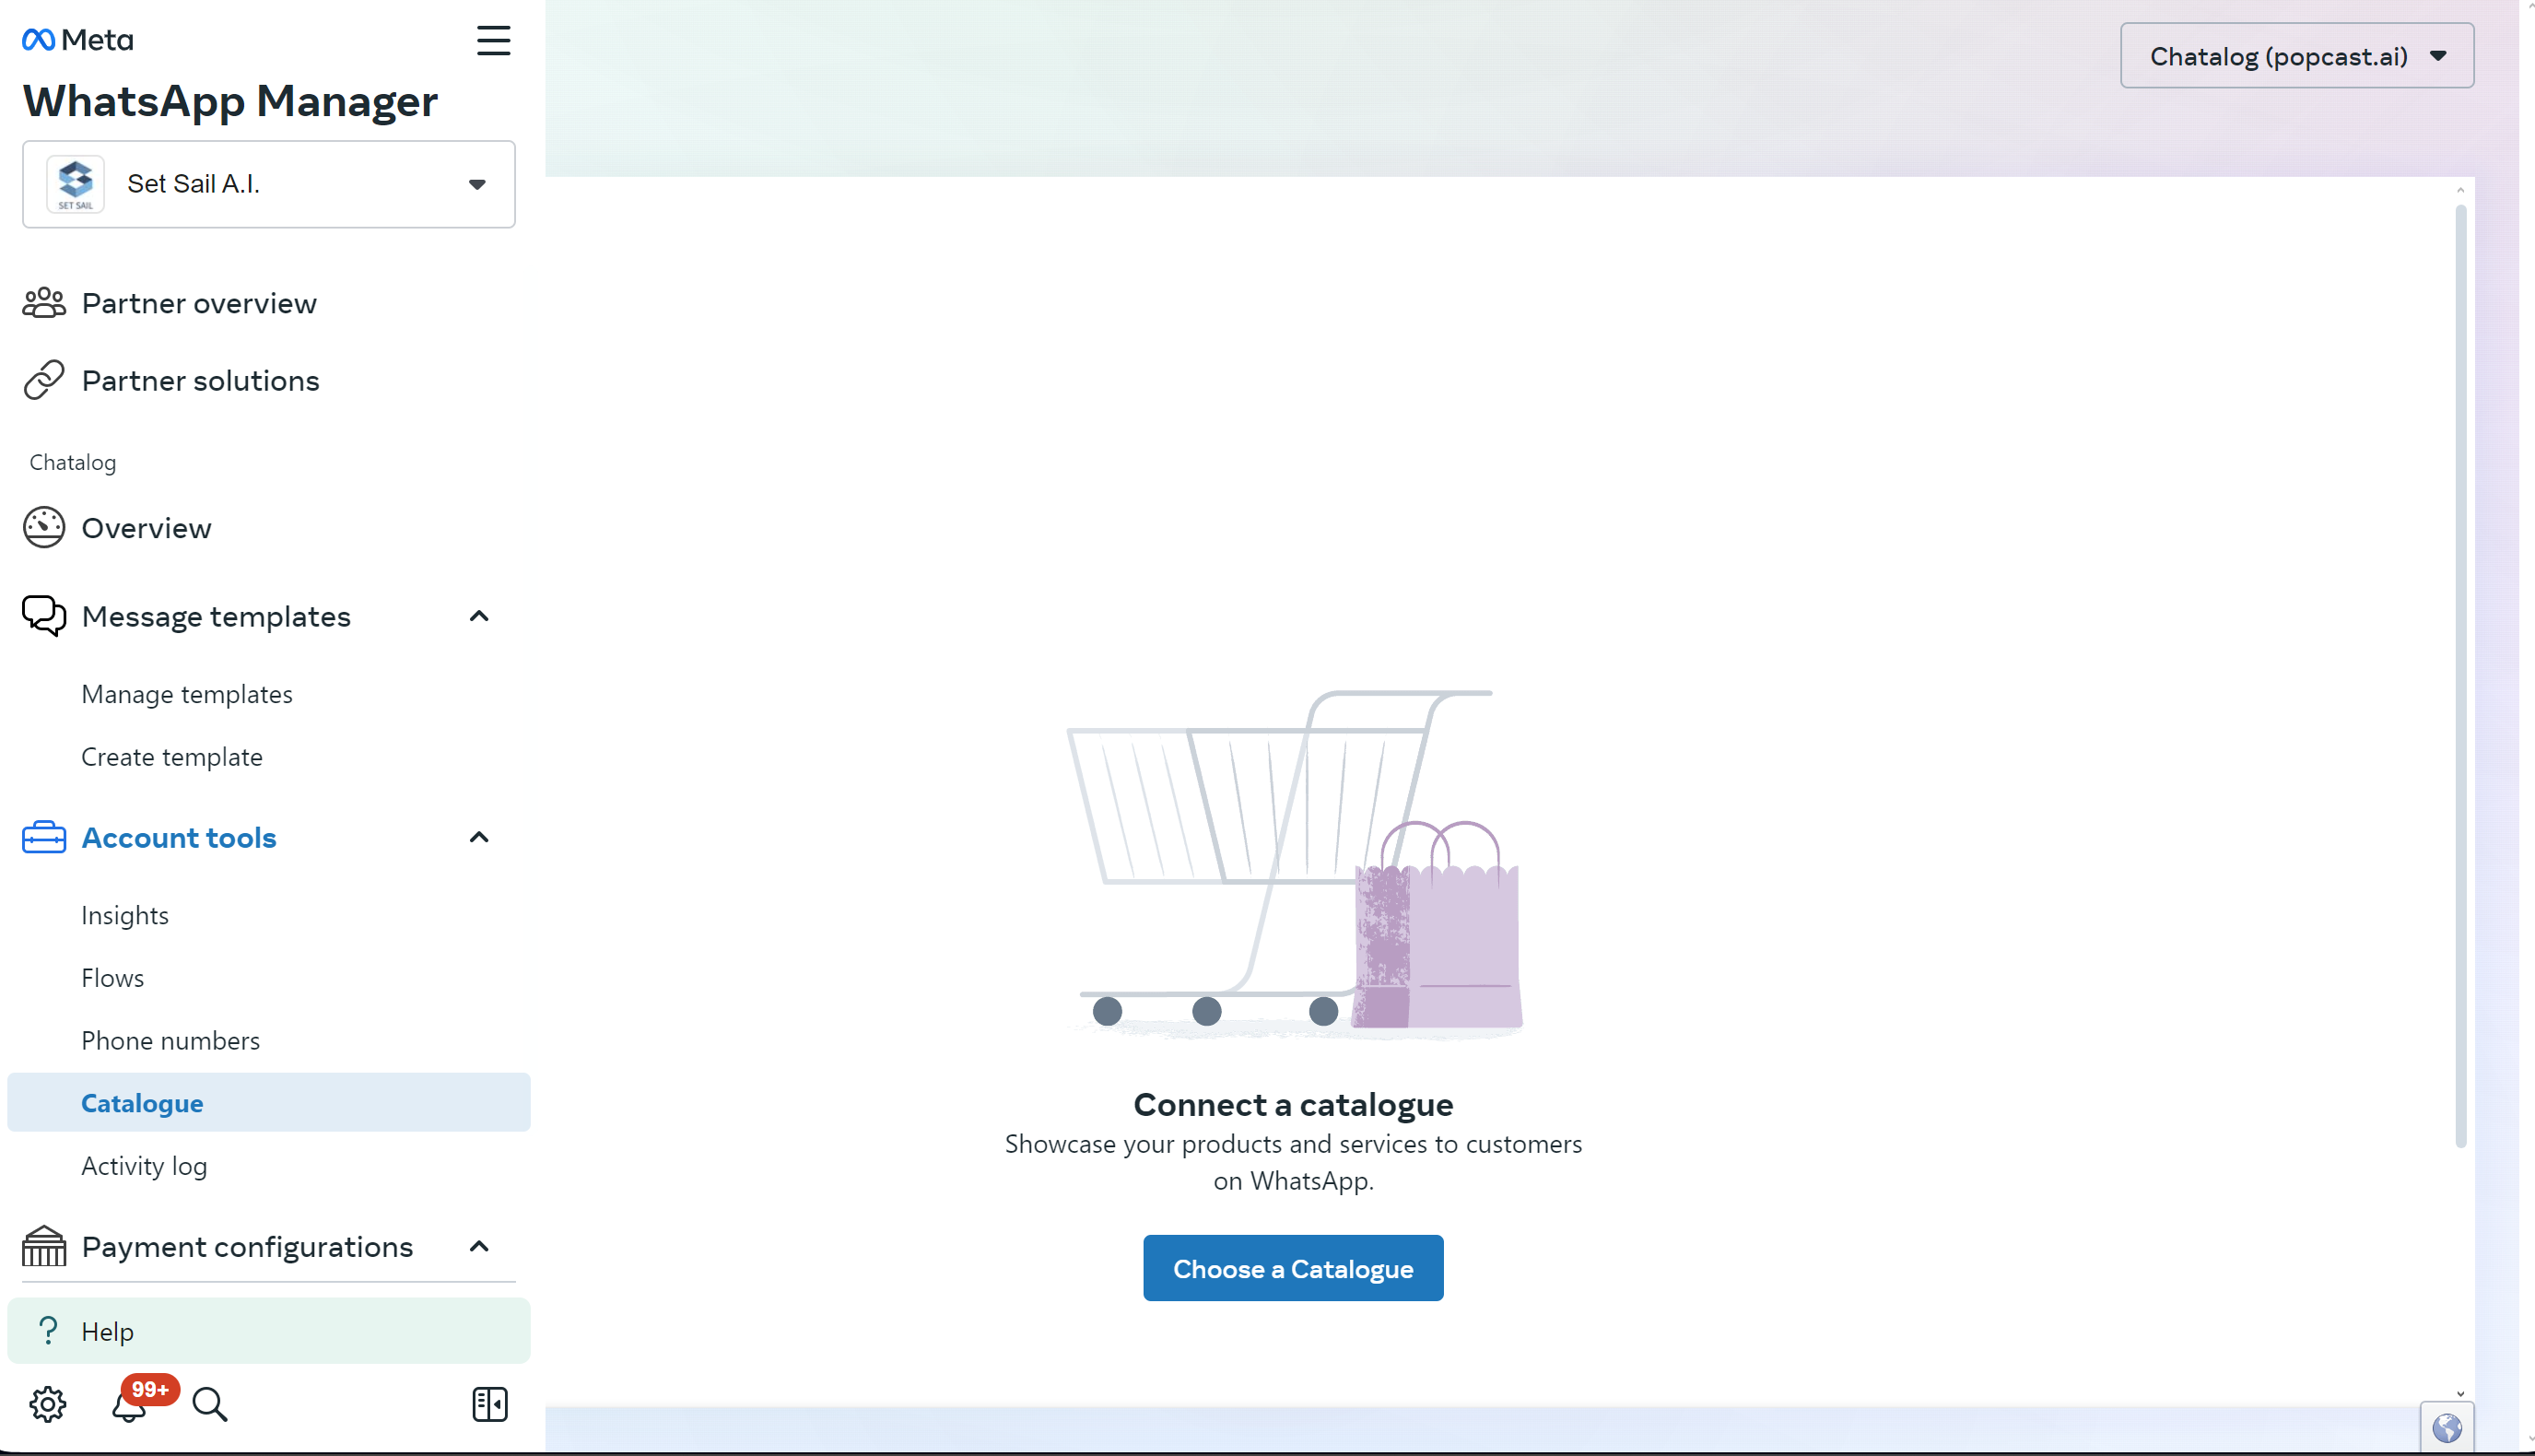


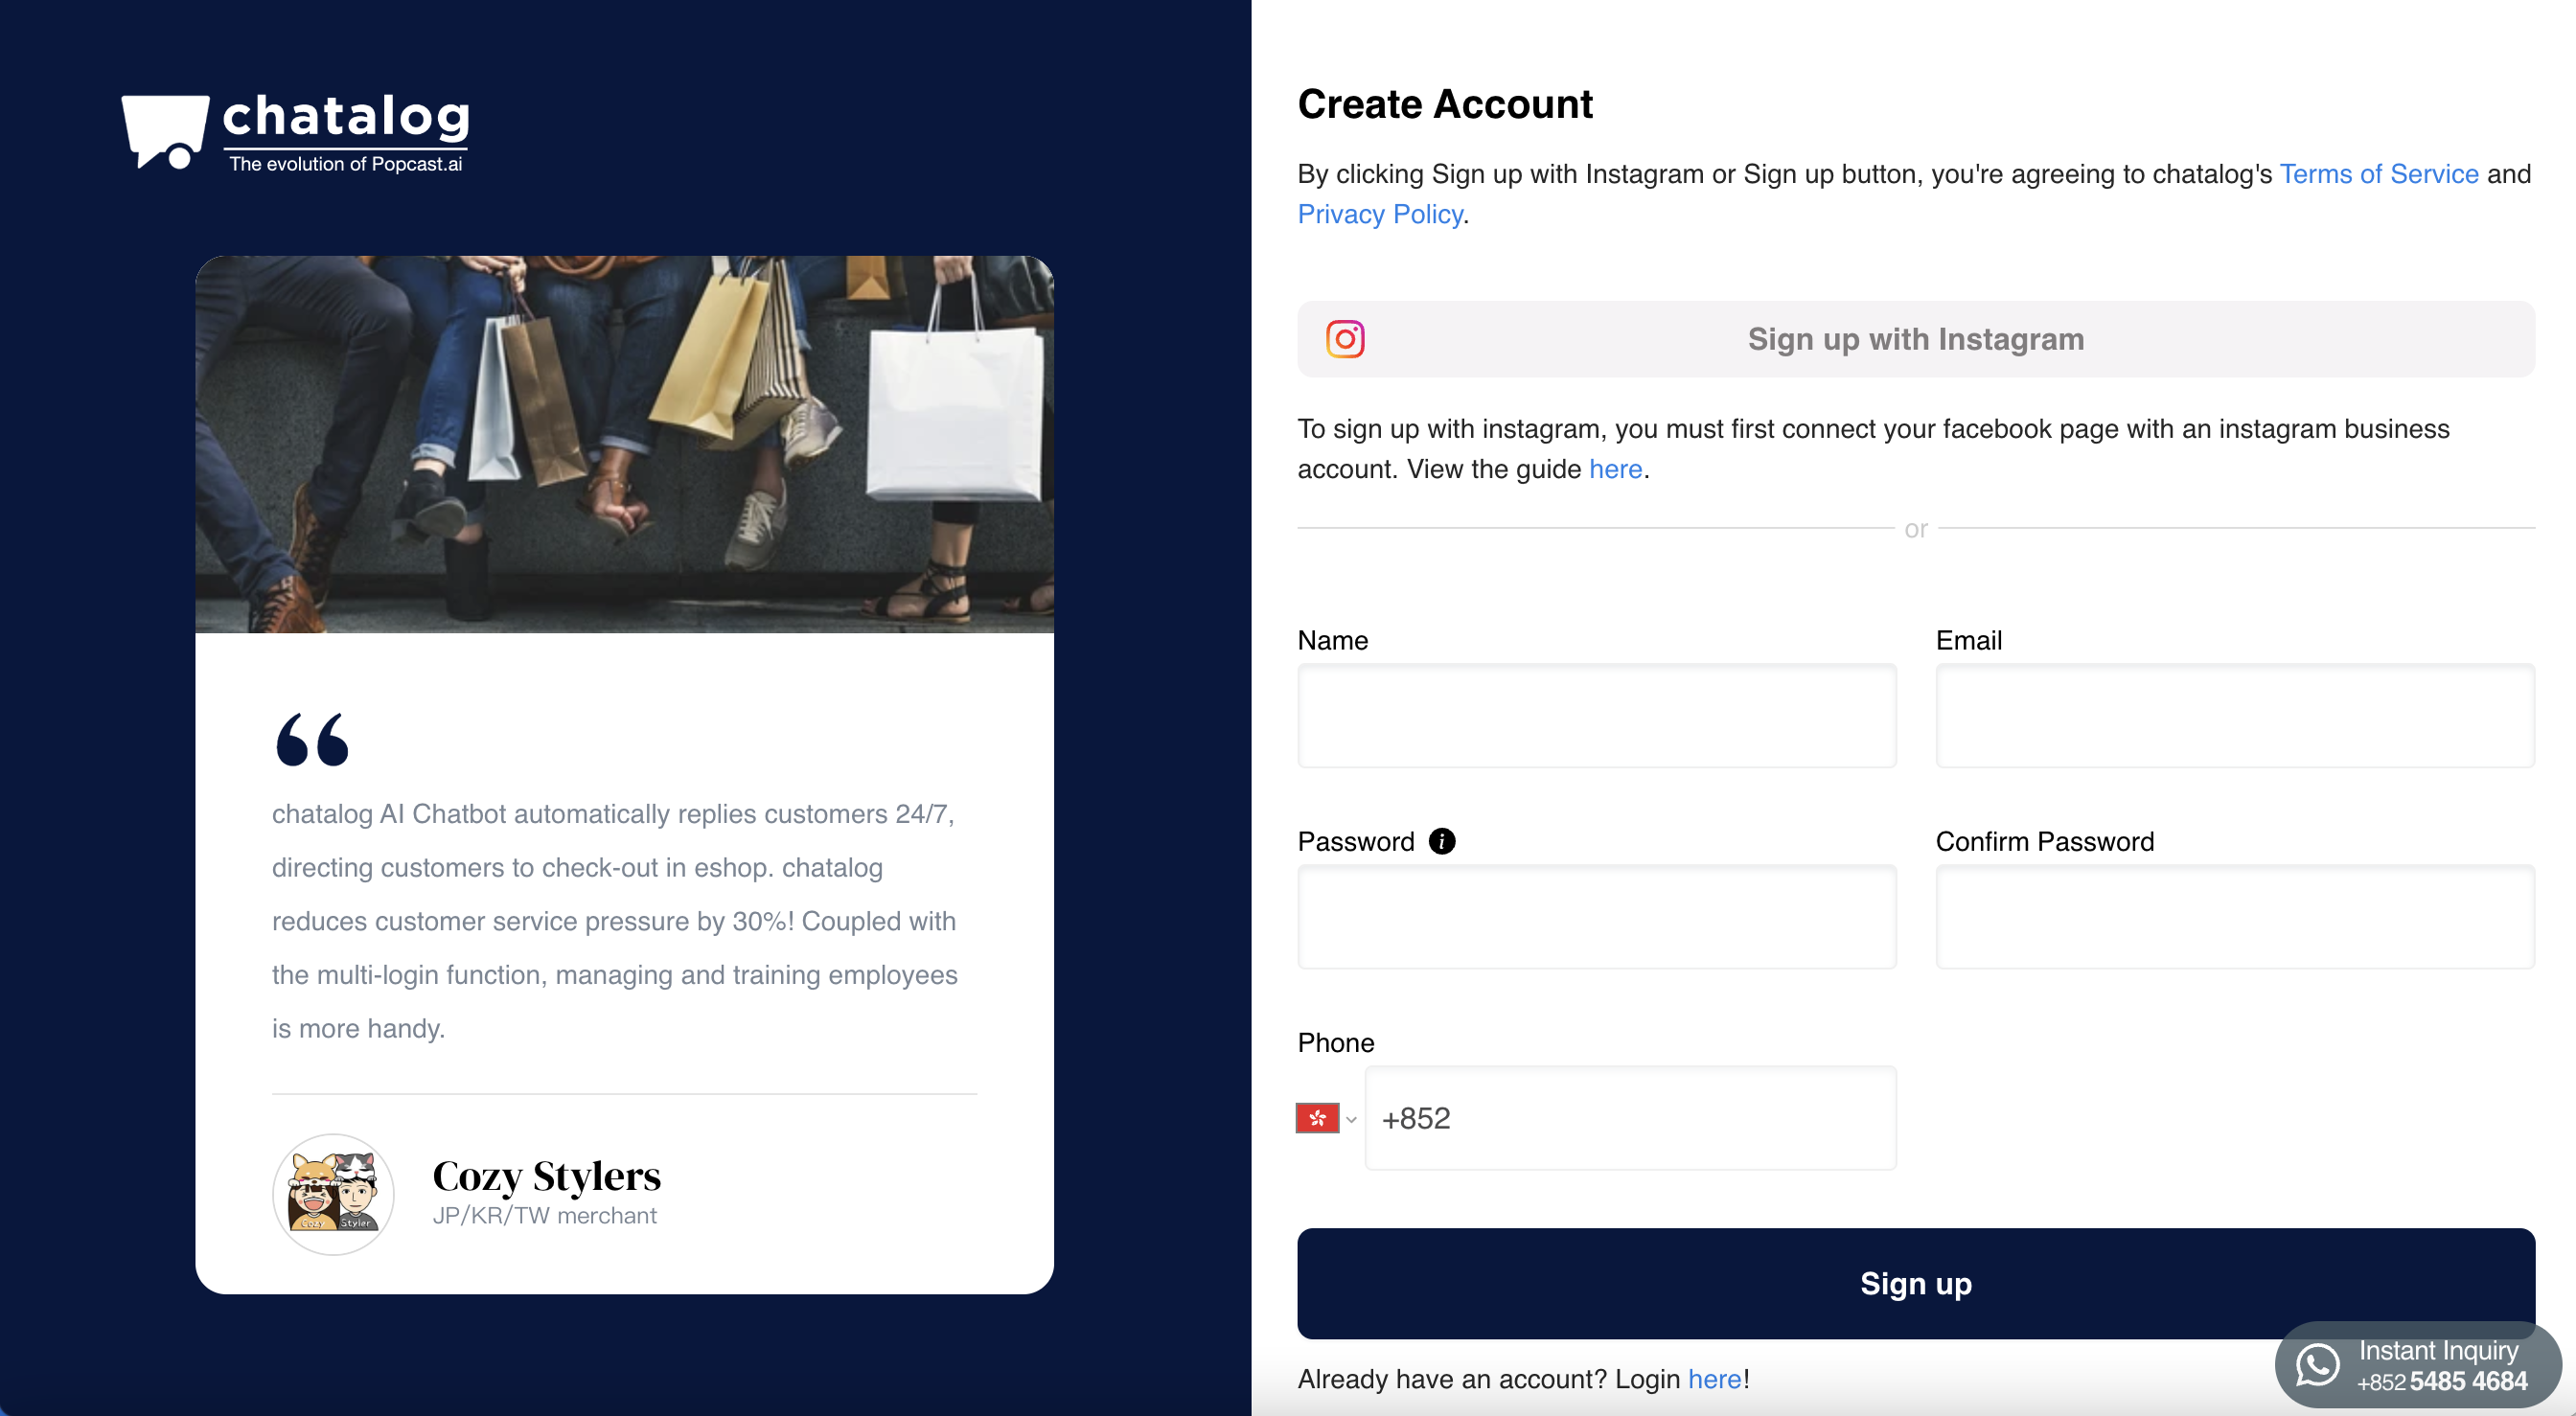
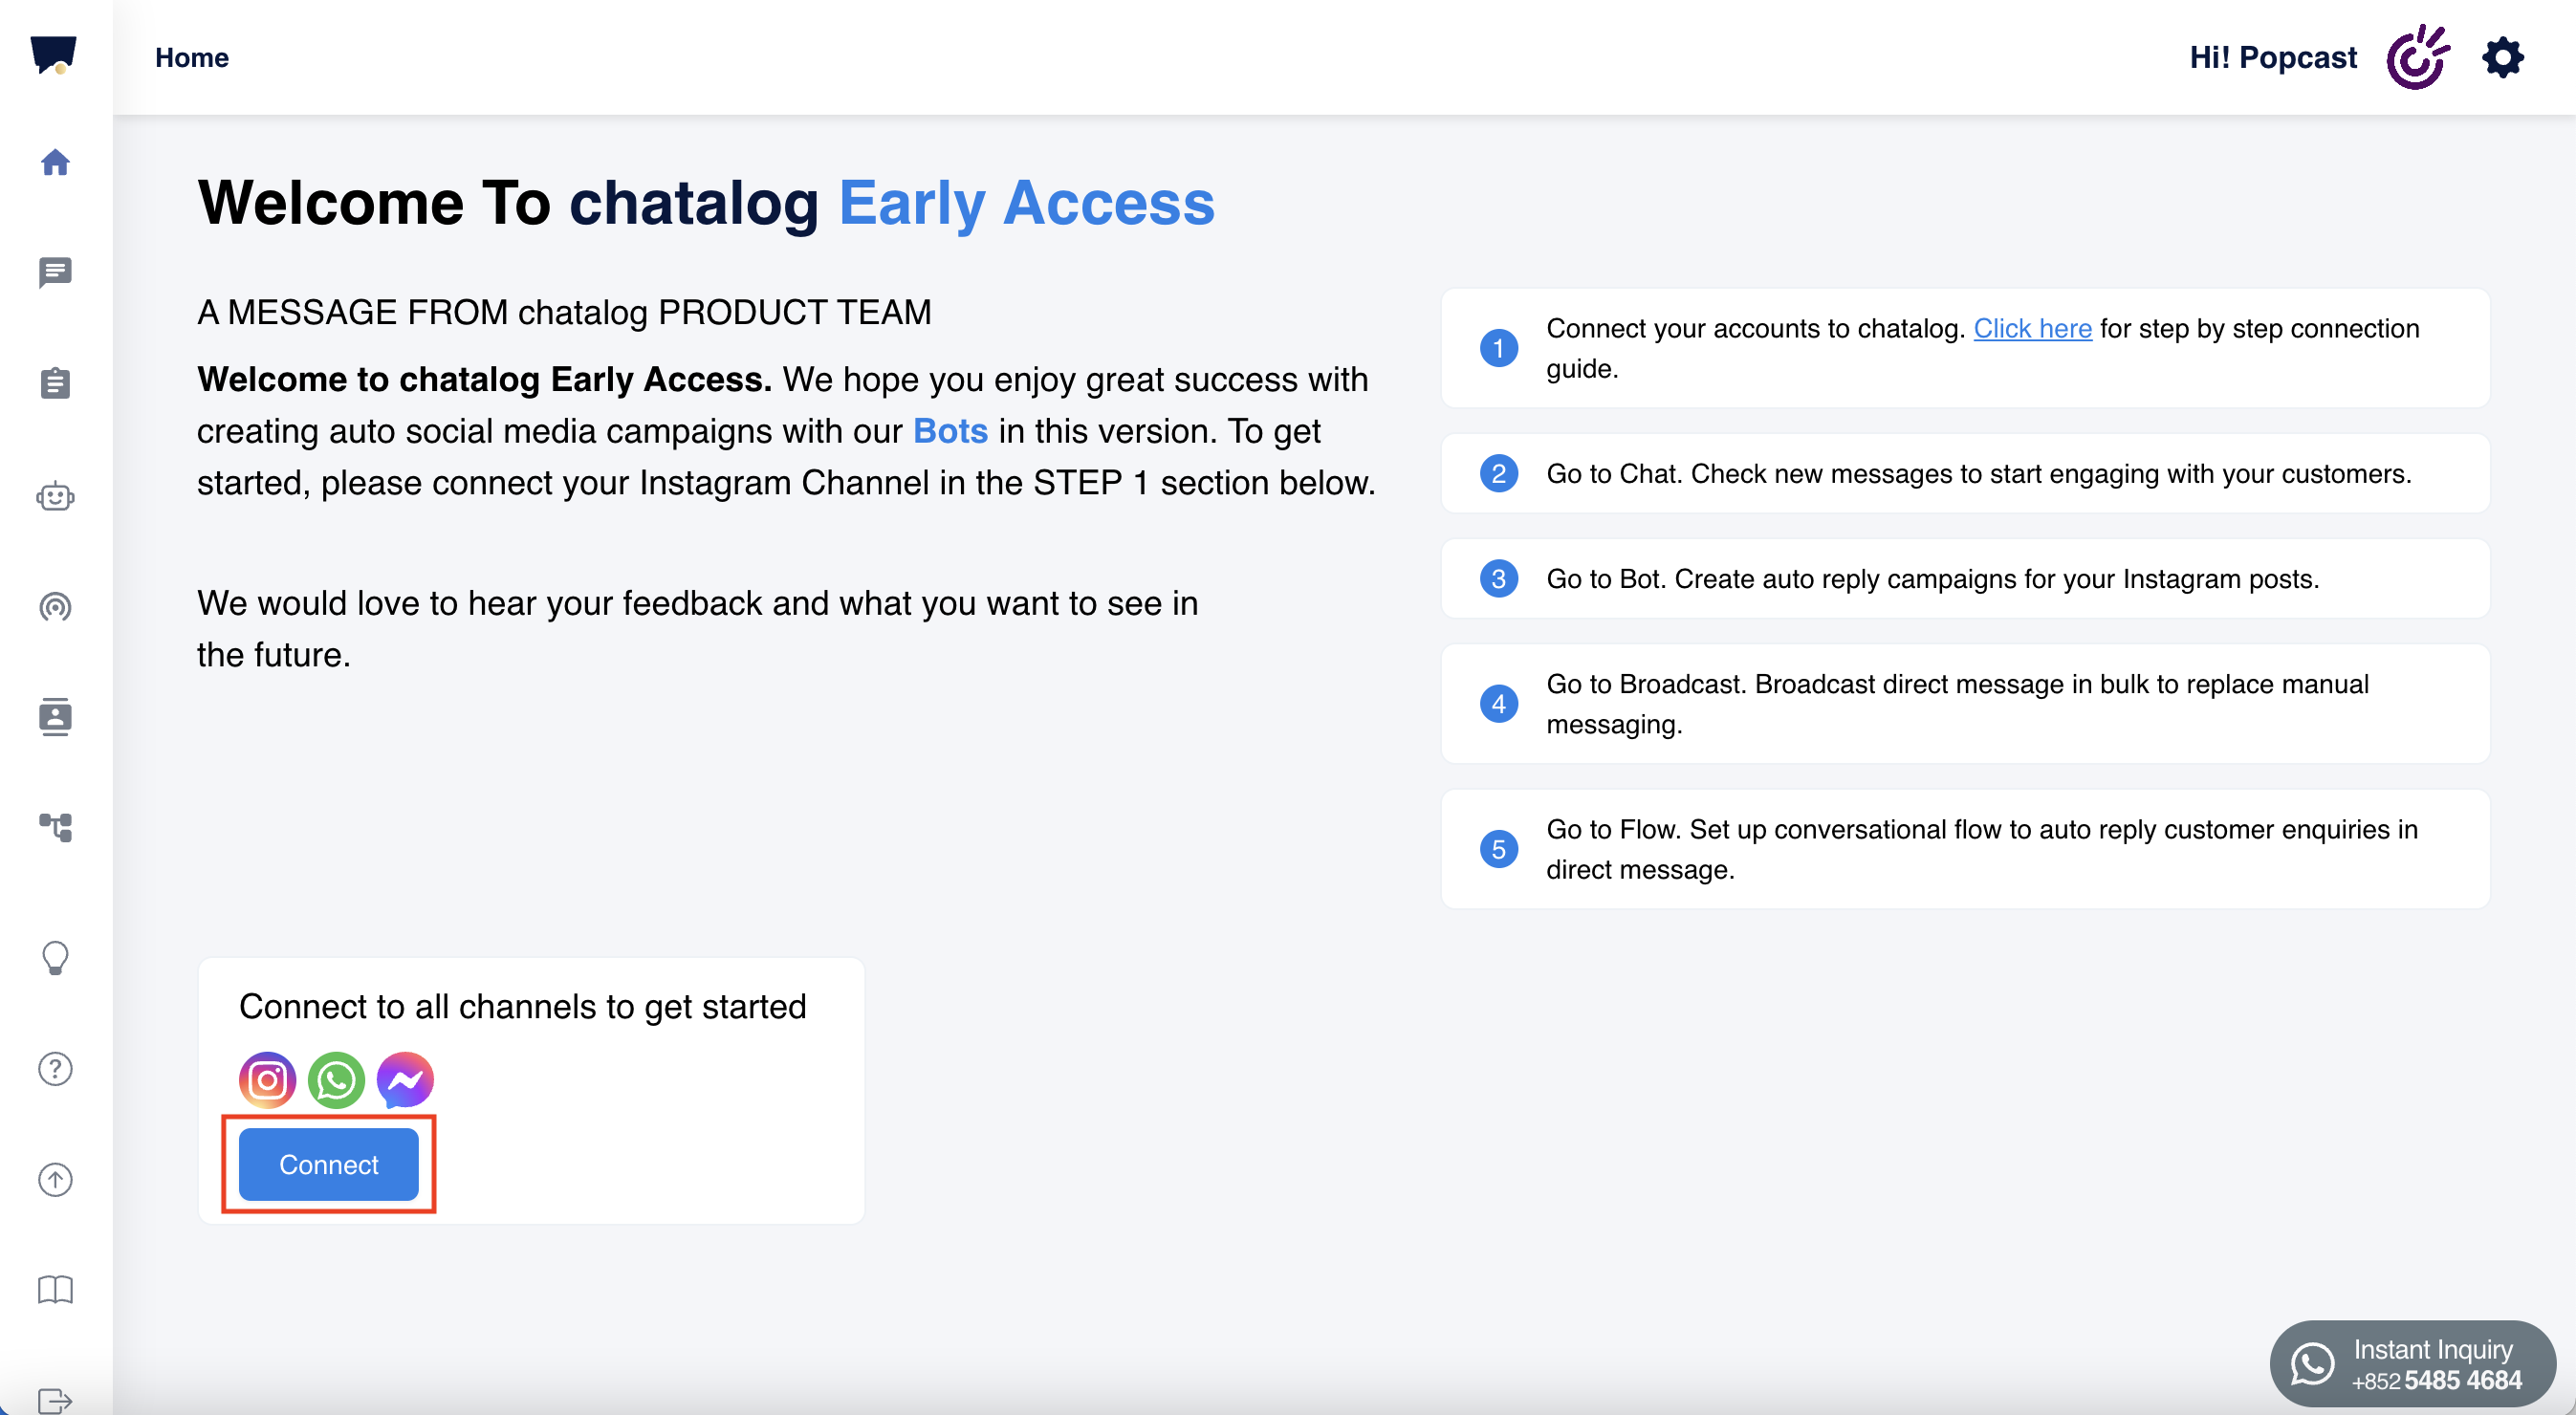
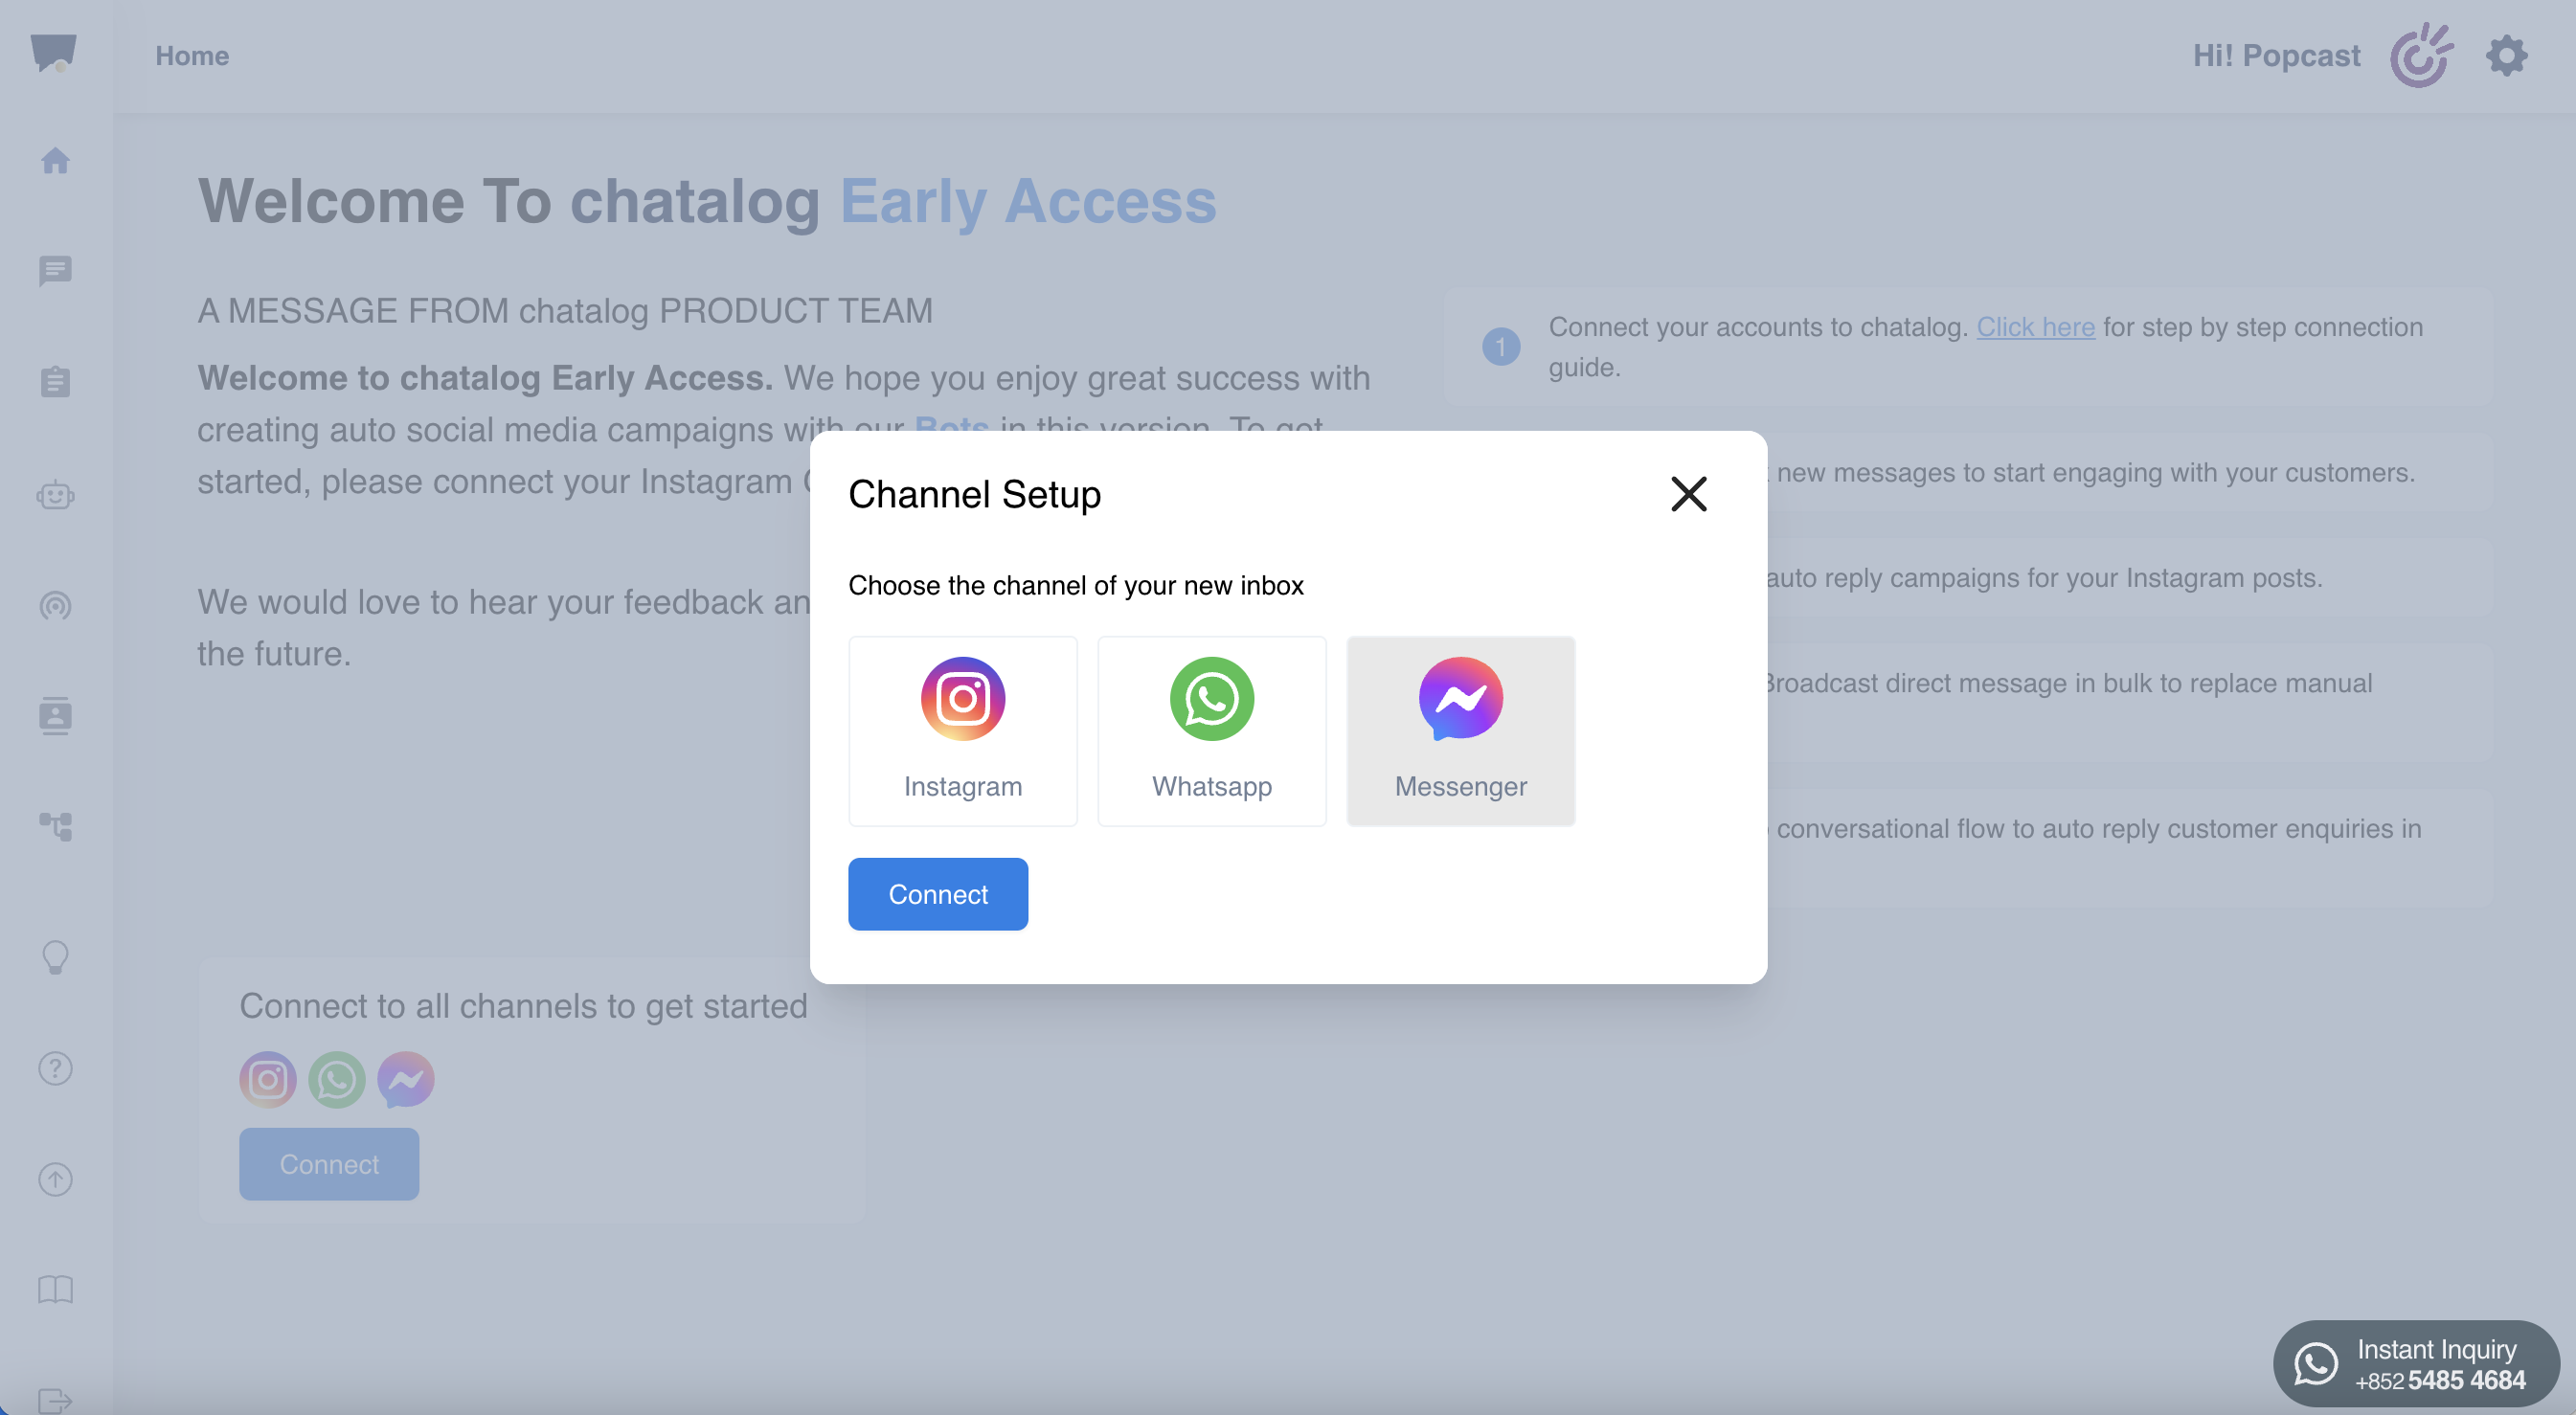


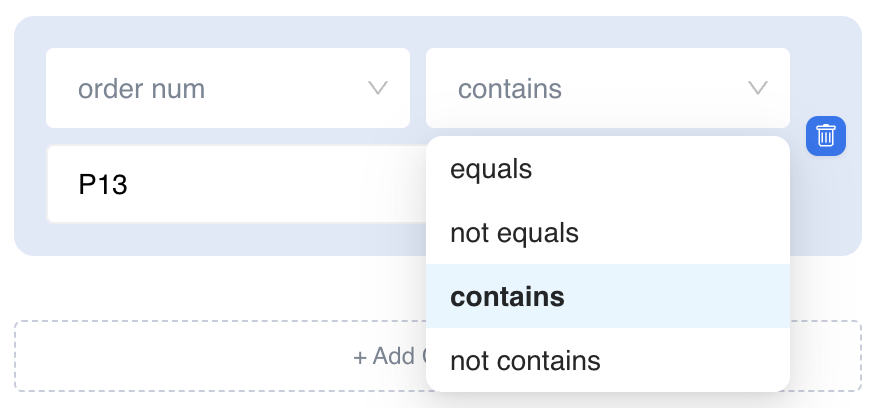


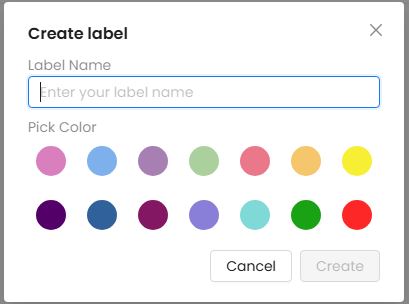

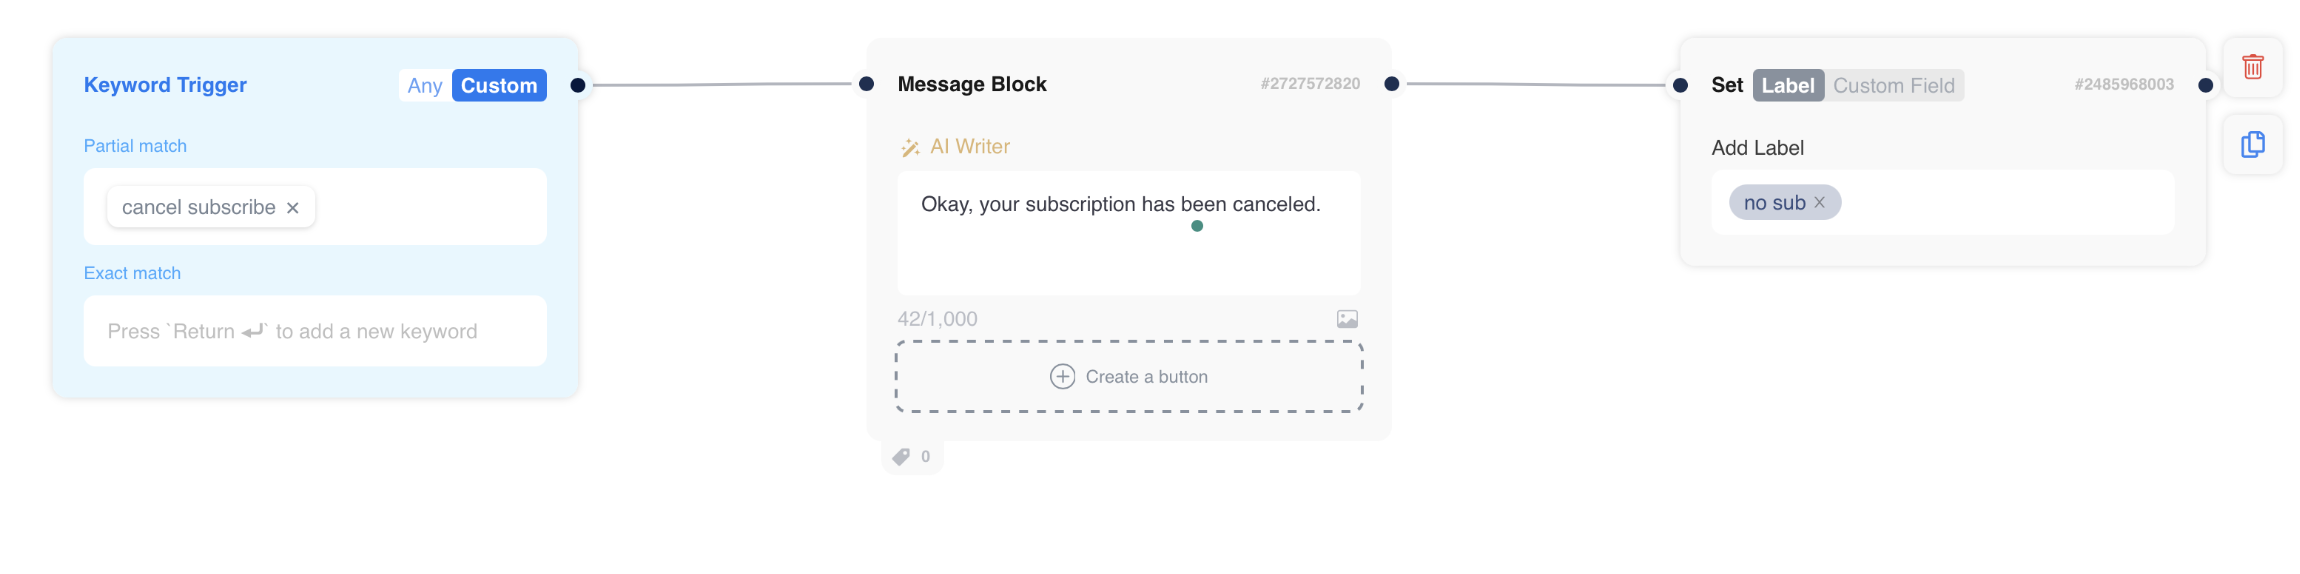


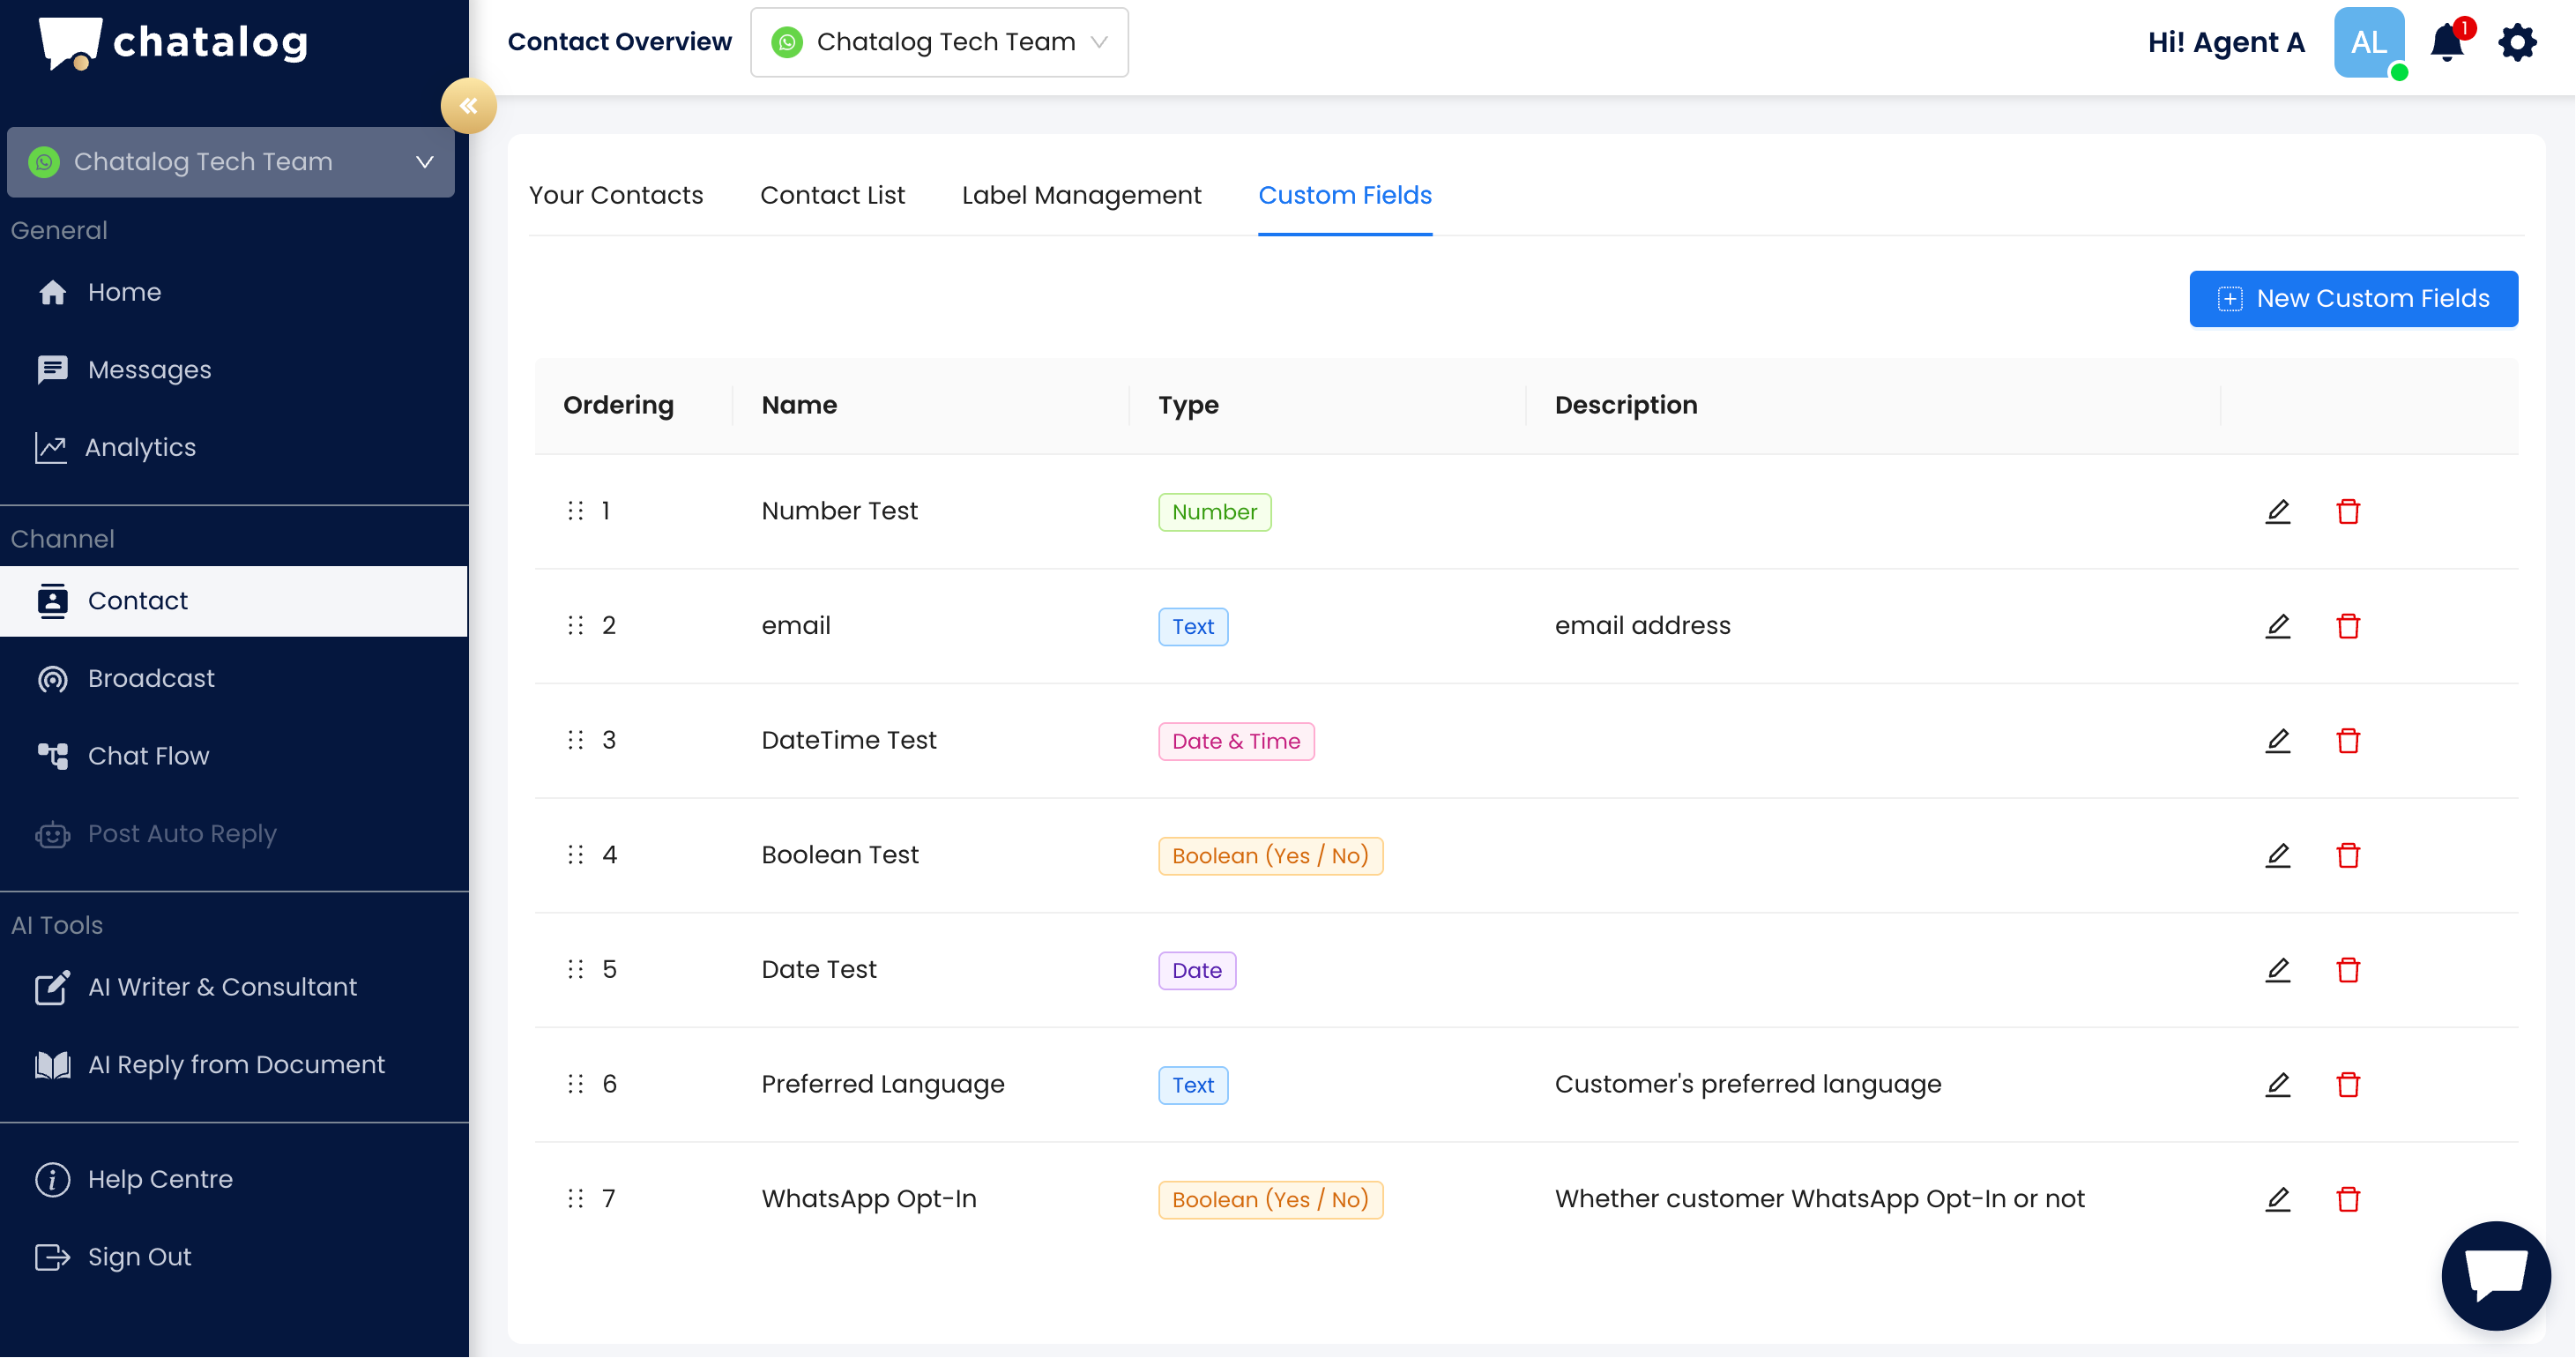


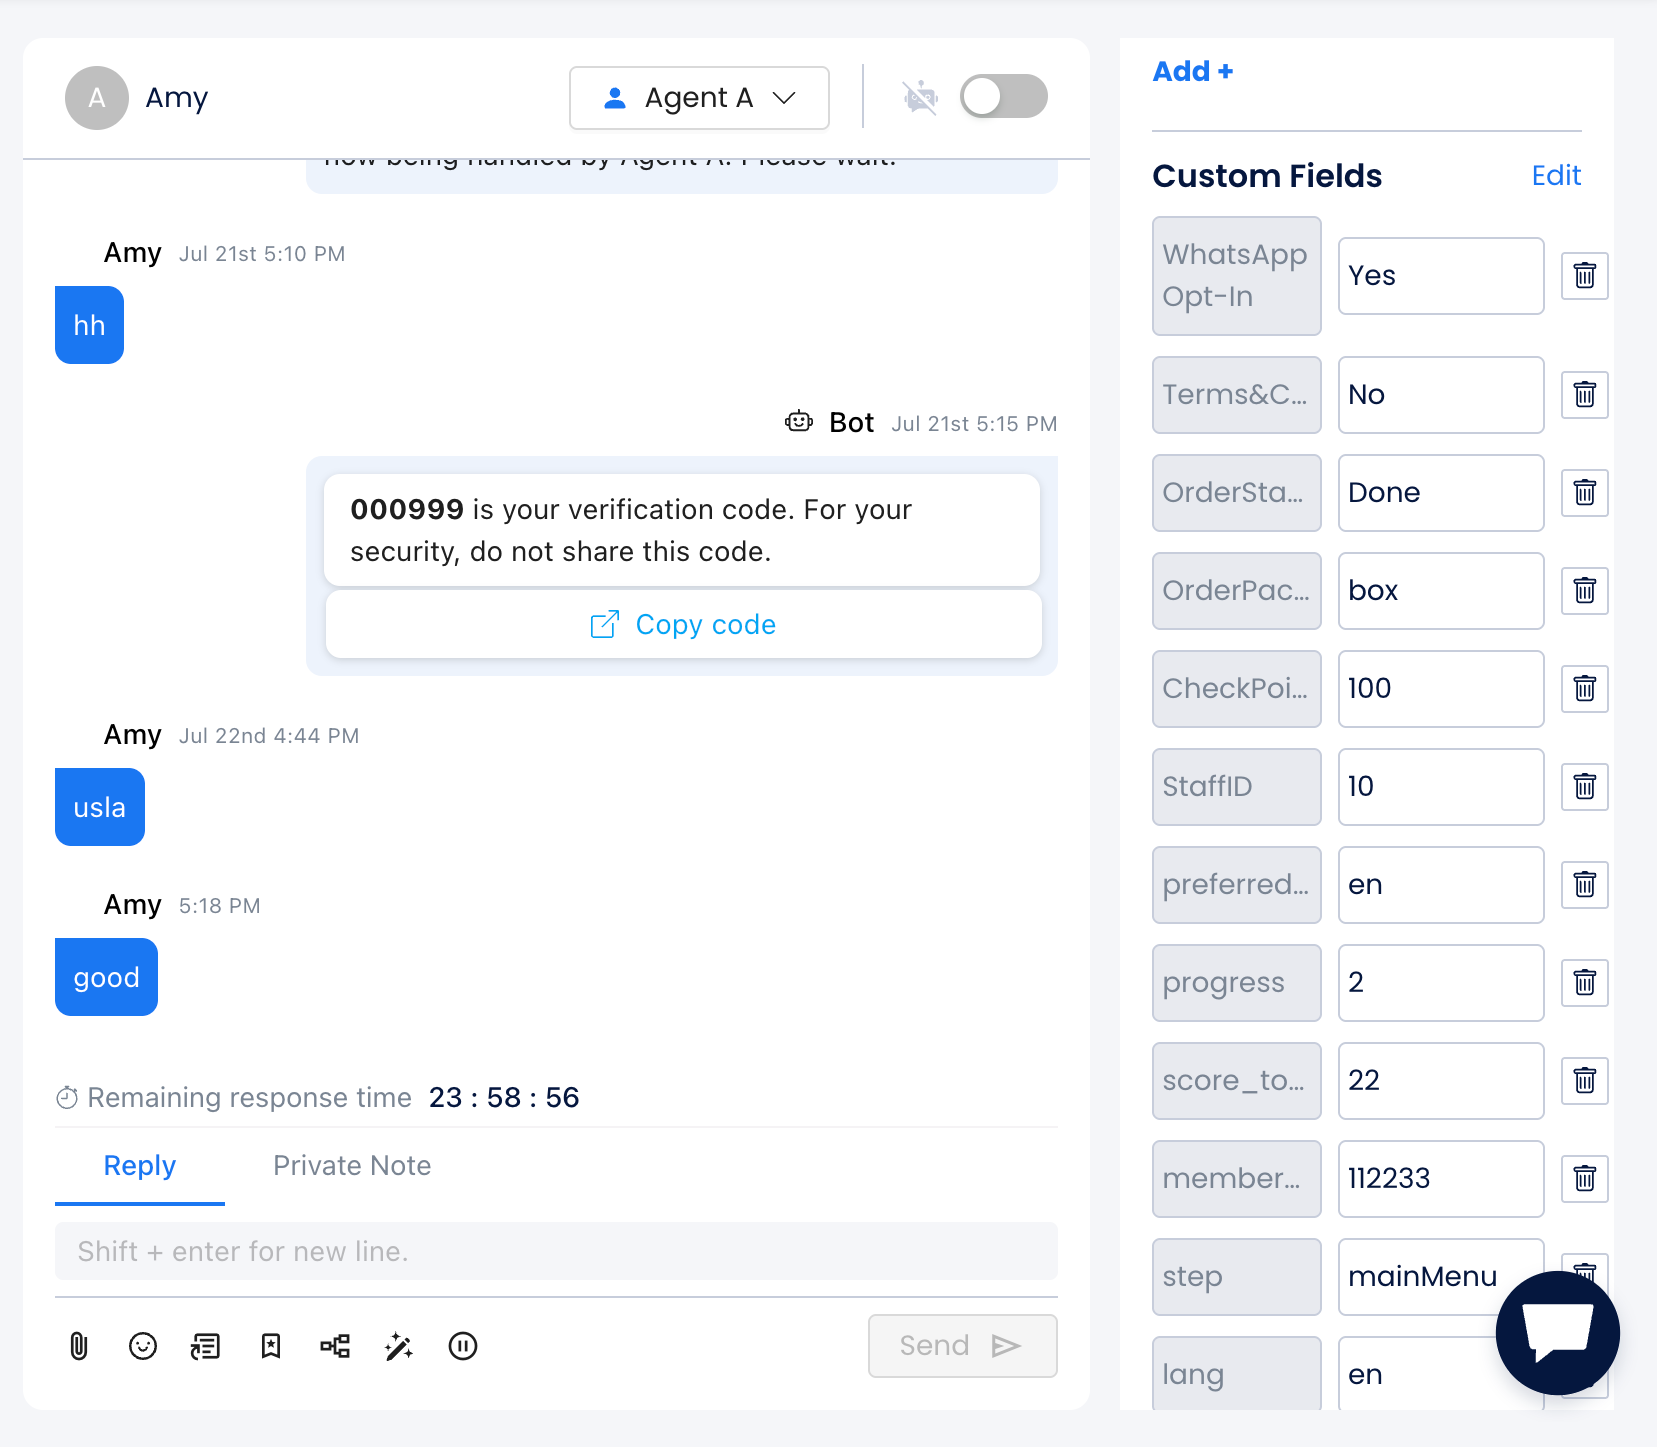


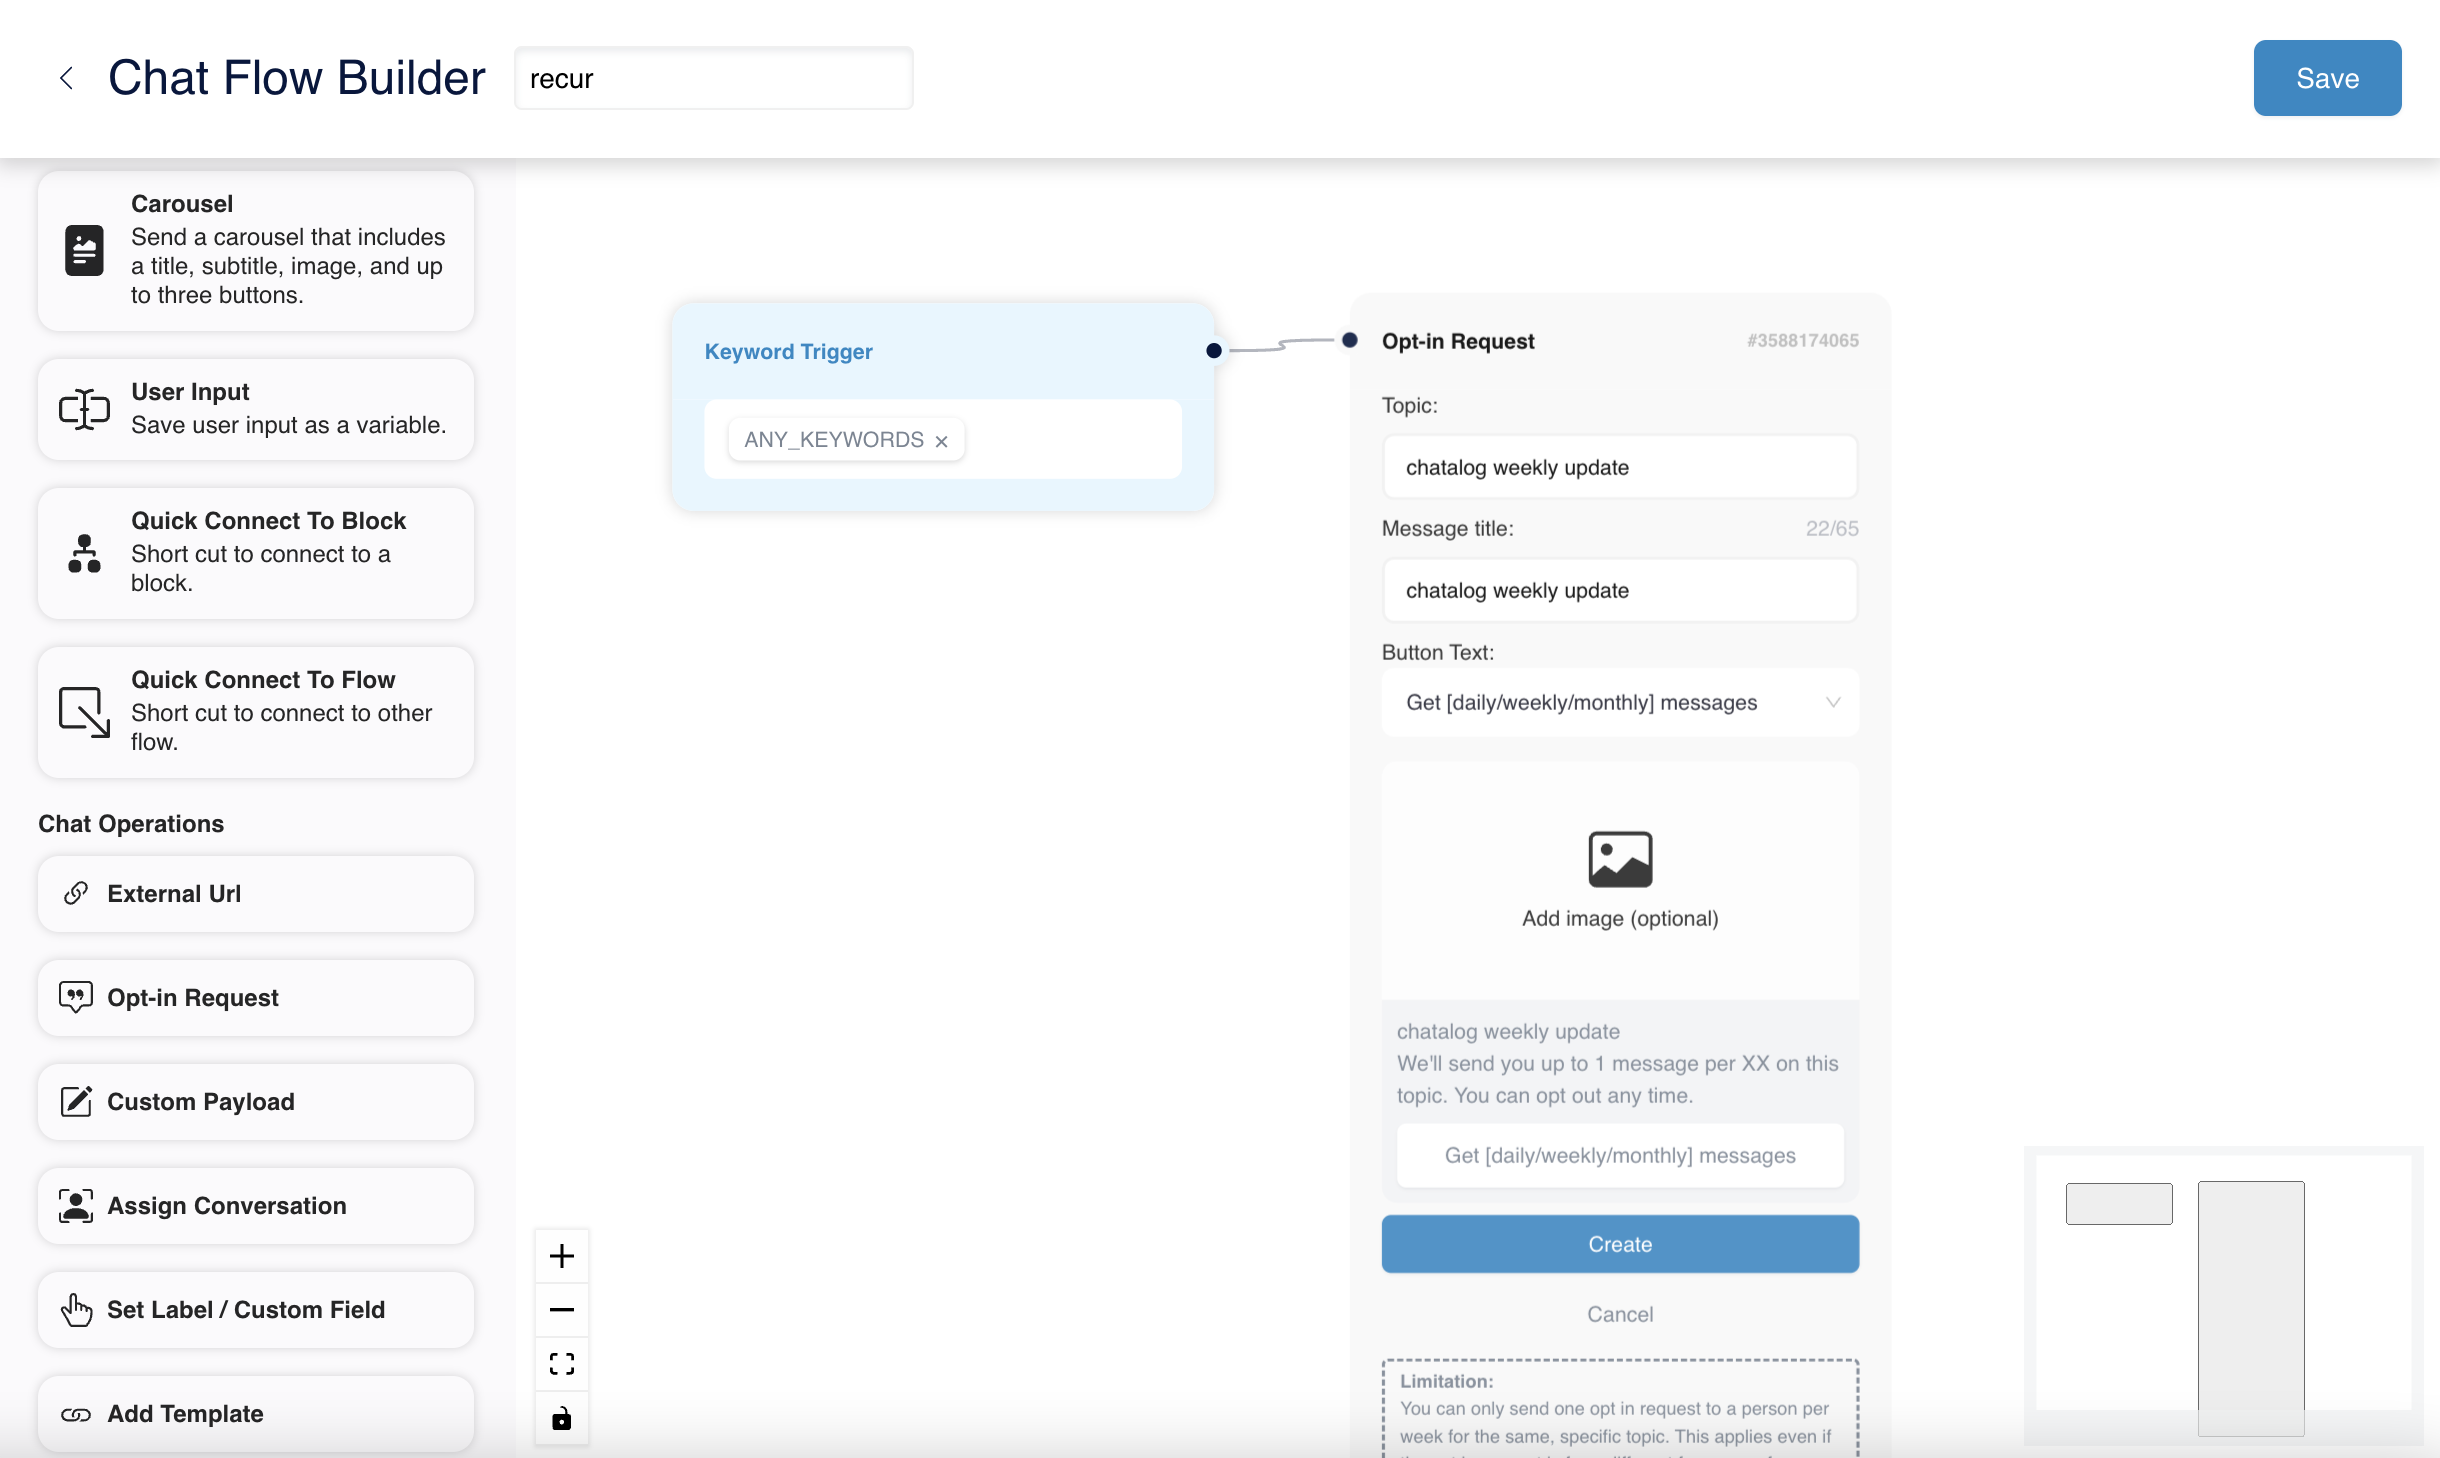
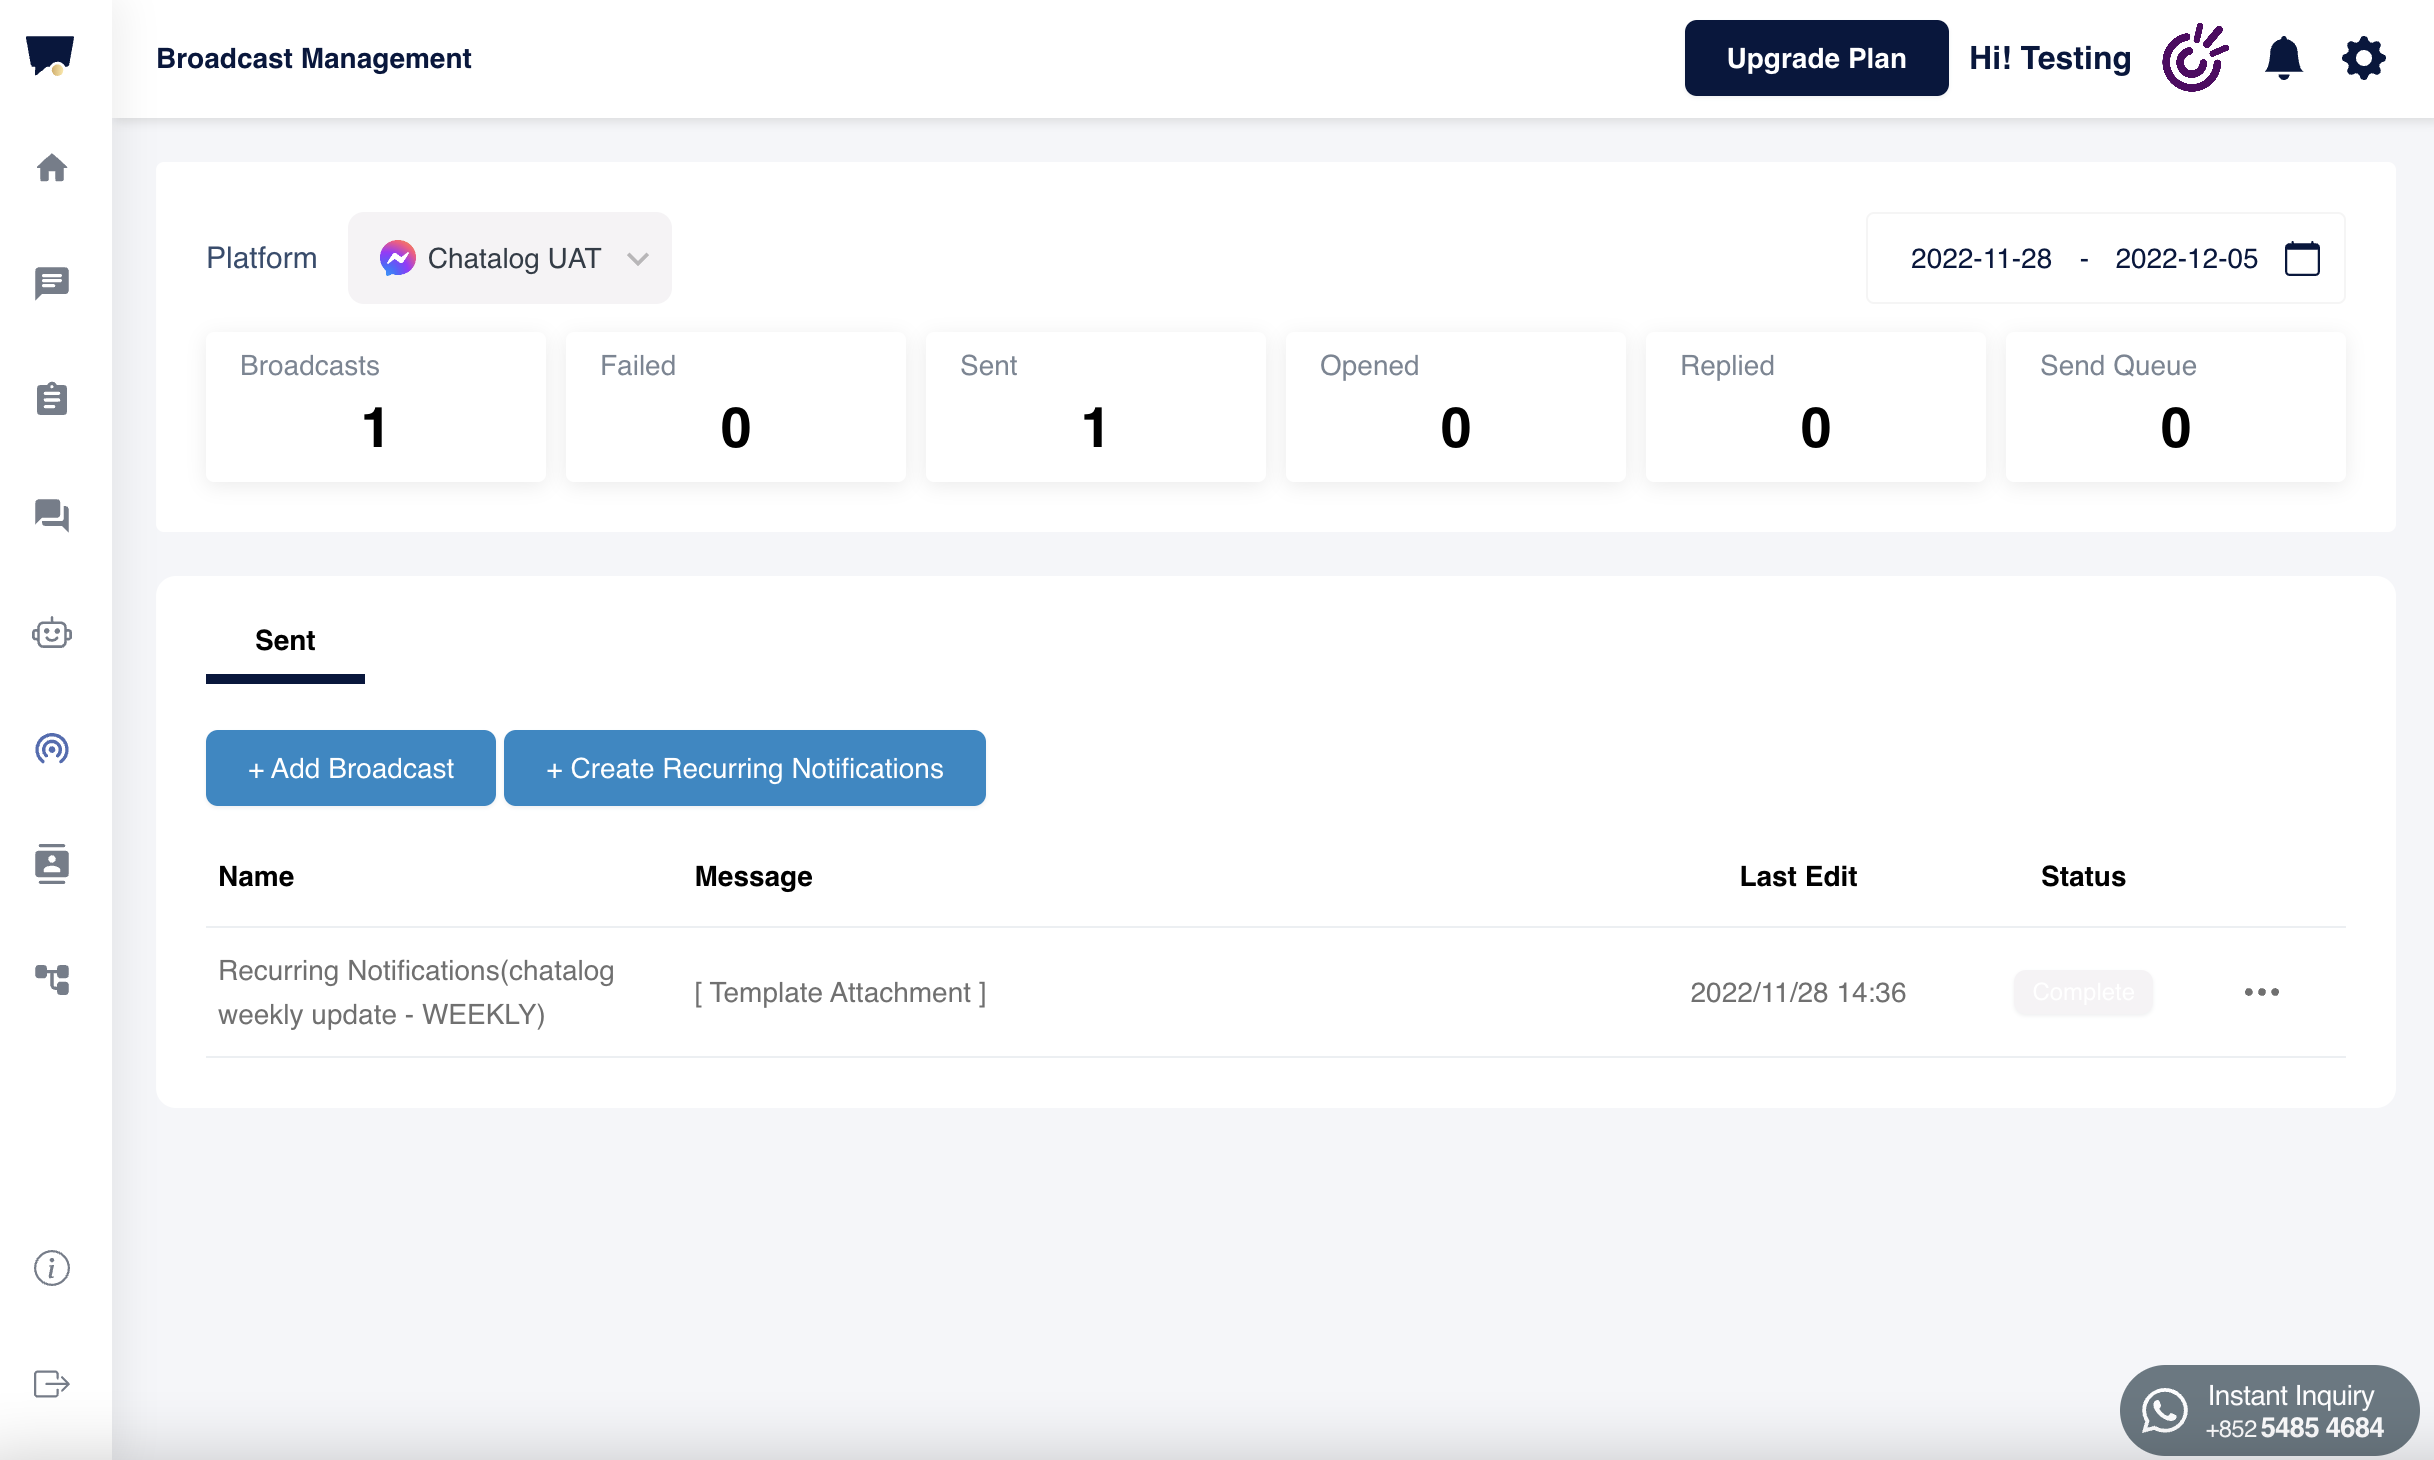
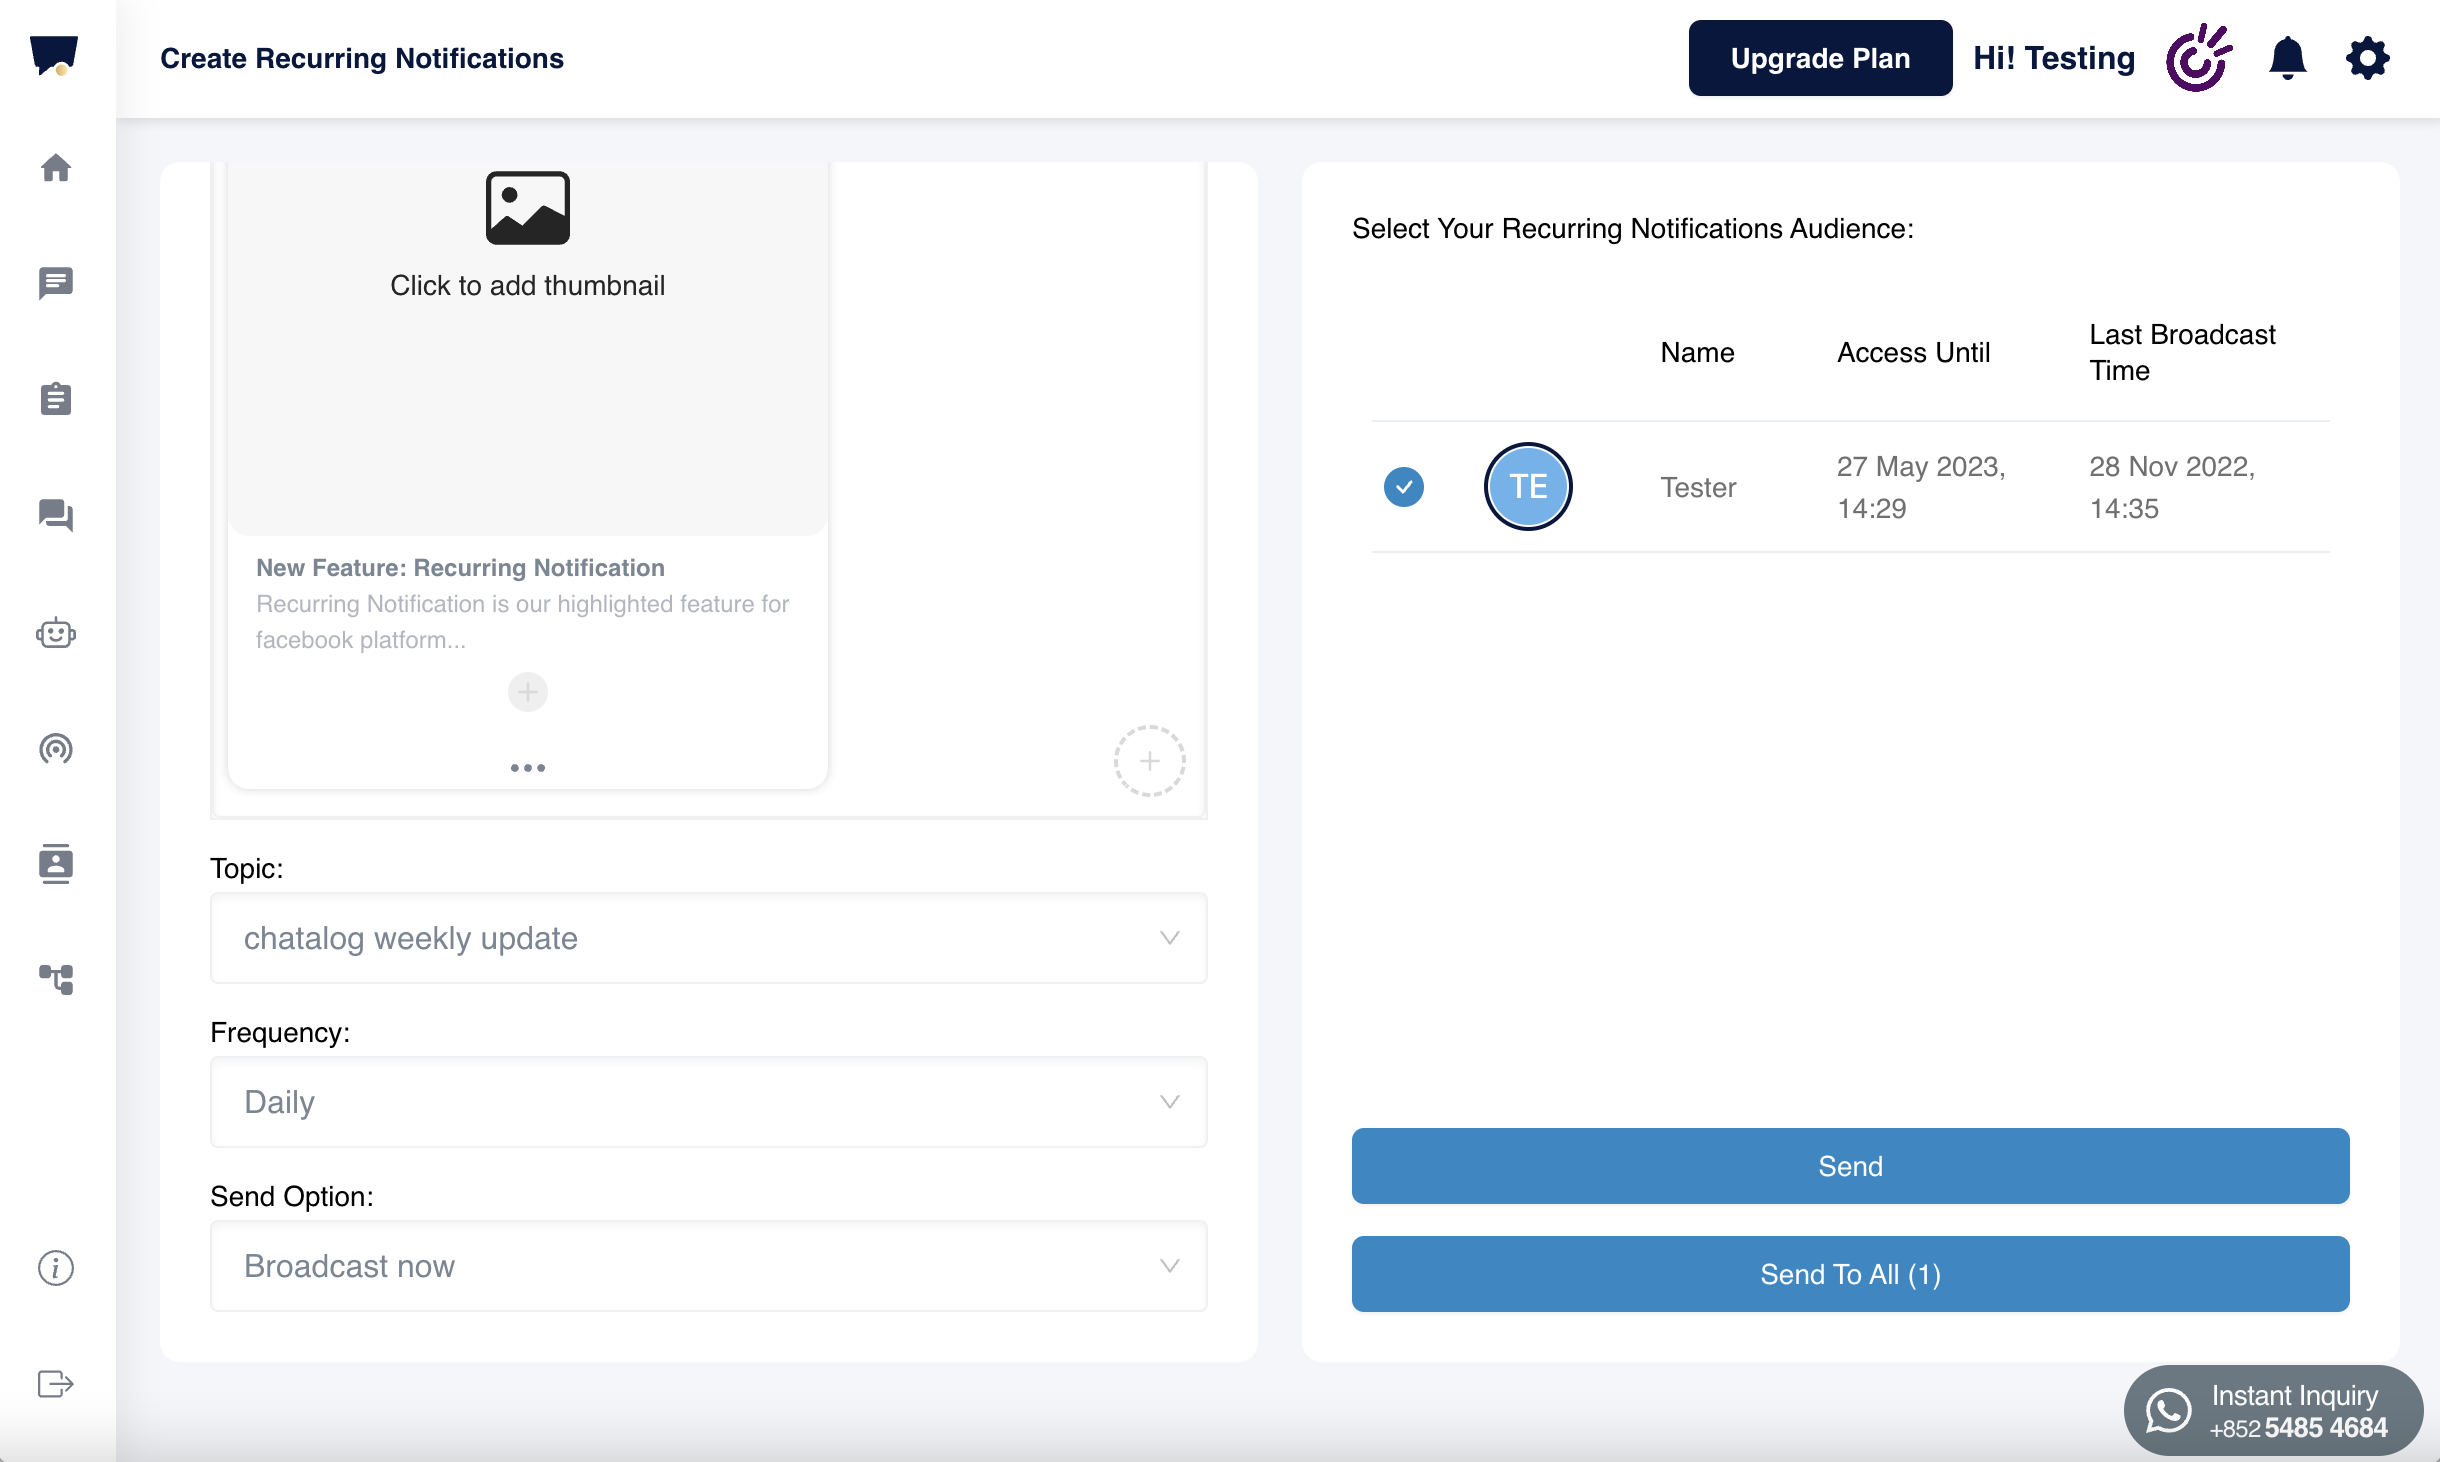


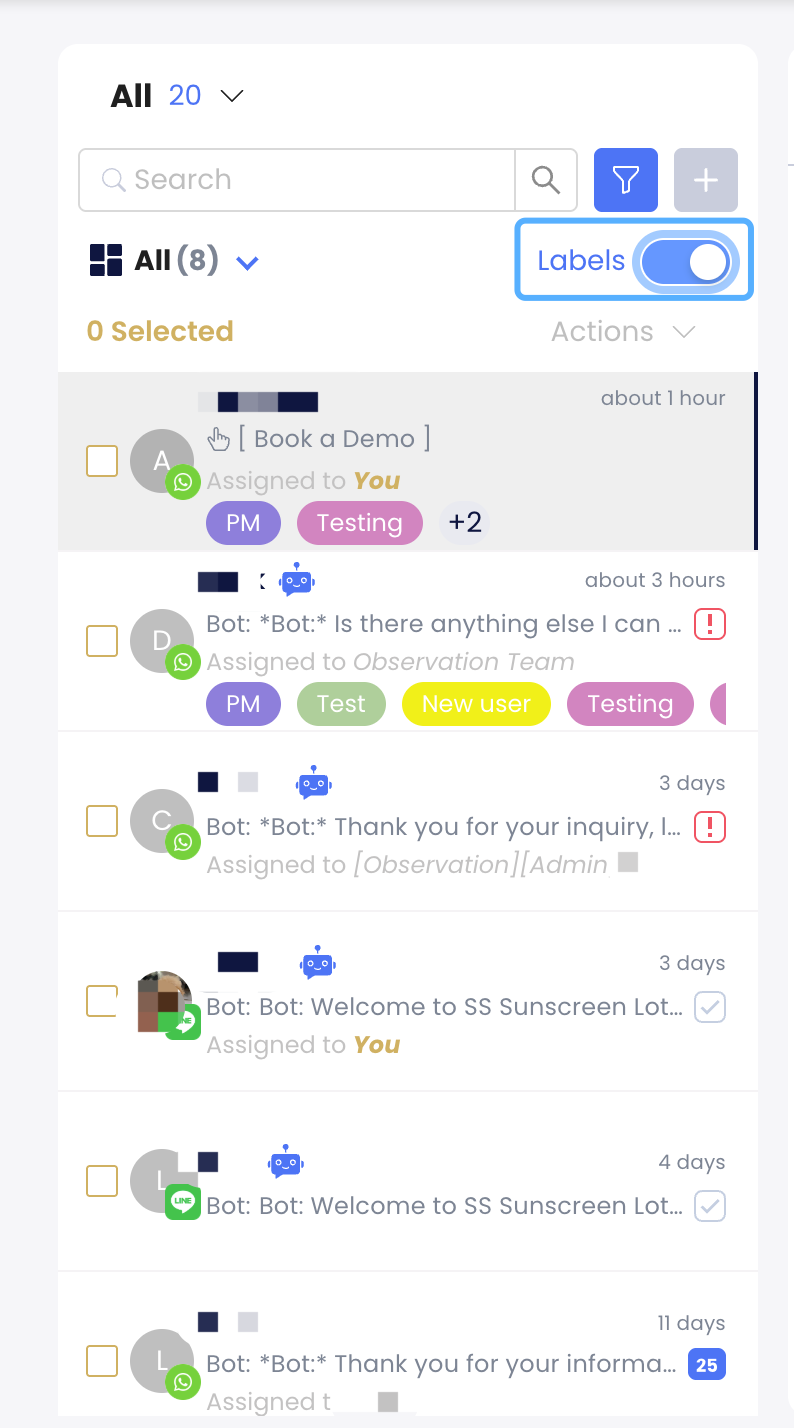
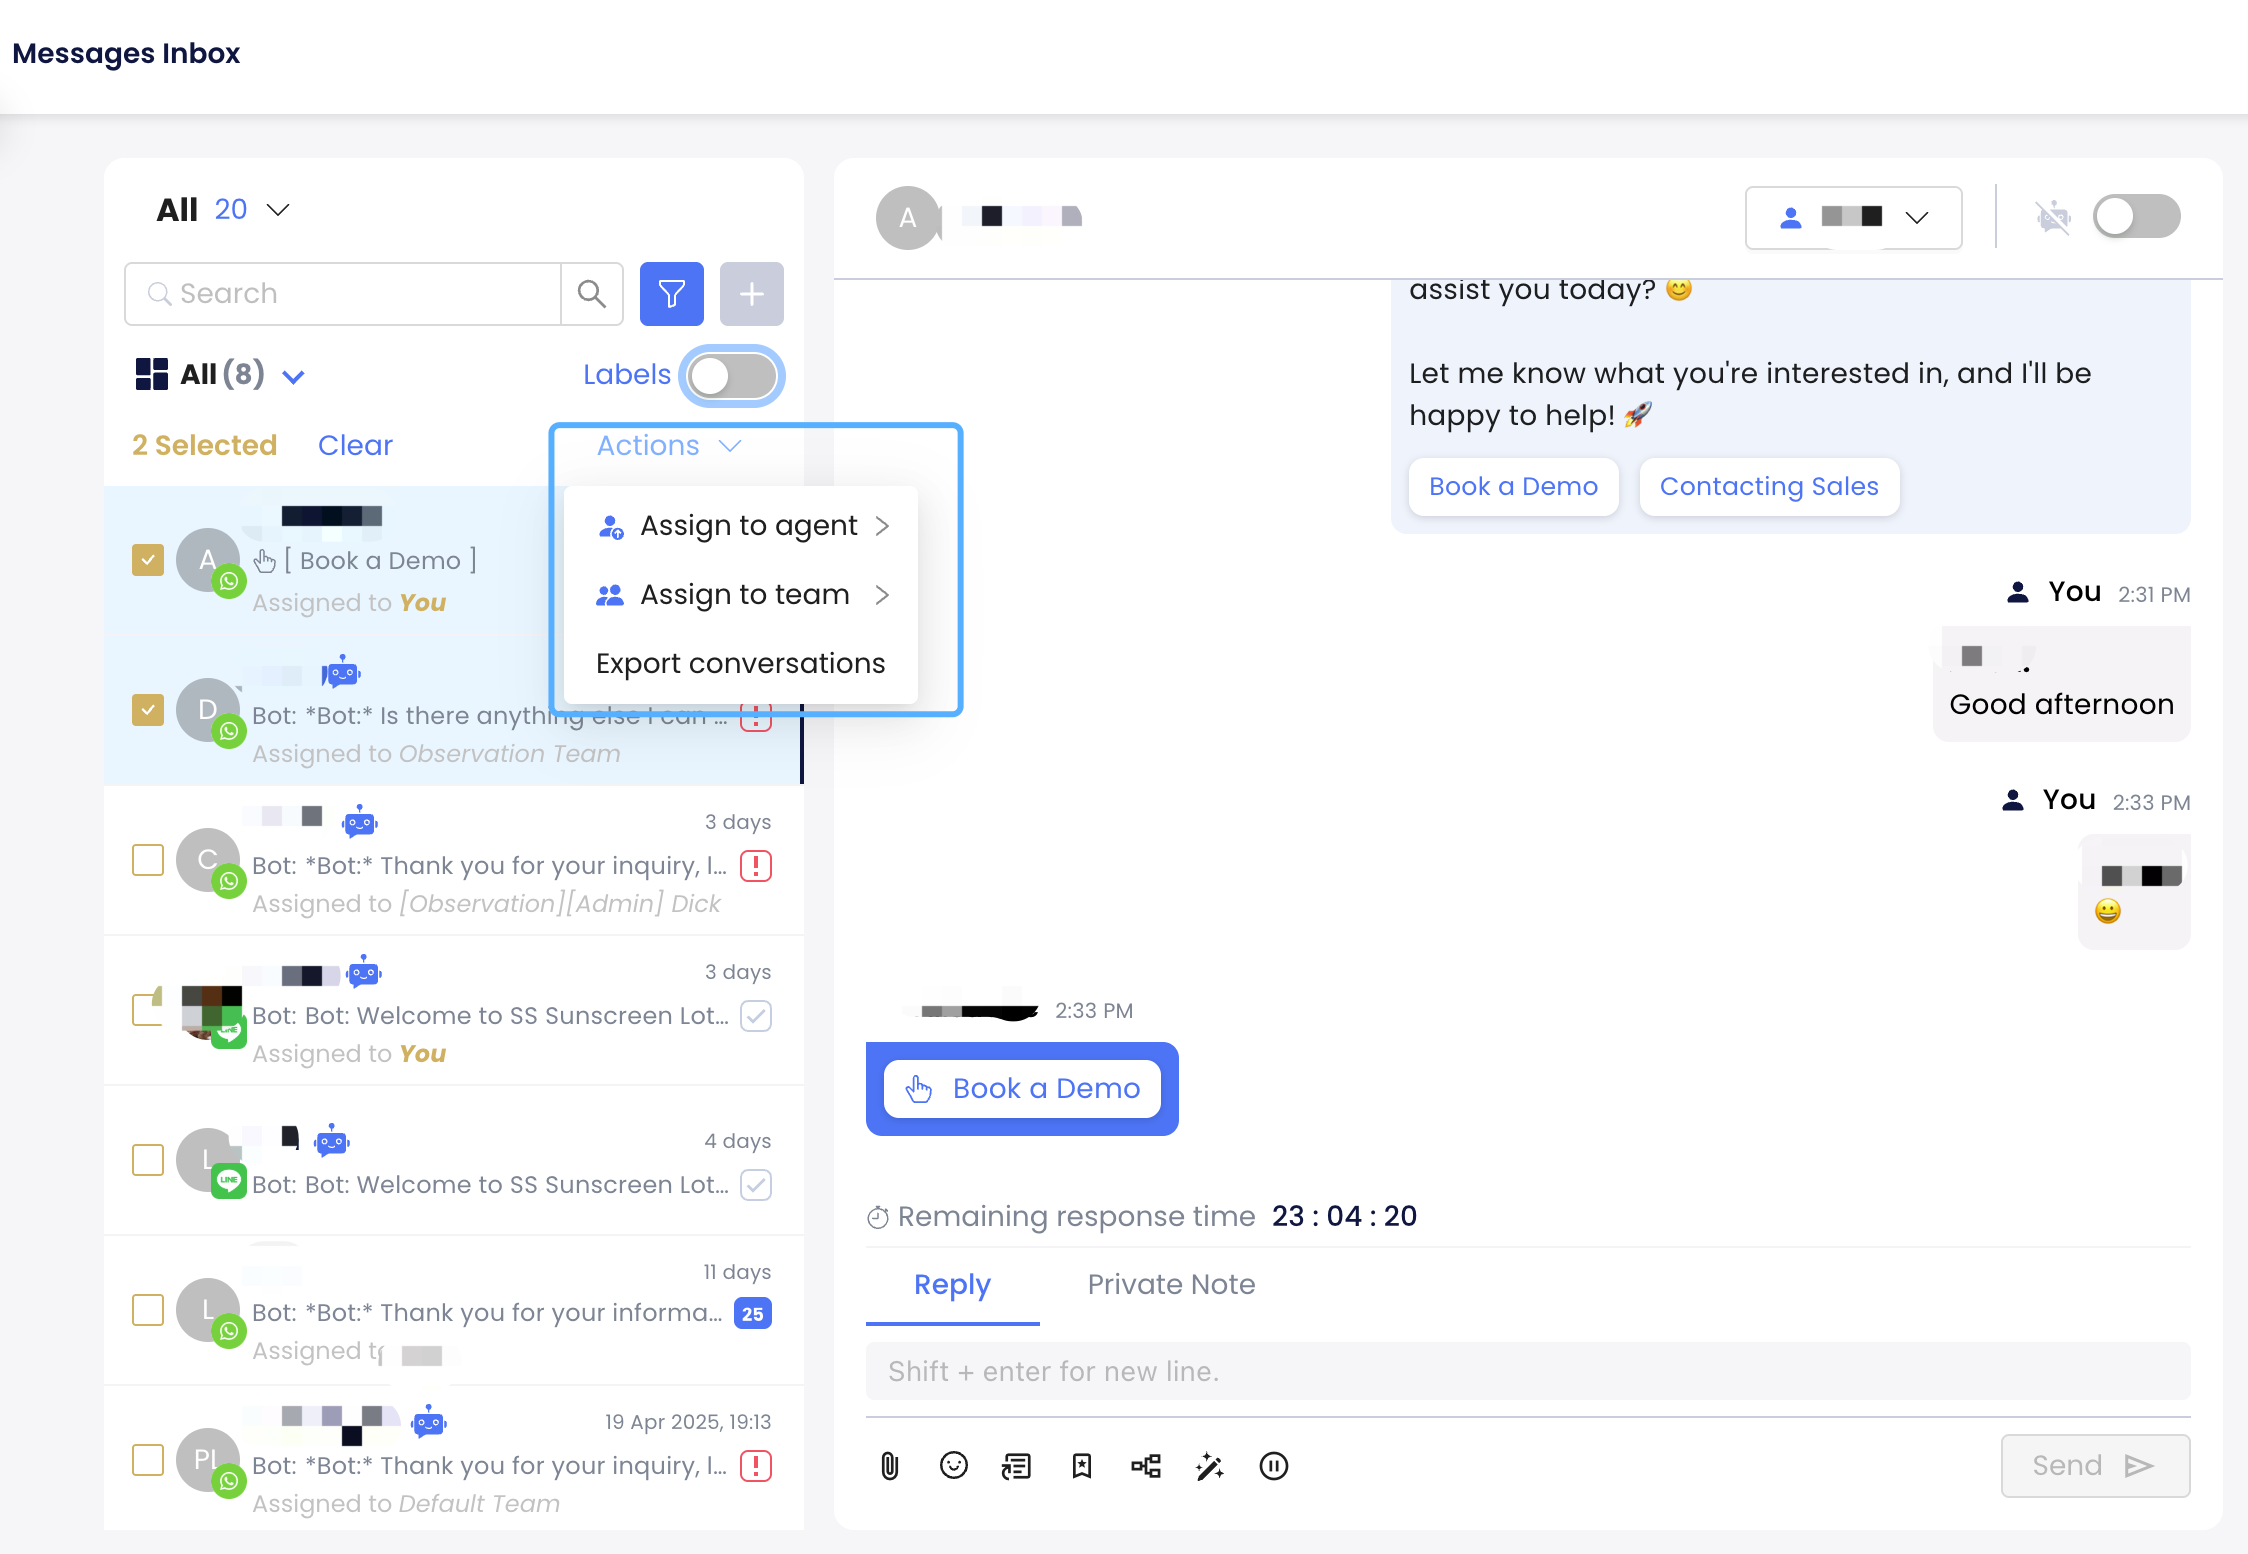



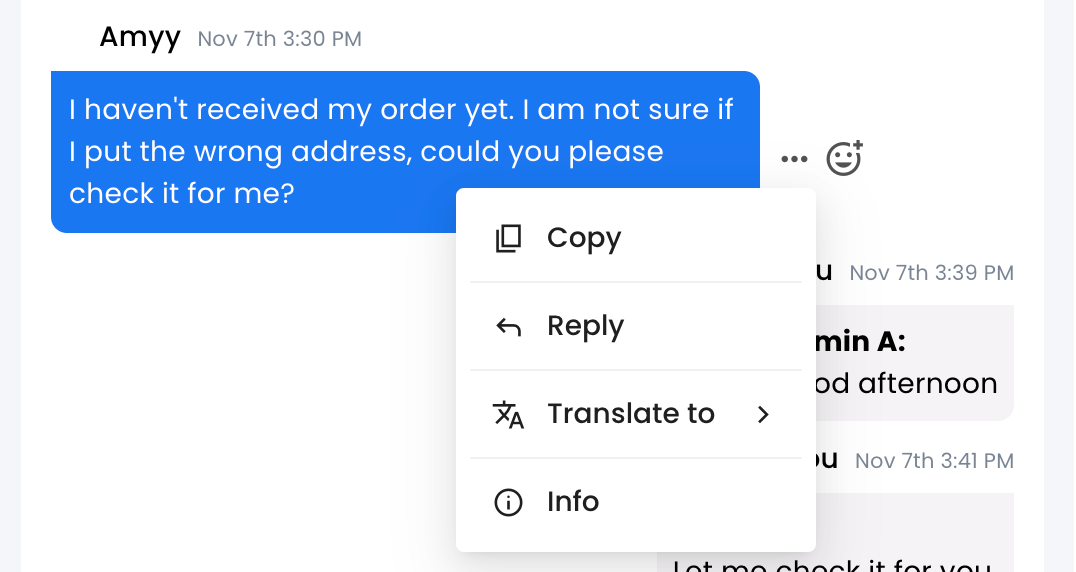


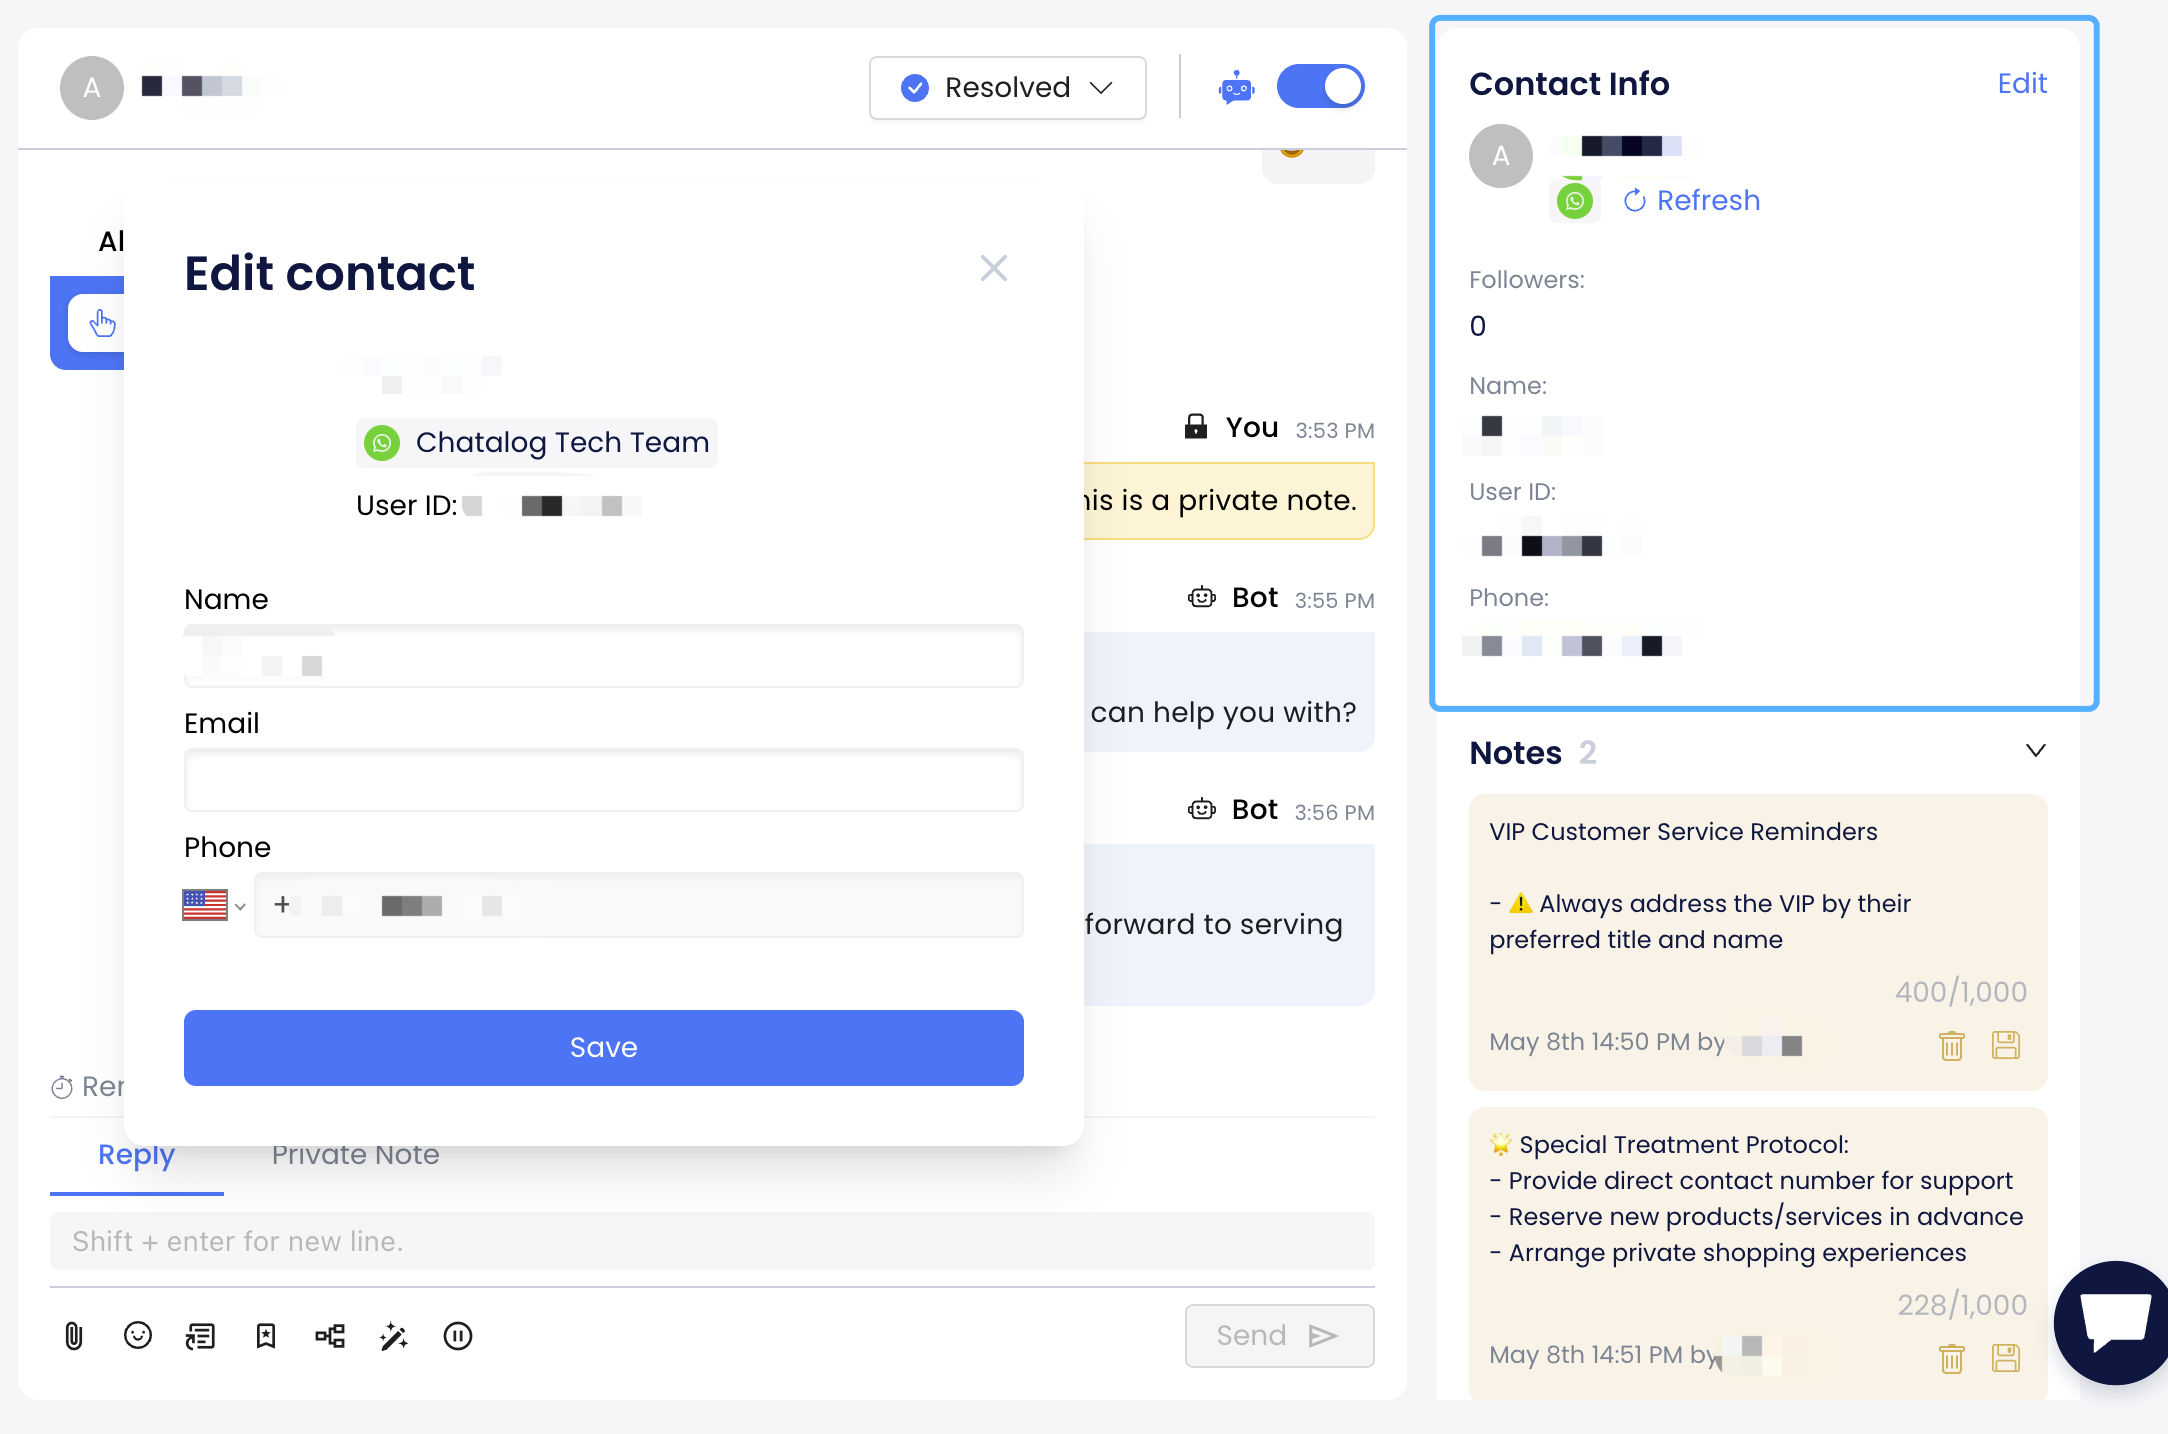

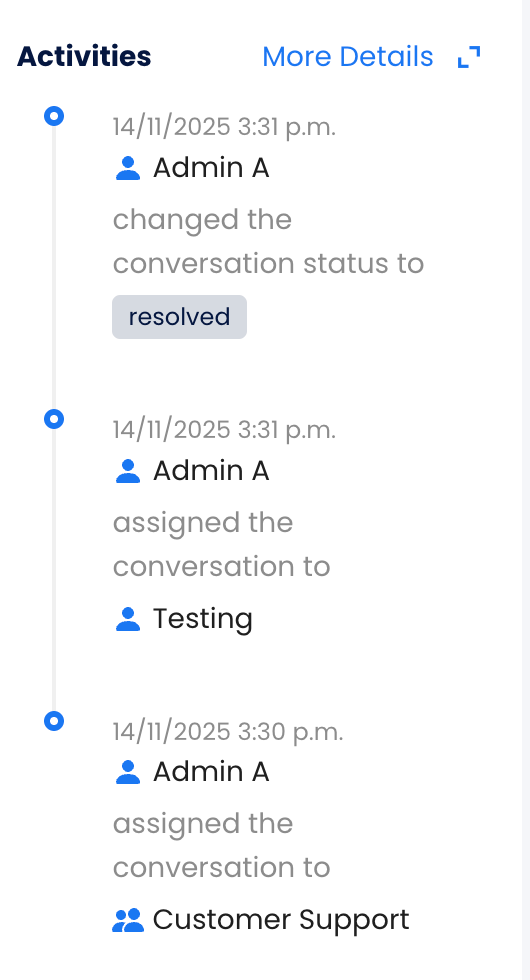



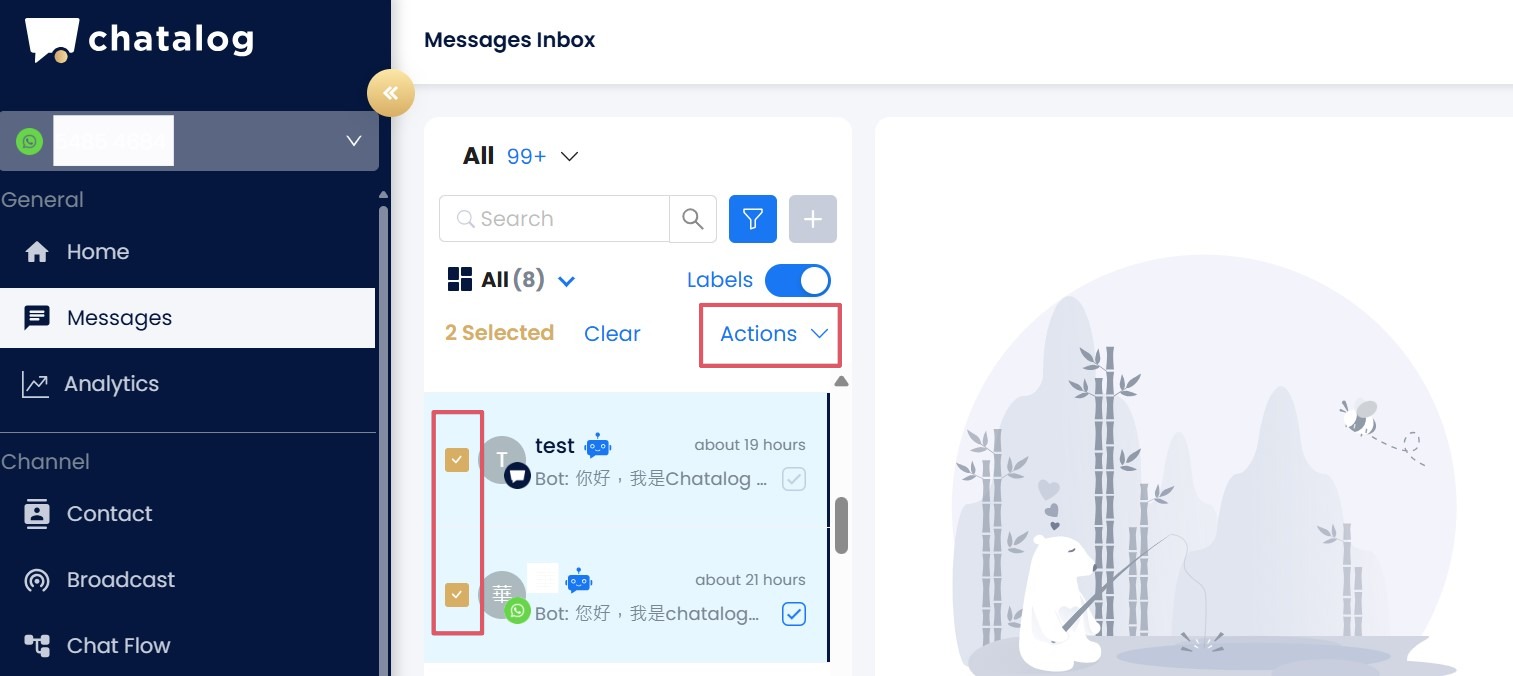
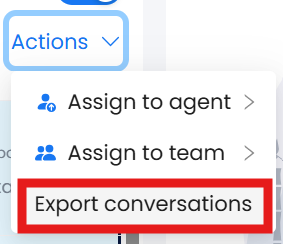

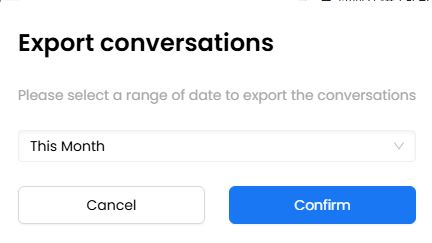

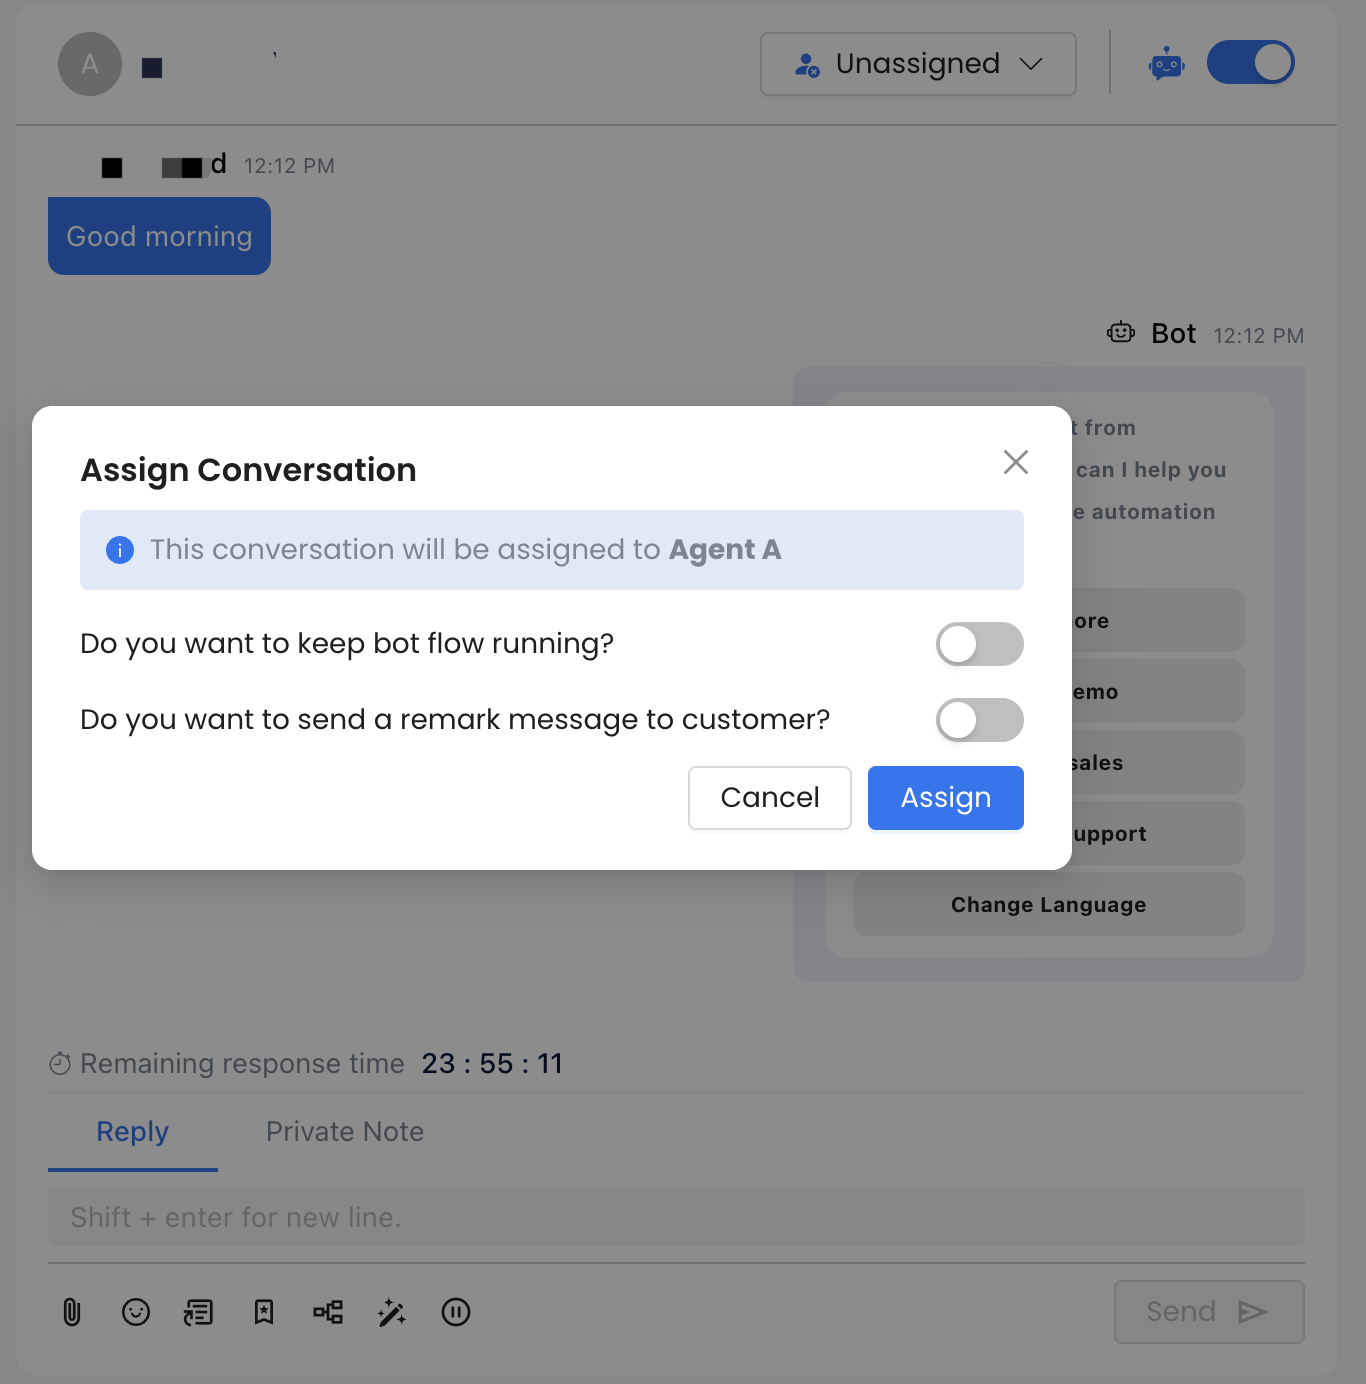


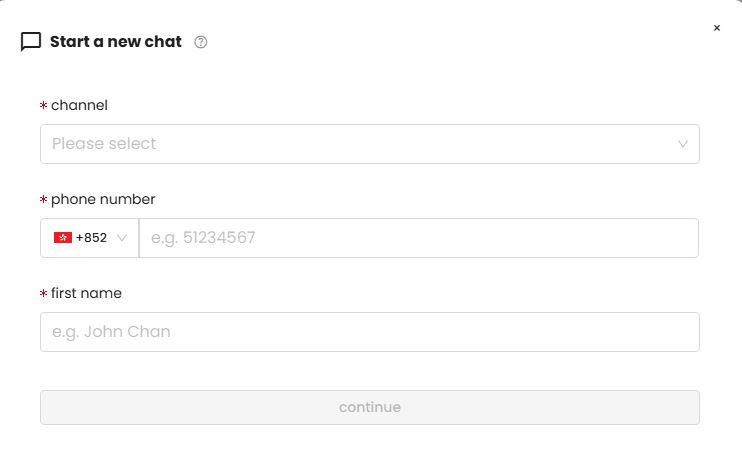


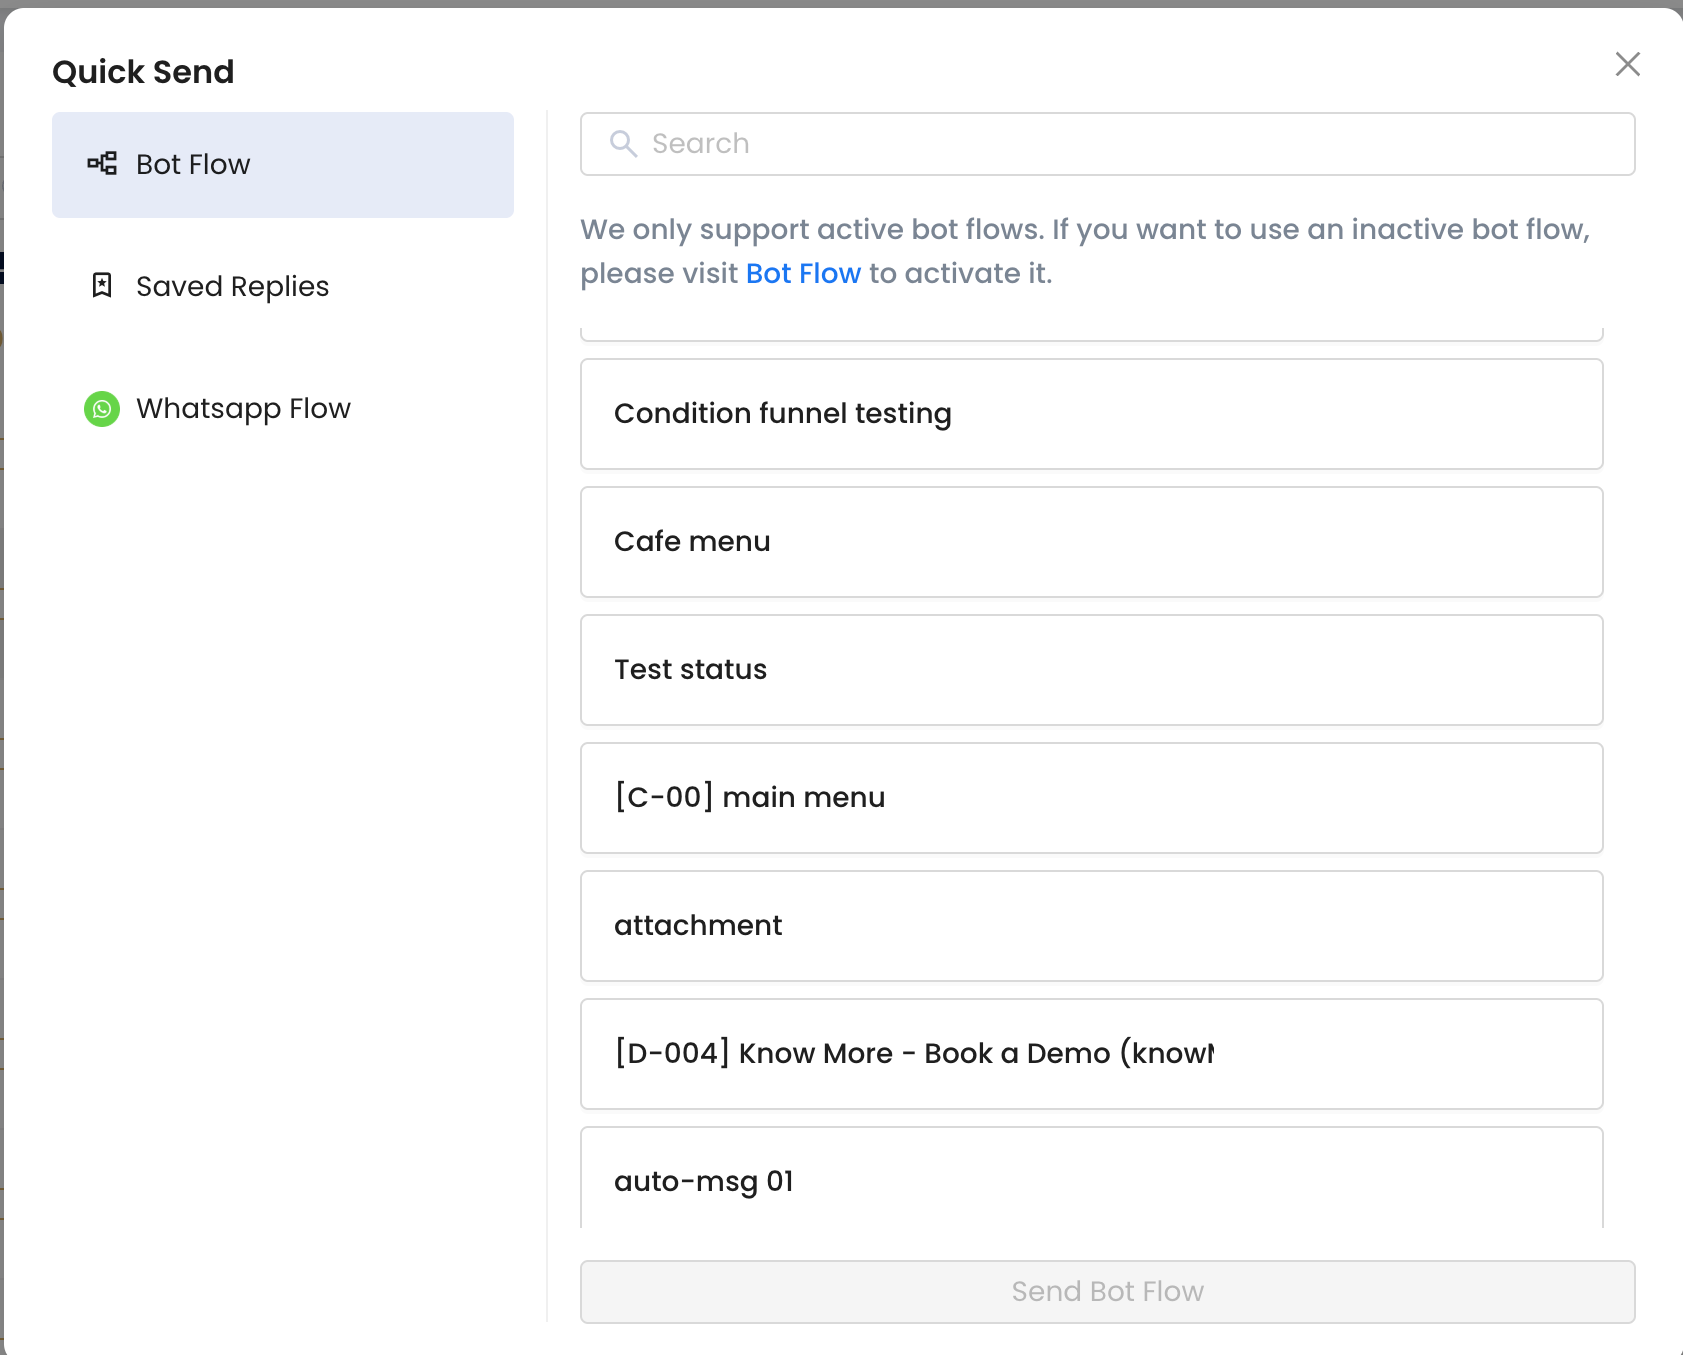
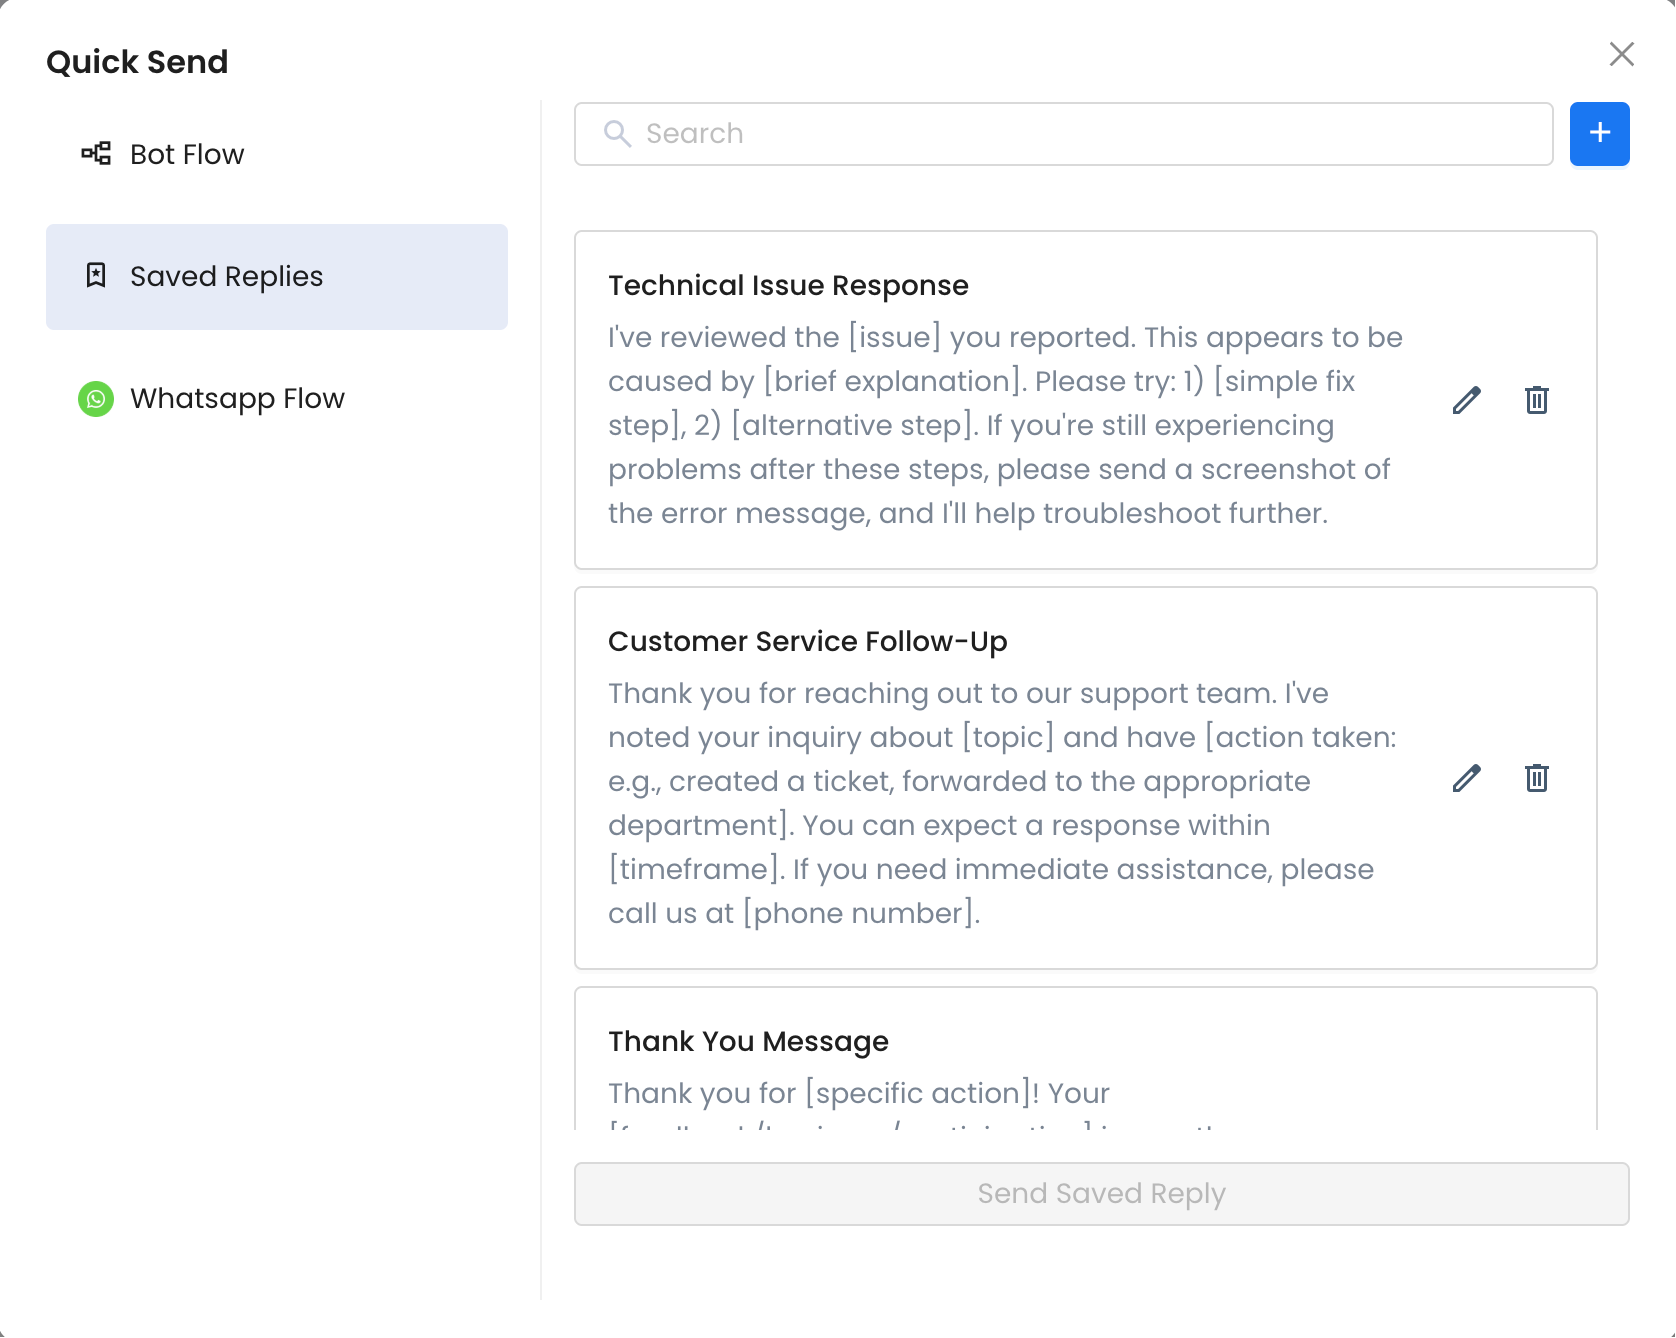


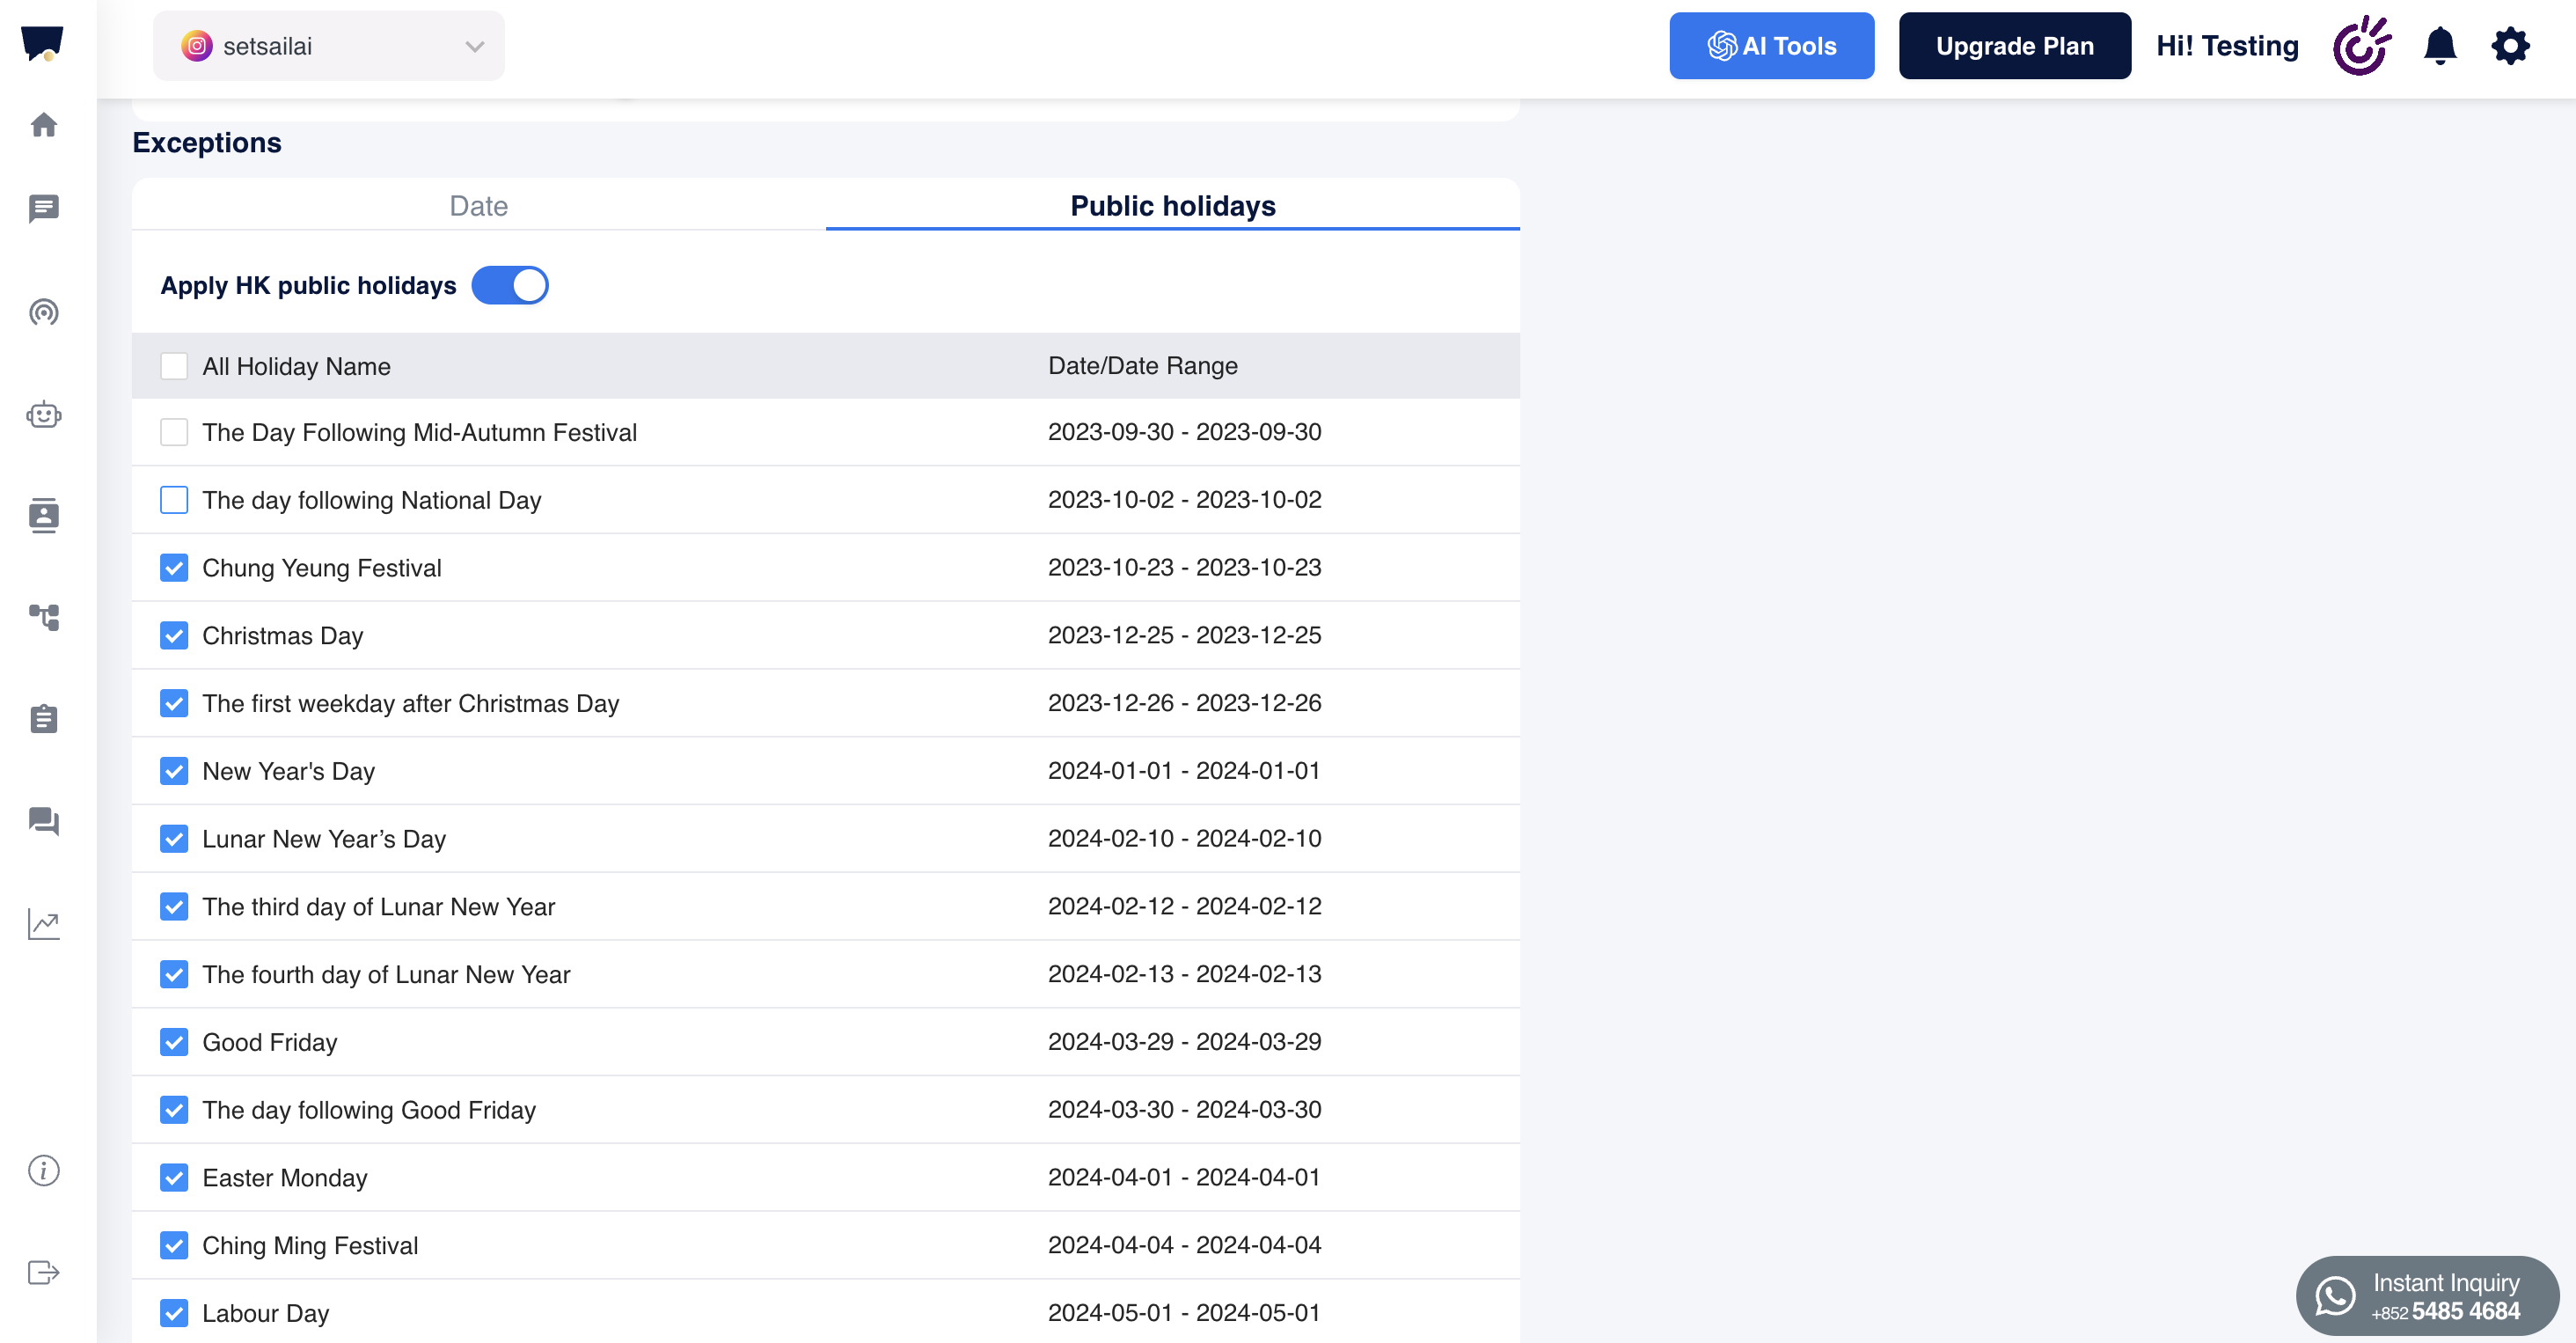
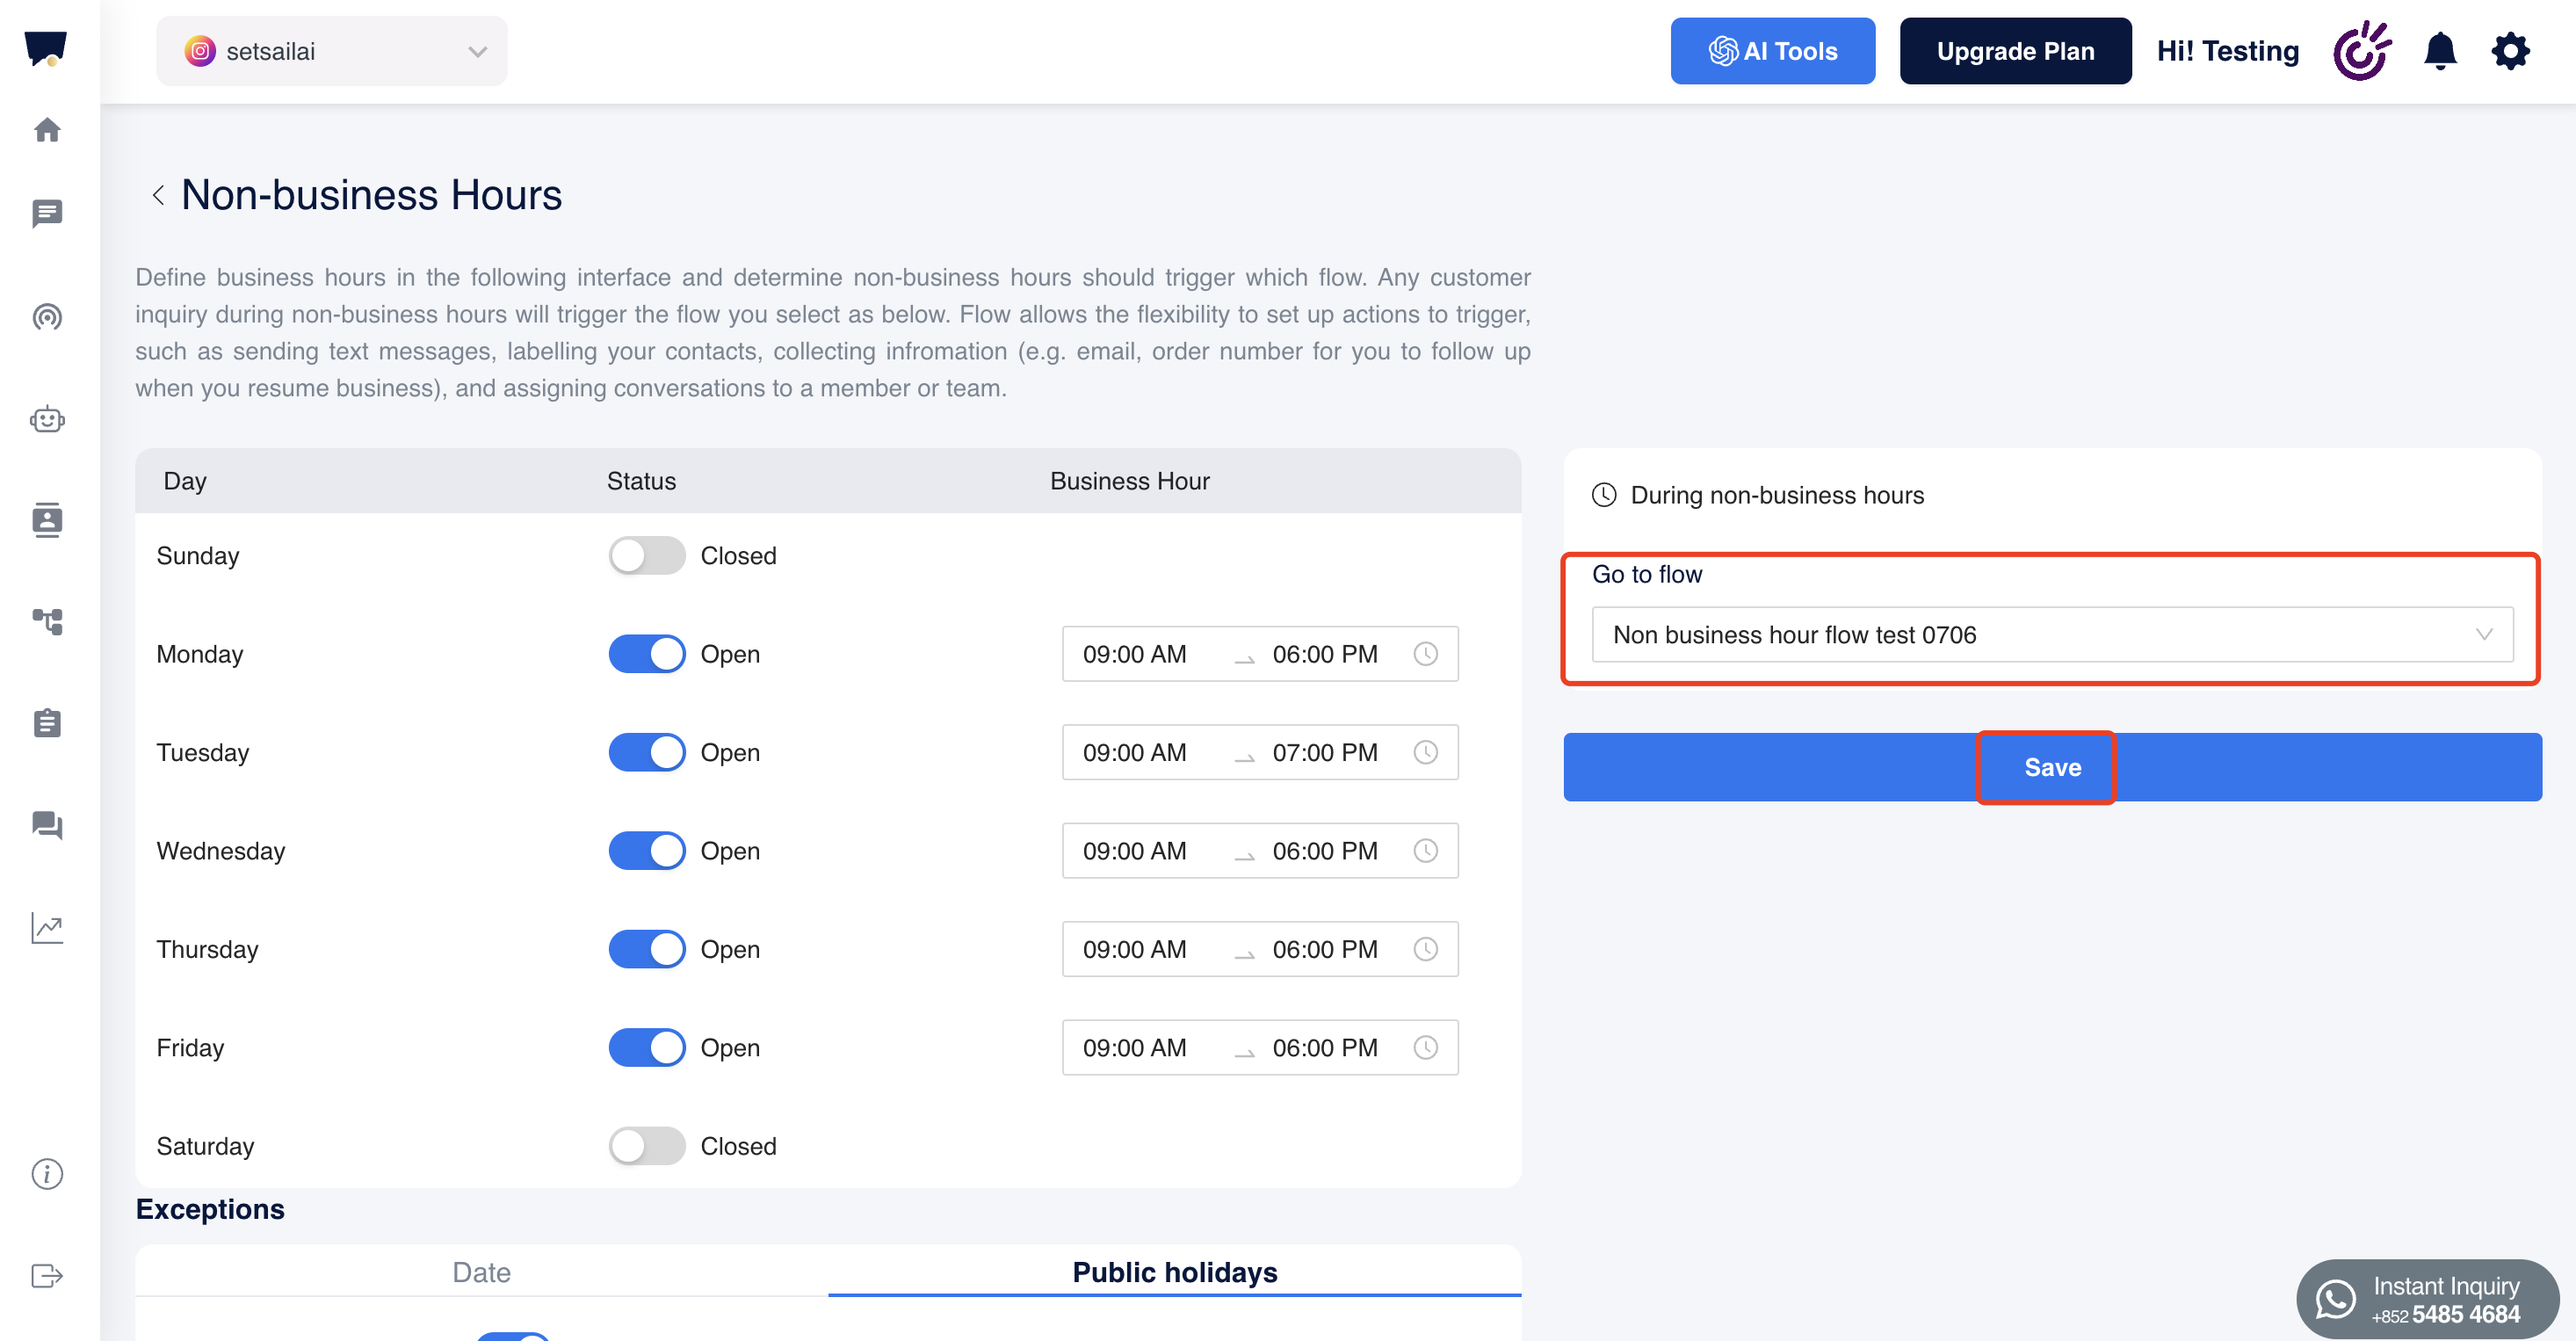

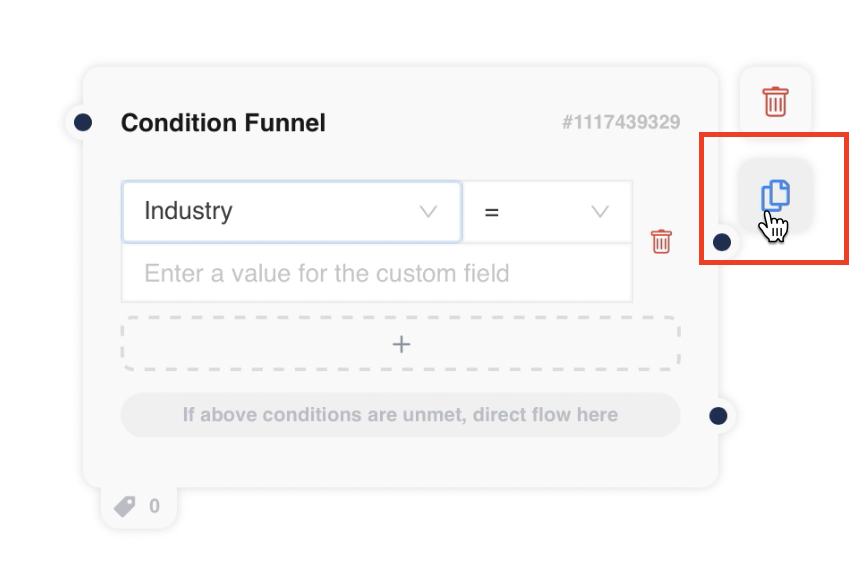
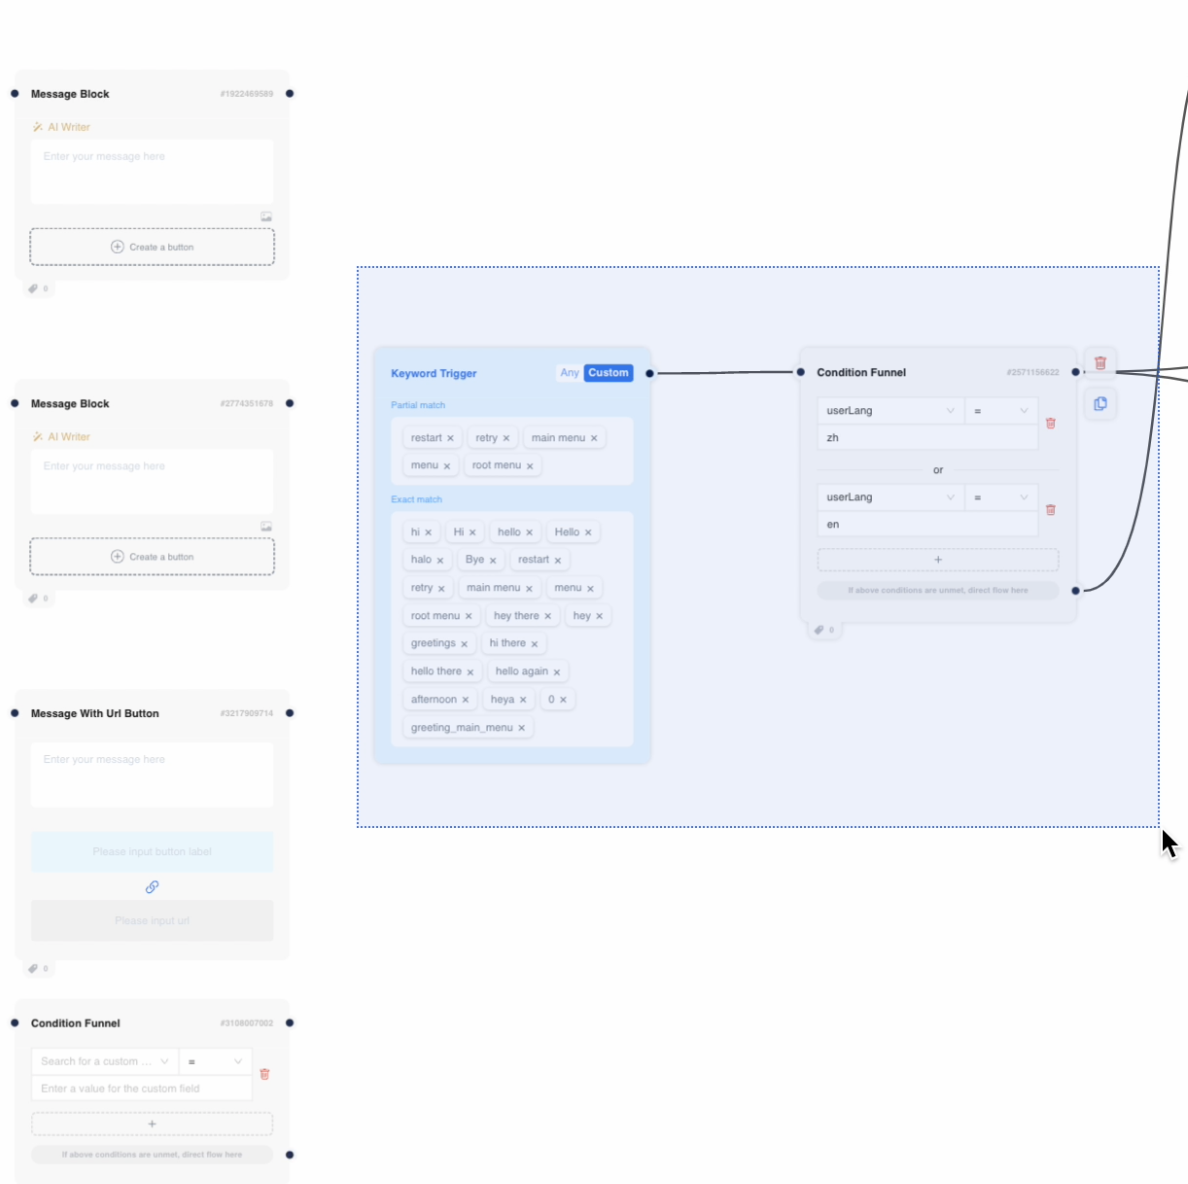


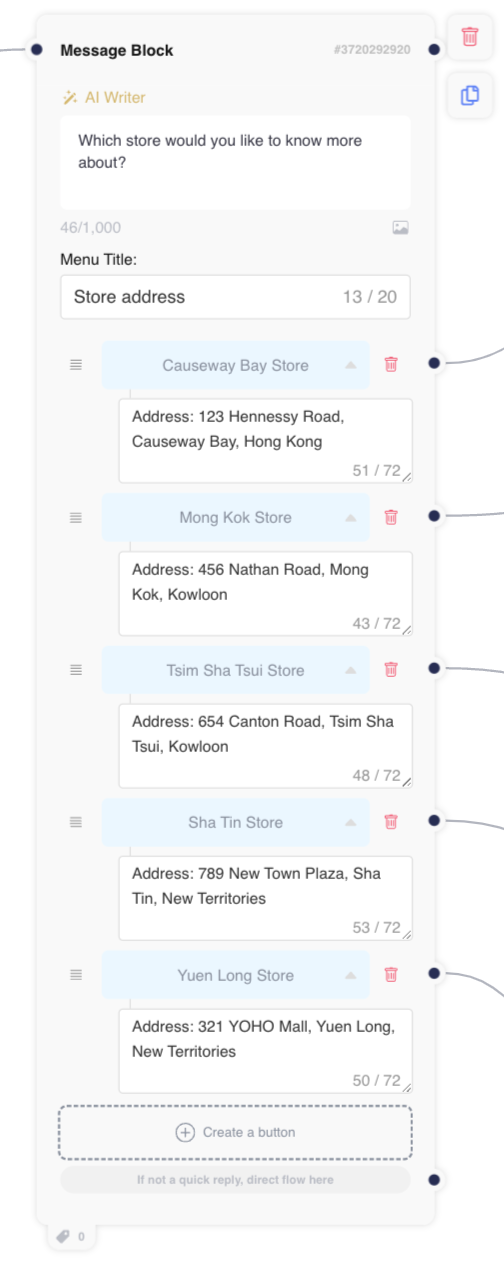
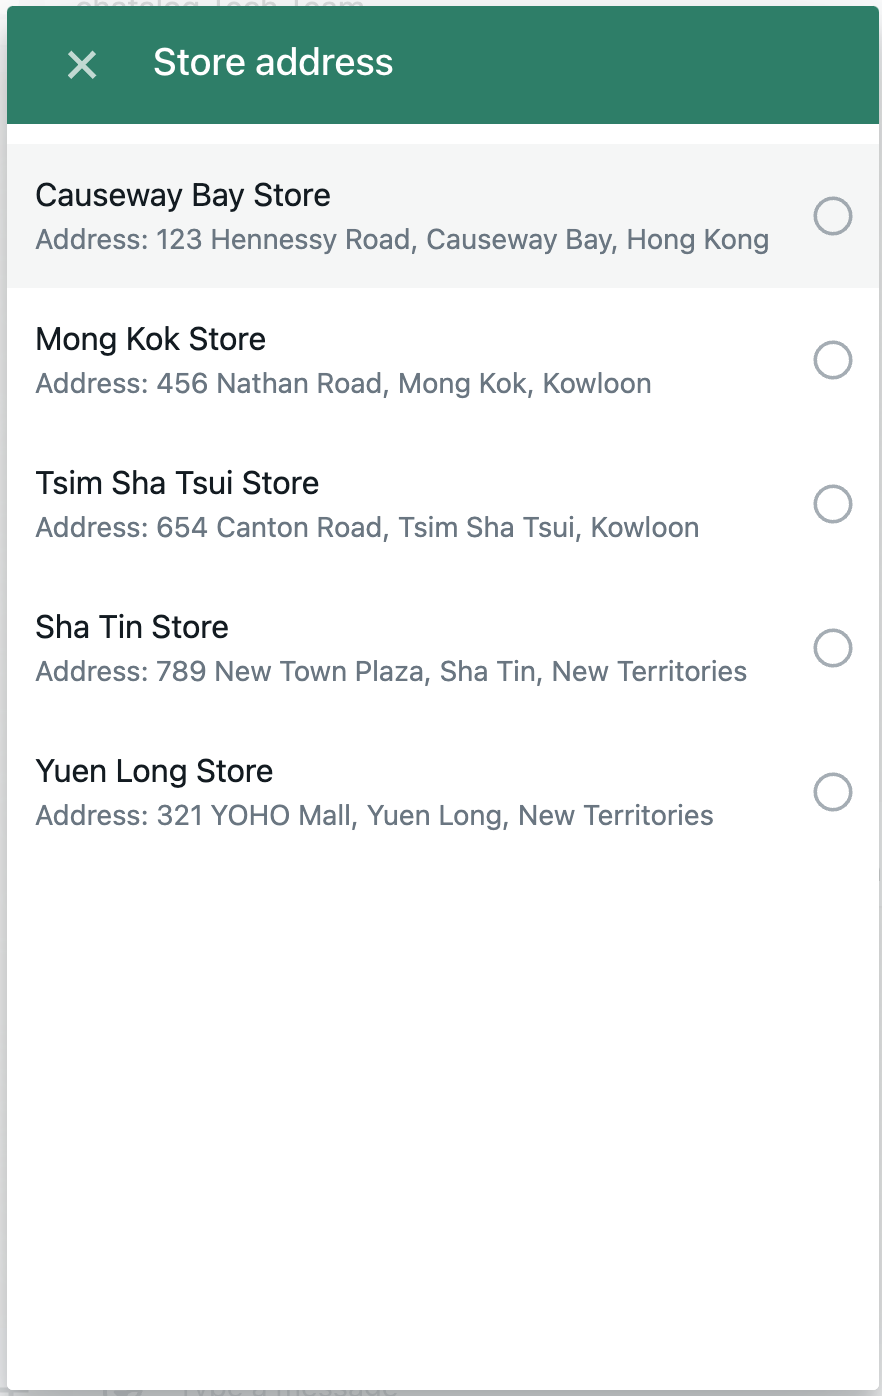

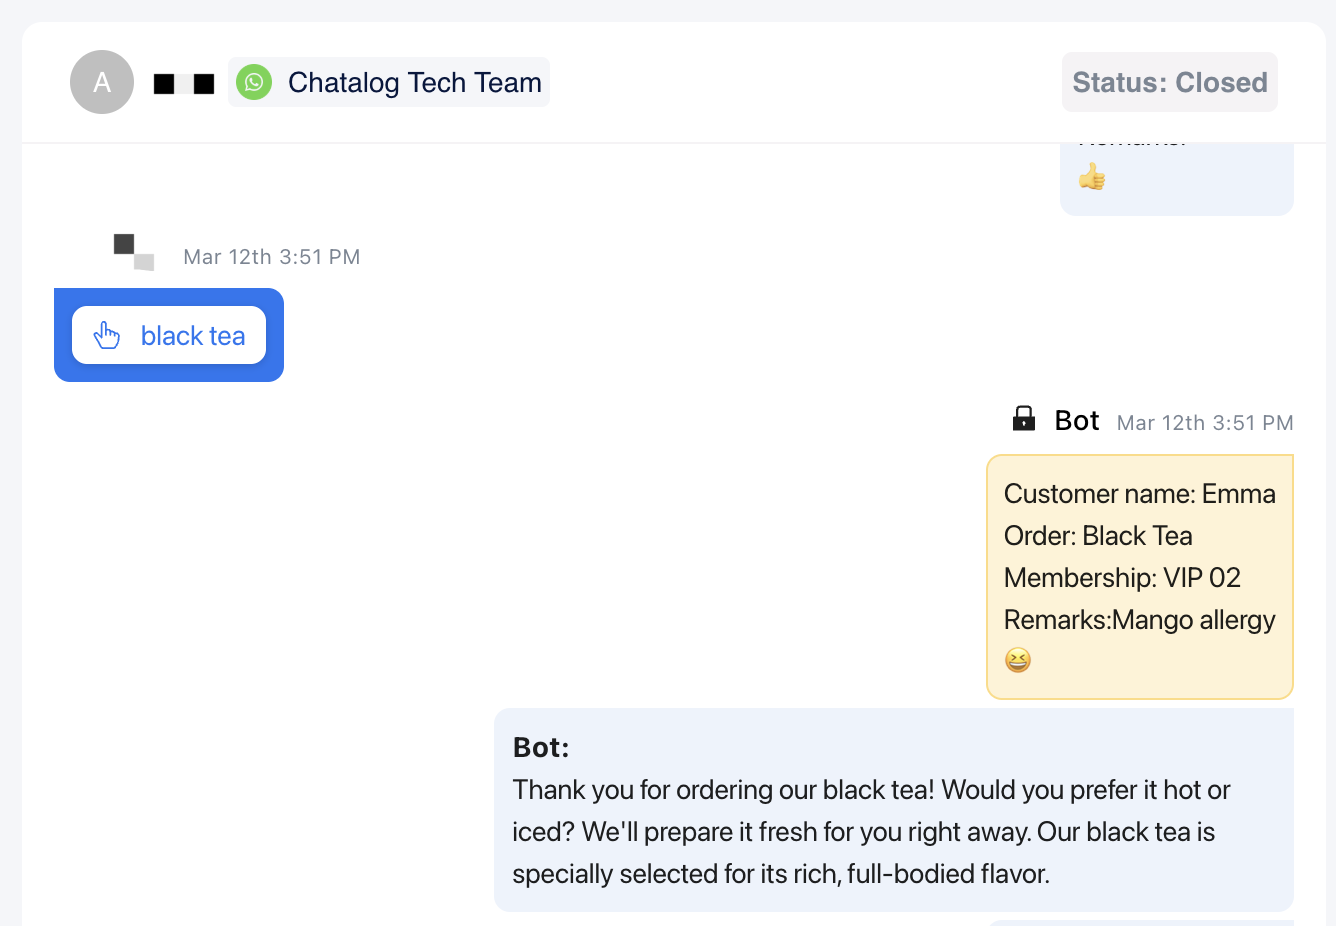


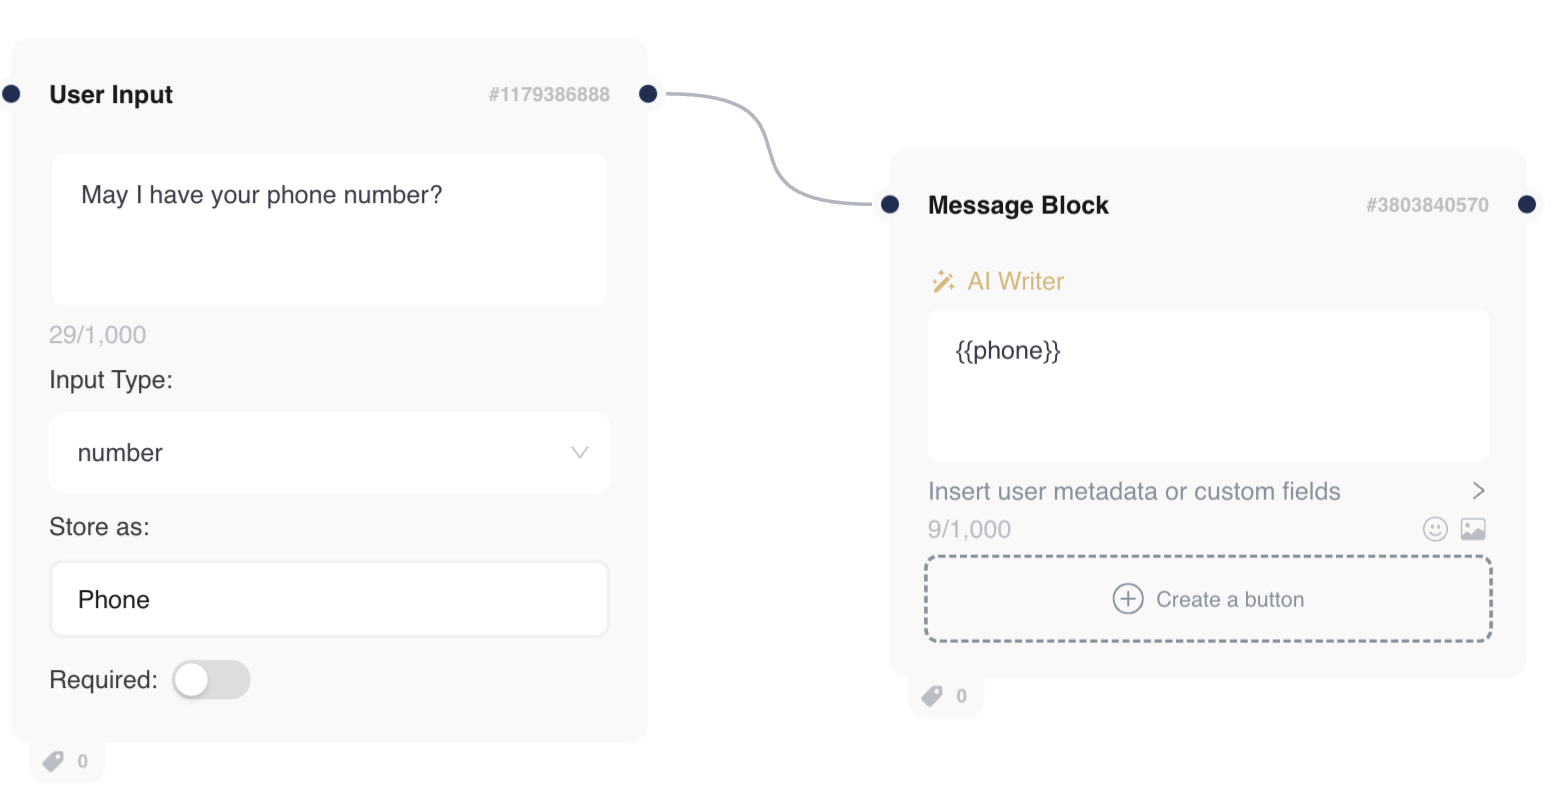


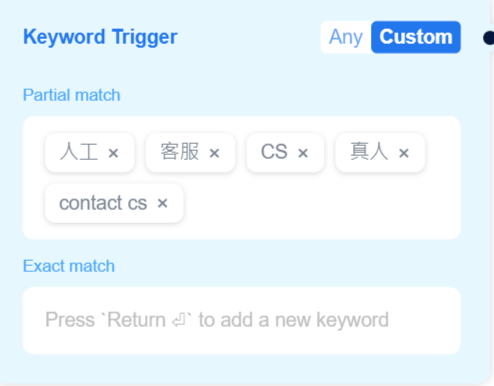



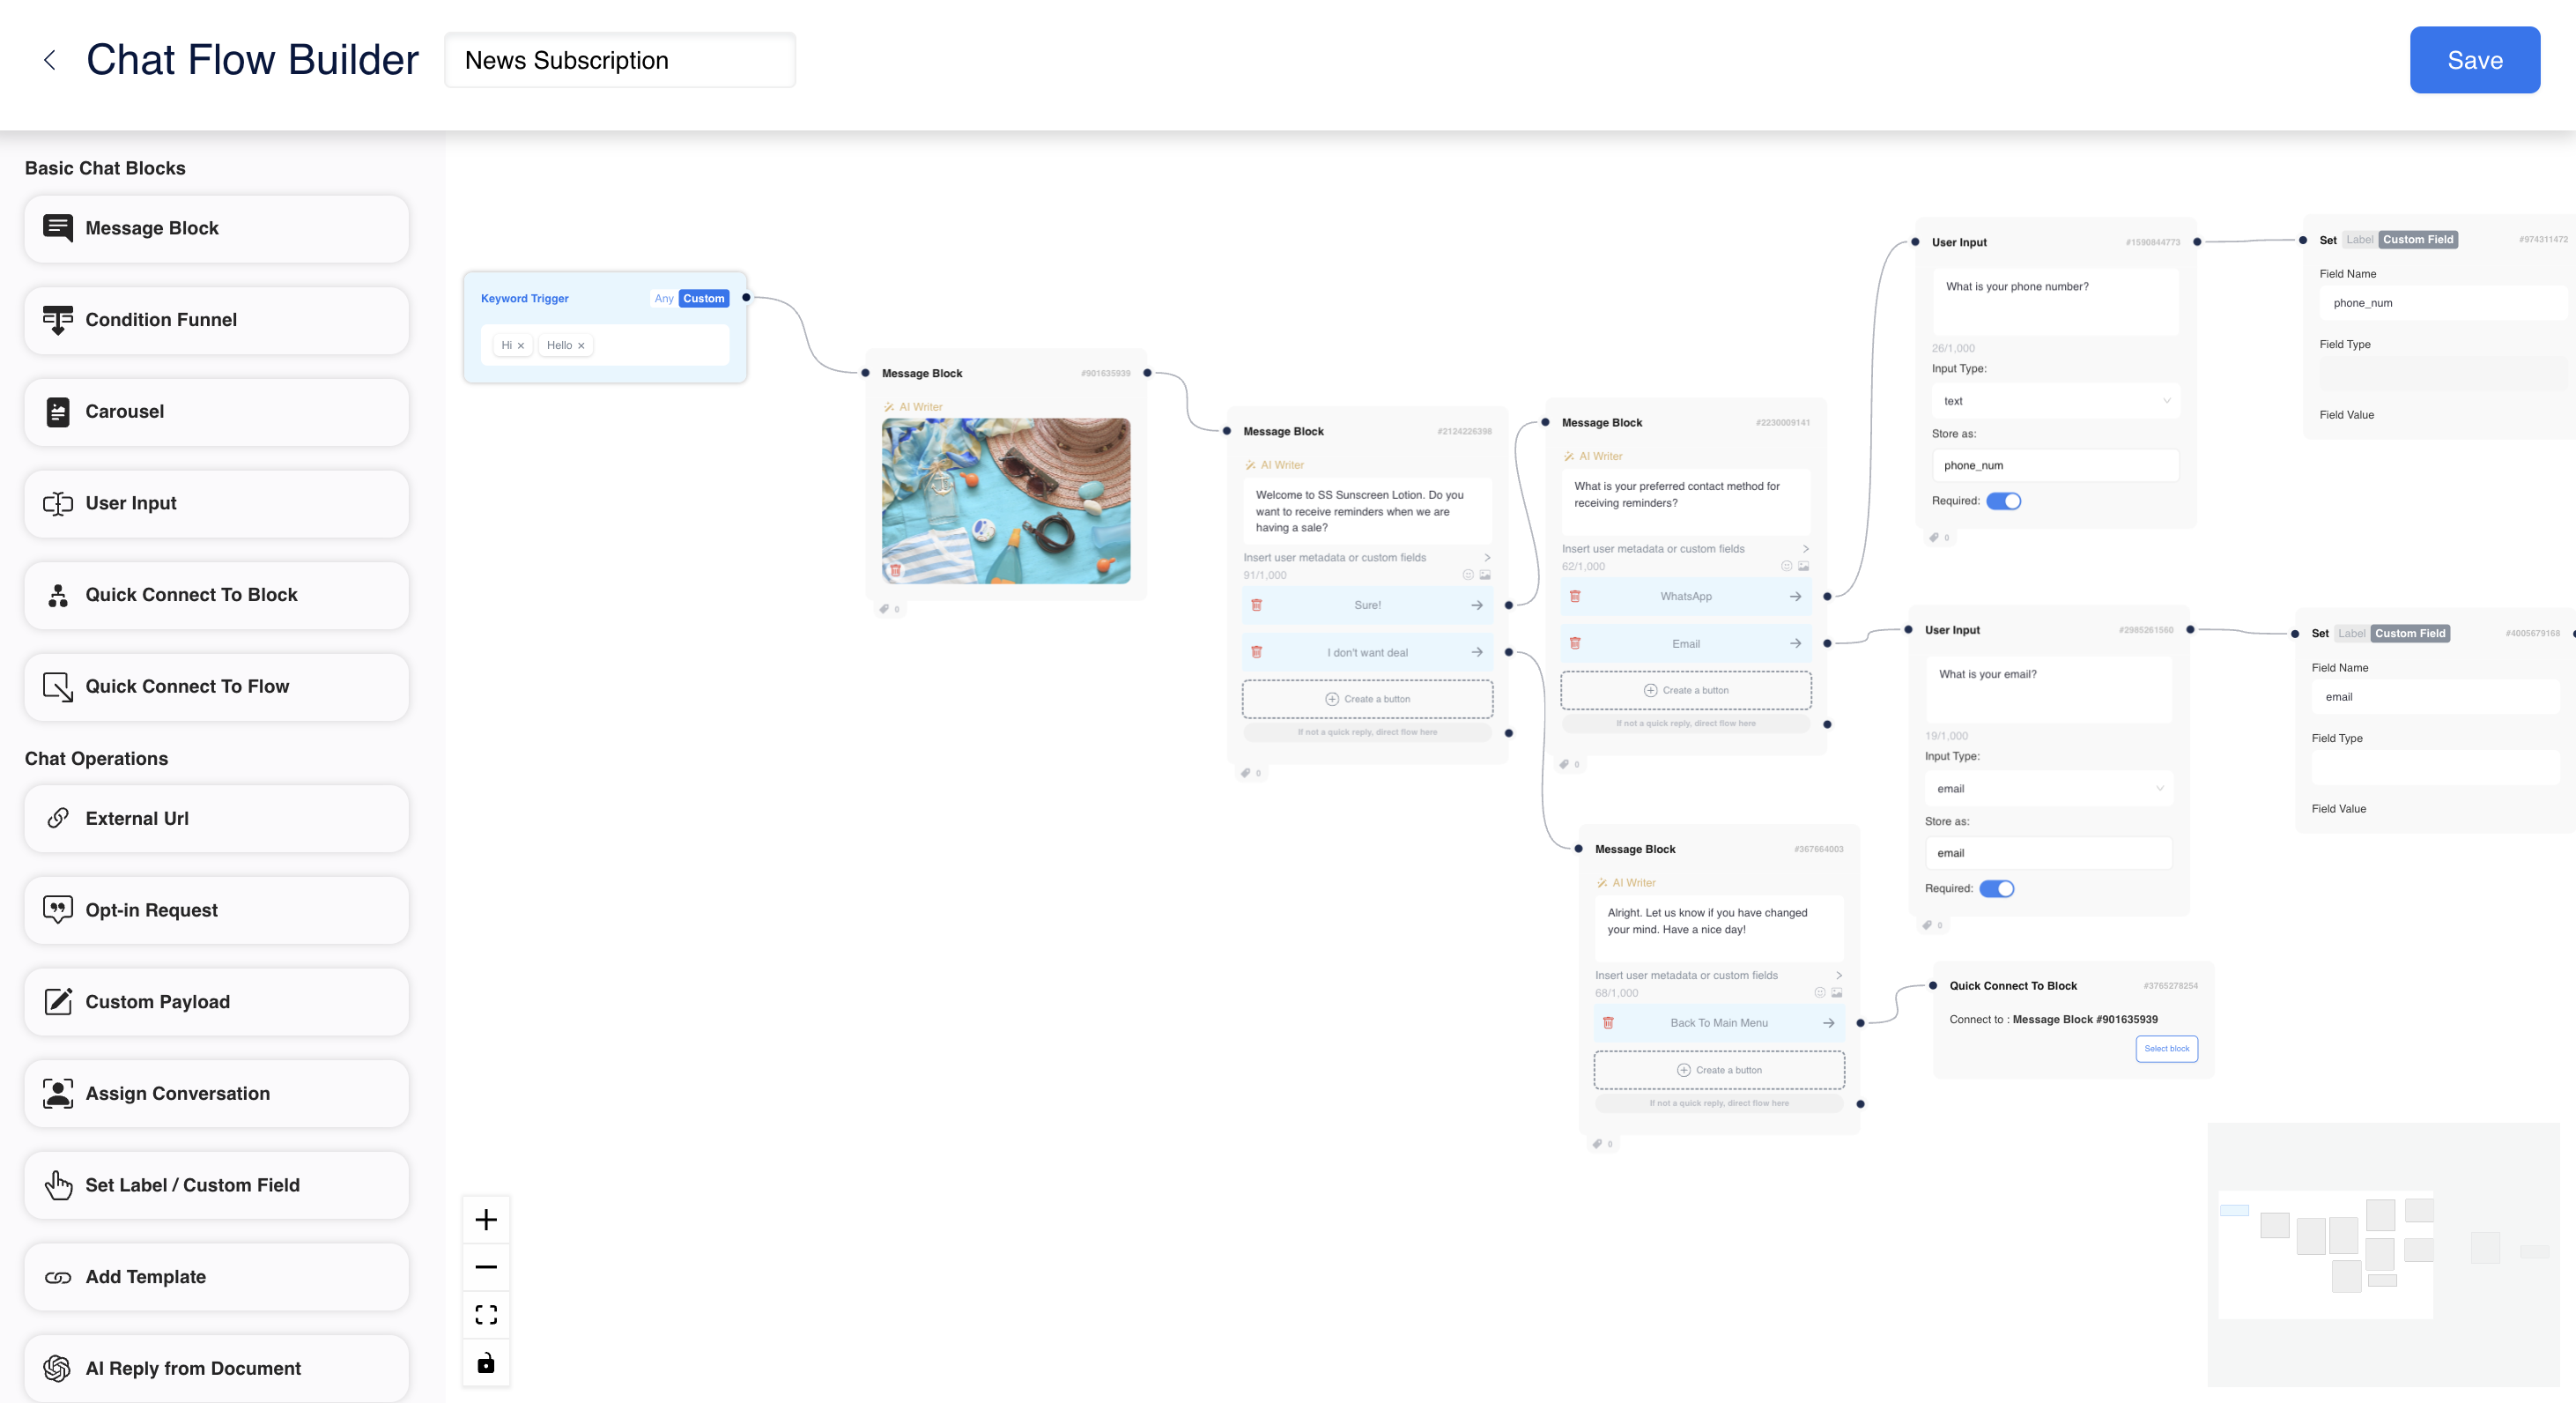


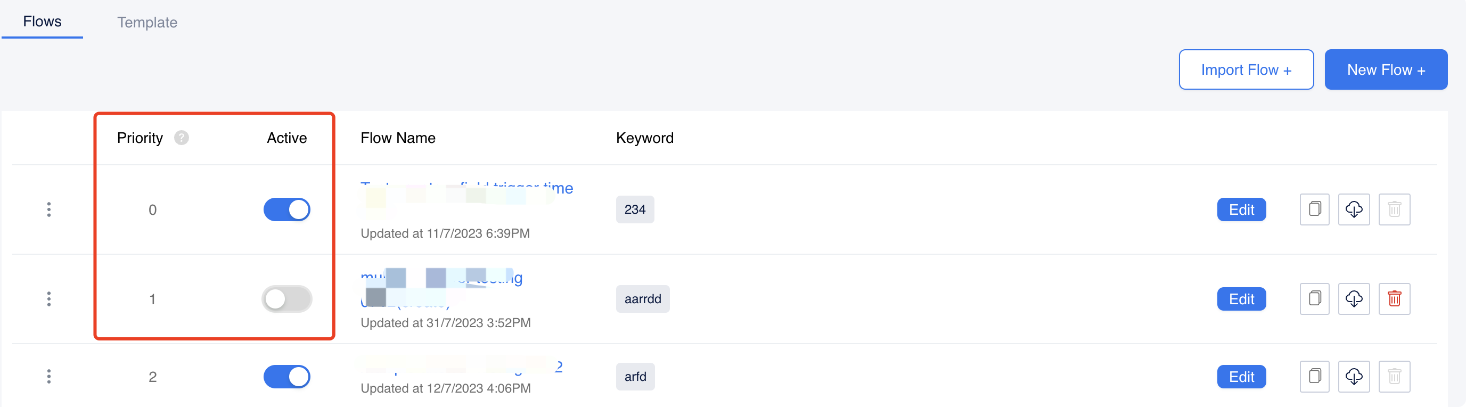


 The switch option "Keep the flow run" at the end of the block will have 2 different actions:
1. Off (default state): When a conversation is assigned to the agent, the conversation status will change to "assign to xxx team/agent/open", and the agent will receive a notification to remind a conversation assigned to him/her. Other flows can't be triggered until this current flow ends.
2. On: When a conversation is assigned to the agent, the agent will receive a notification to remind a conversation assigned to him/her. The conversation could stay in "closed" so that clients can still trigger other flows.
{% endhint %}
# Condition Funnel
The **Condition Funnel** block lets you route a conversation into different paths based on variable values, user input, or message content.\
It is commonly used to validate inputs (such as email or phone number), check user attributes, or control logic using numeric or text-based conditions.
***
### 1. Condition Funnel Overview
The switch option "Keep the flow run" at the end of the block will have 2 different actions:
1. Off (default state): When a conversation is assigned to the agent, the conversation status will change to "assign to xxx team/agent/open", and the agent will receive a notification to remind a conversation assigned to him/her. Other flows can't be triggered until this current flow ends.
2. On: When a conversation is assigned to the agent, the agent will receive a notification to remind a conversation assigned to him/her. The conversation could stay in "closed" so that clients can still trigger other flows.
{% endhint %}
# Condition Funnel
The **Condition Funnel** block lets you route a conversation into different paths based on variable values, user input, or message content.\
It is commonly used to validate inputs (such as email or phone number), check user attributes, or control logic using numeric or text-based conditions.
***
### 1. Condition Funnel Overview